Troubleshooting Facebook Page Creation Issues
Table of Contents
Introduction
There may be instances when a newly created location in Uberall doesn't produce a corresponding Facebook page. Should you experience this, a Facebook page will need to be created natively within Facebook for the location. The Uberall Support Team is ready to help out with creating the page or you can choose to create the page yourself. This article provides a walkthrough for both options.
Uberall Support Assistance
Our team can help out with the process by creating a new Facebook page within our Meta Business Suite. The ownership of this page will need to be transferred to your Meta Business Suite. Once you obtain ownership, the page will be completely released from us, and we will no longer own the page.
This requires that you provide us with the necessary information so we can successfully provide you ownership when a new page is created.
What we will need
For our team to successfully transfer ownership, we will need the following information:
Steps to take
Our team will create the Facebook page and provide you with admin access using the Facebook account details above. Once we provide access there are additional steps that you'll need to take to complete the process:
|
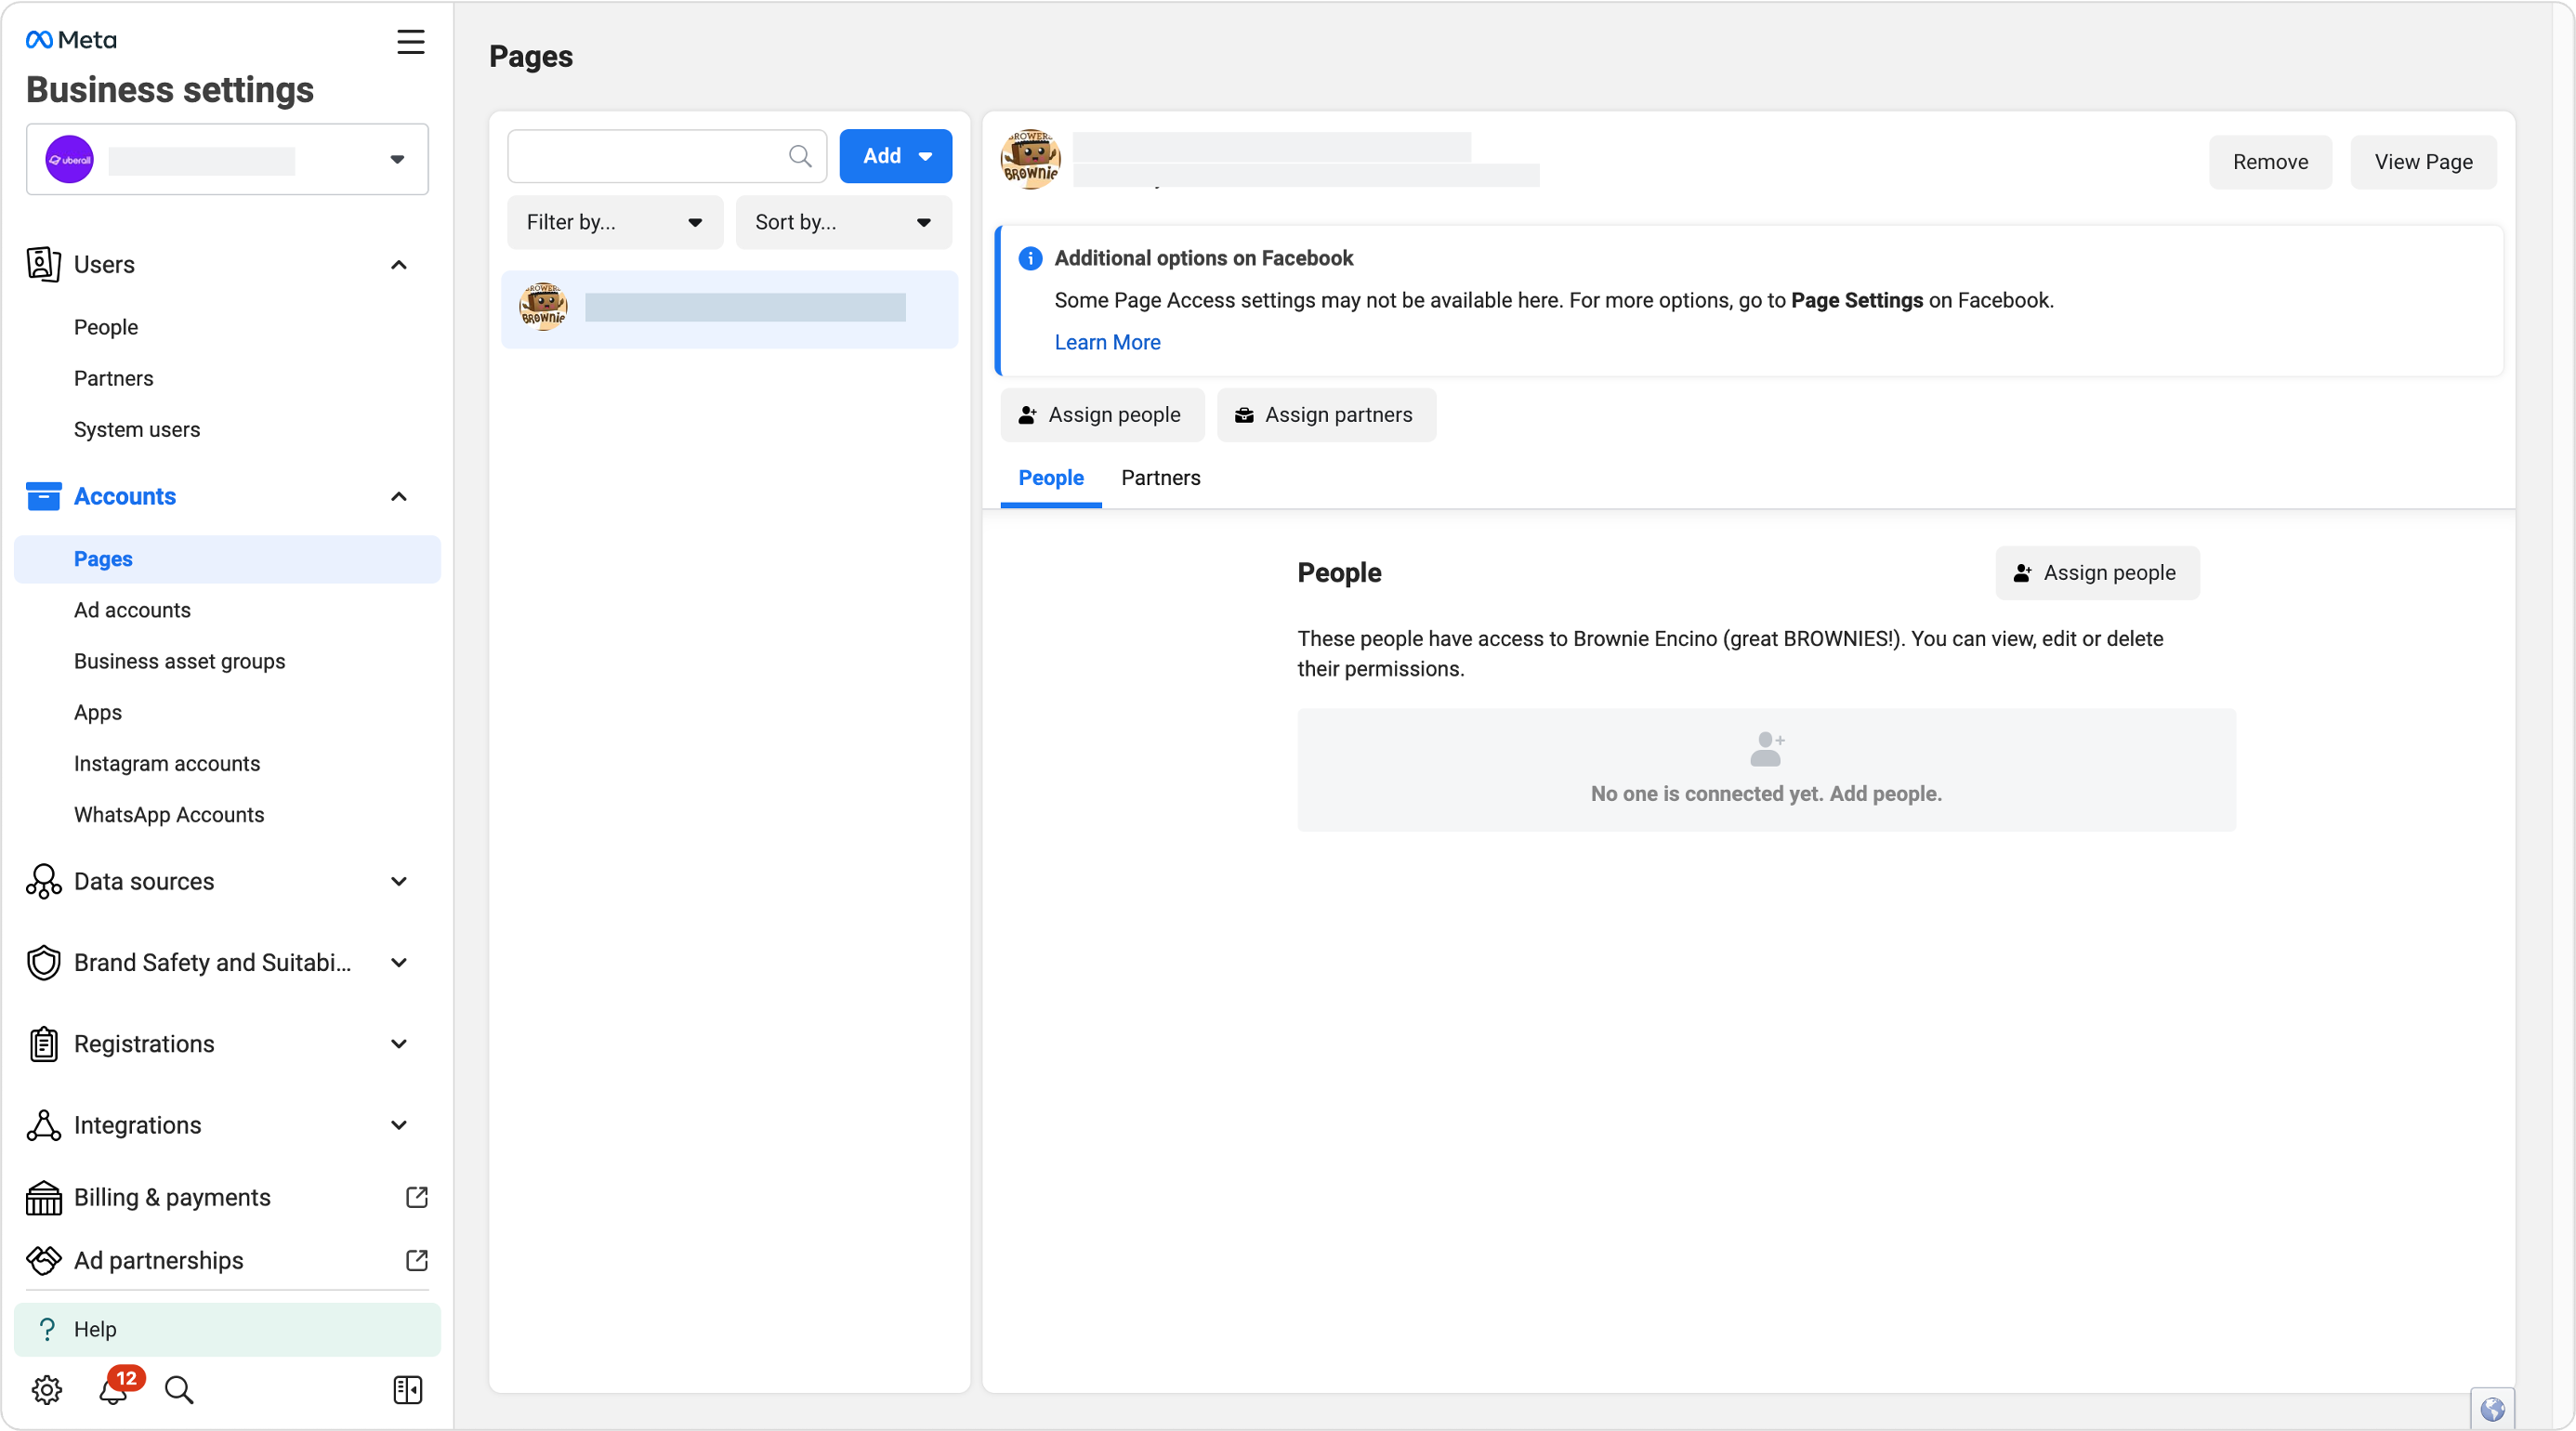
1.Visit your Meta Business Suite Start by visiting https://business.facebook.com/settings. |
|
|
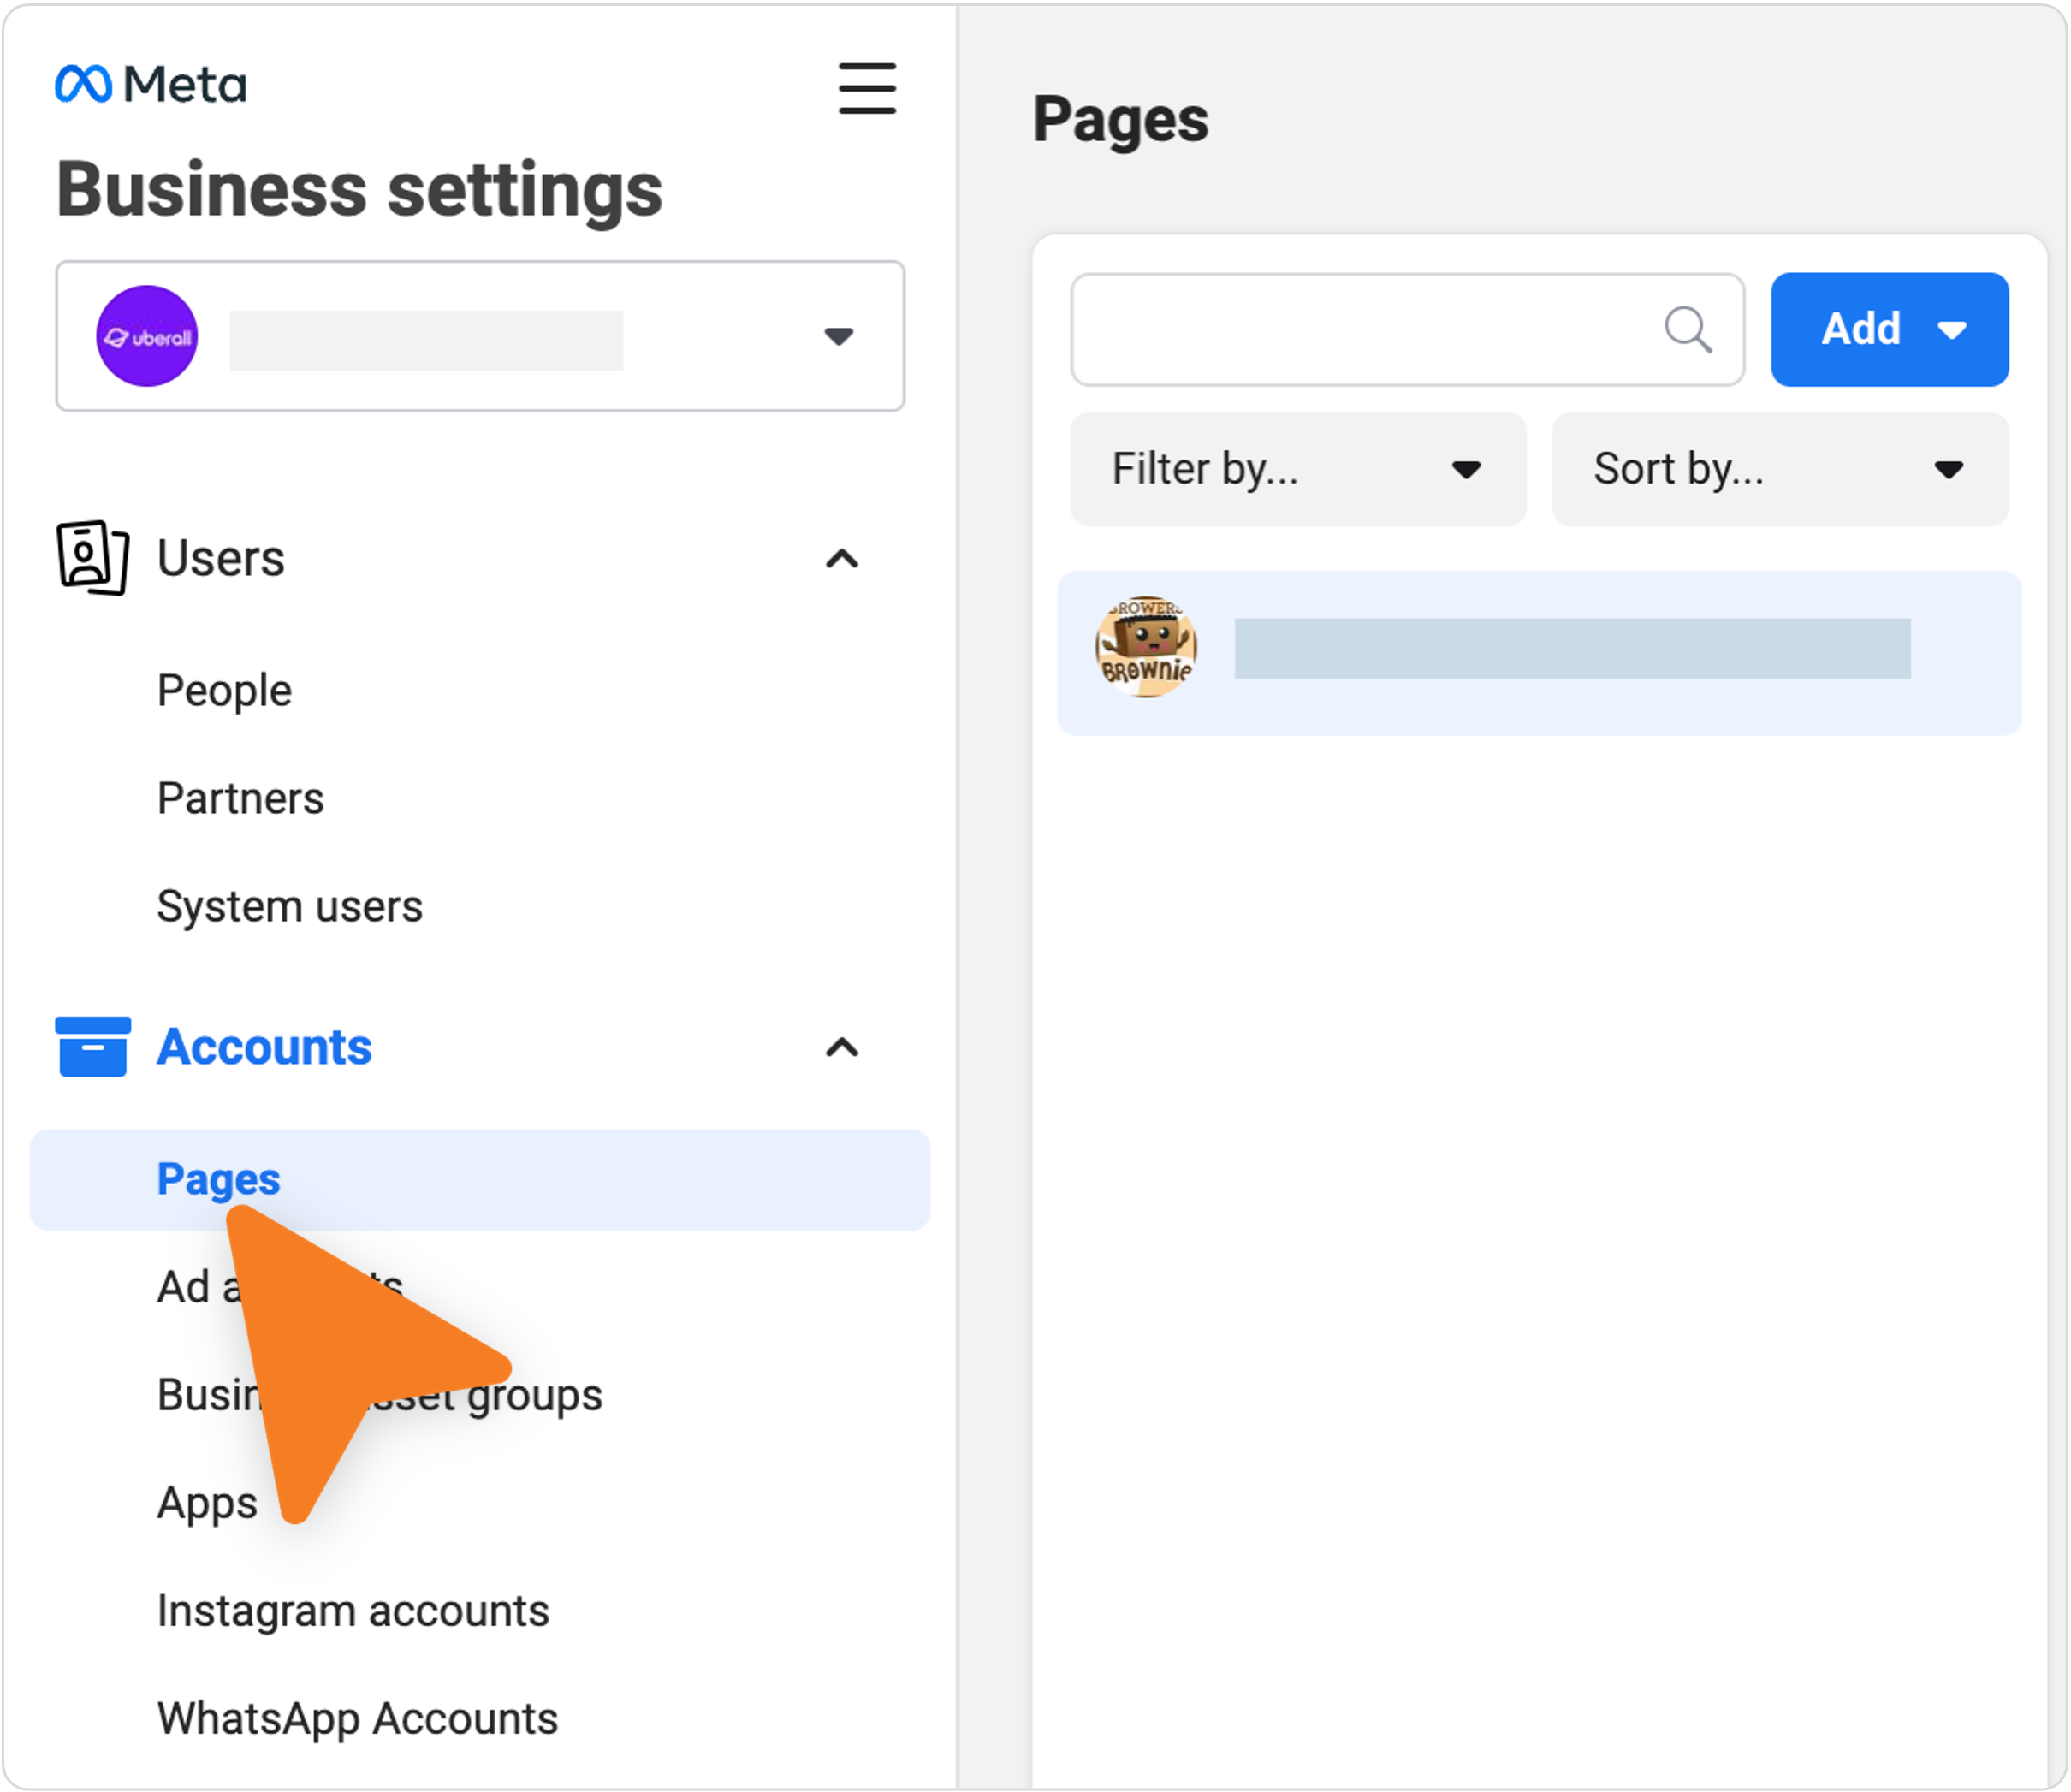
2. Navigate to Pages On the left navigation bar, locate the “Accounts” section and click on the Pages option. |
|
|
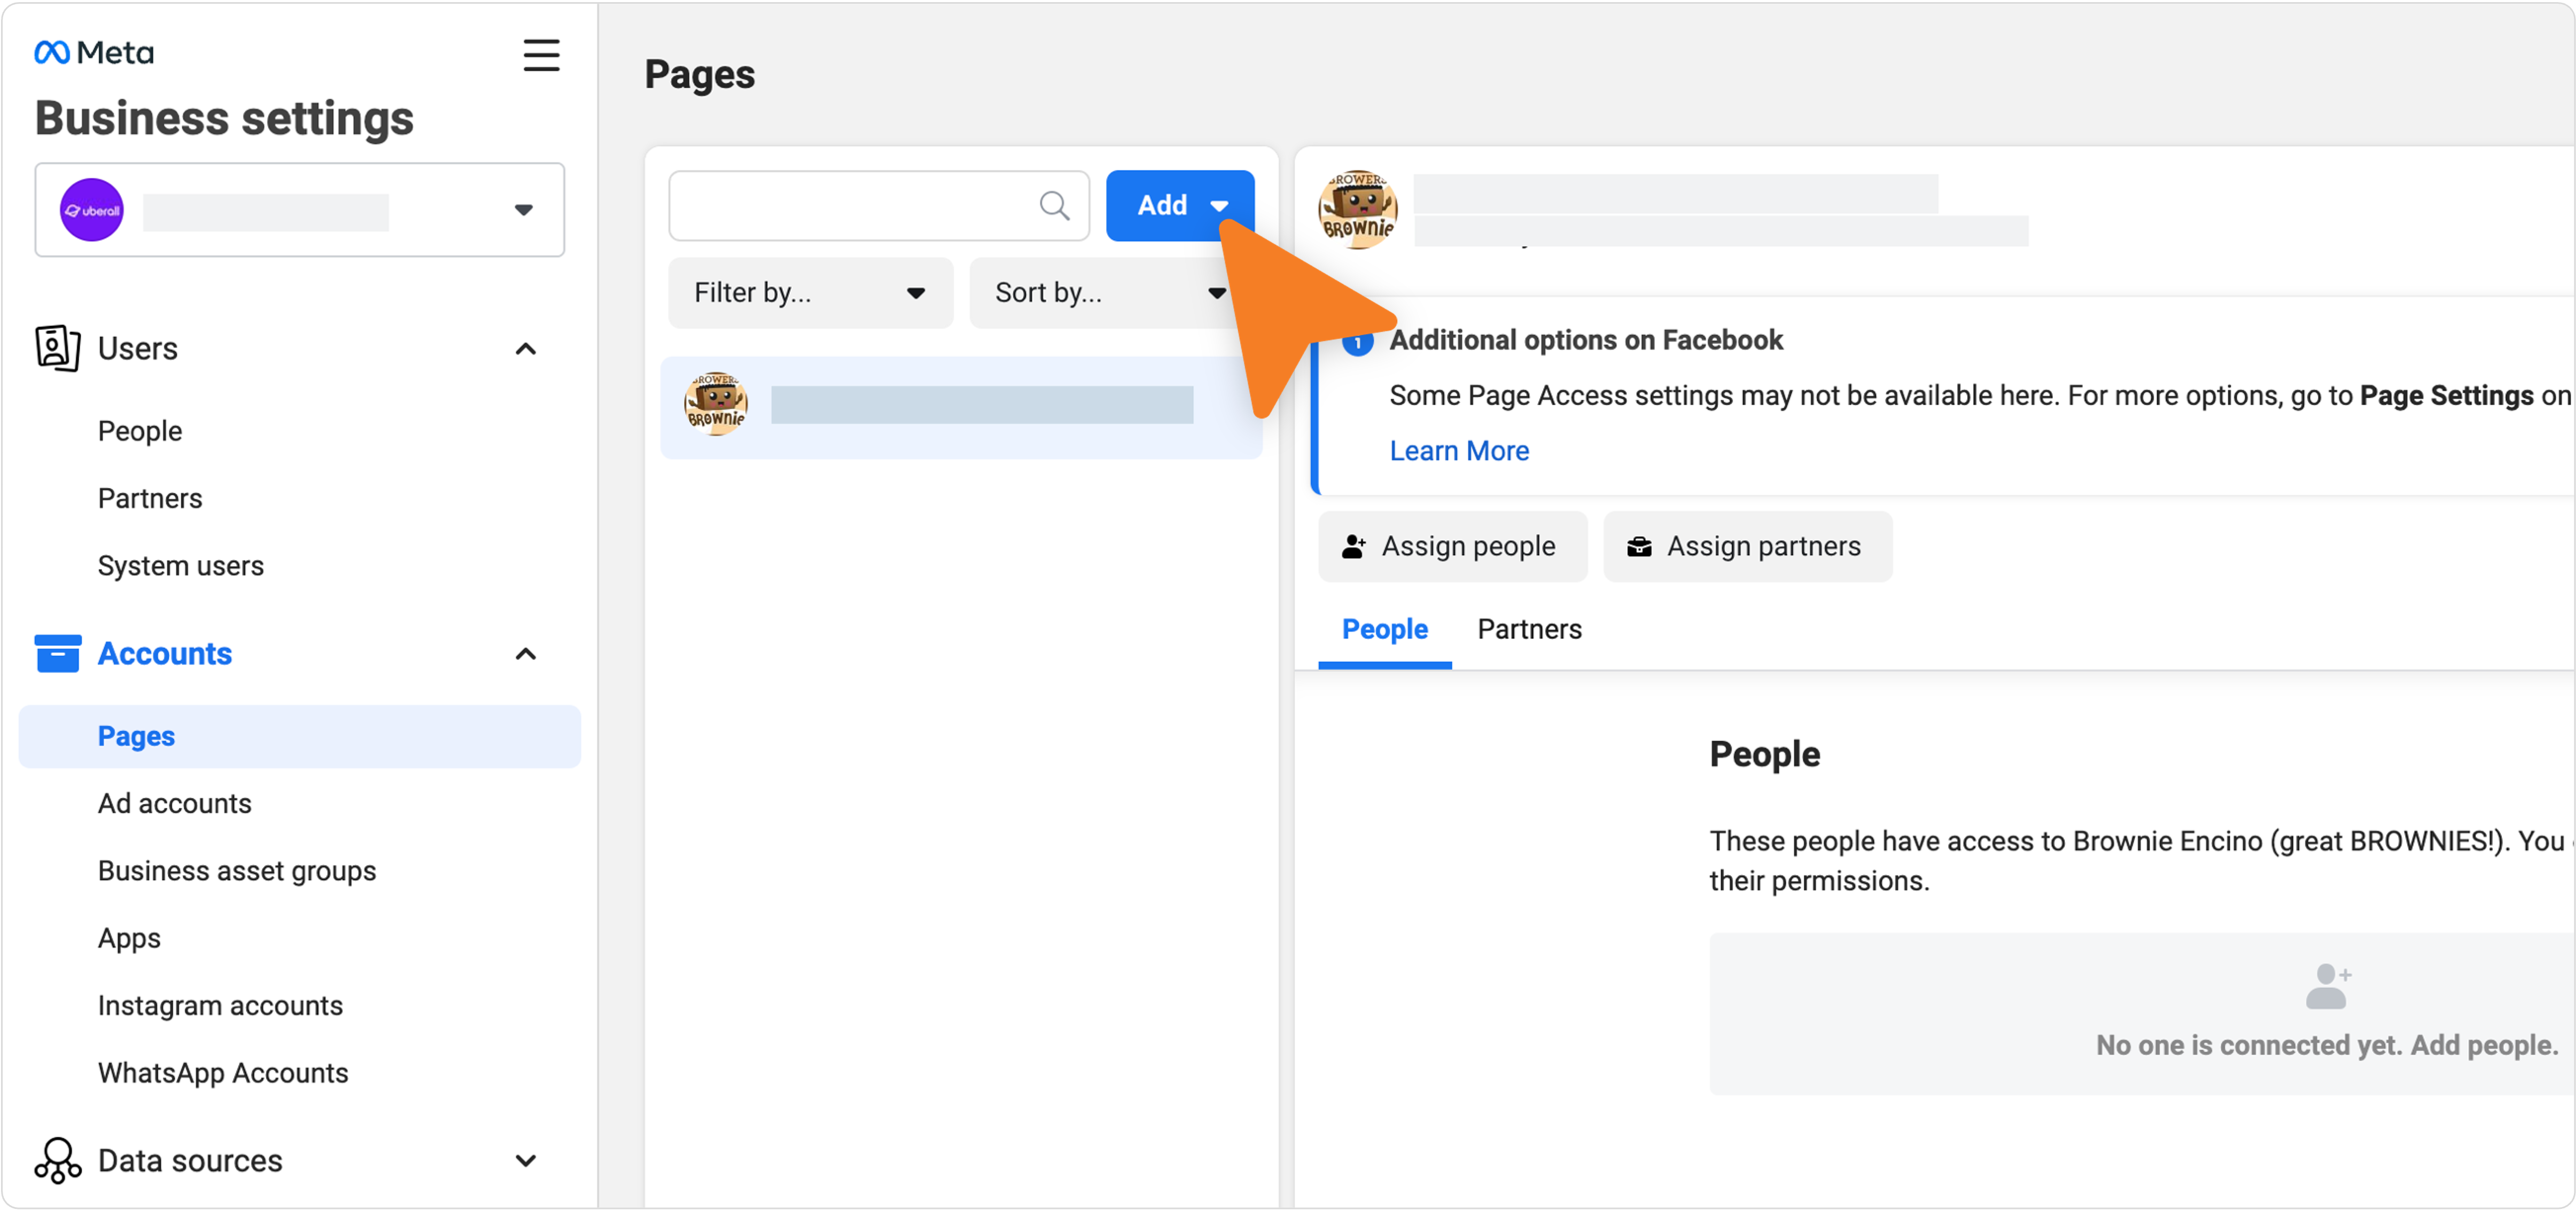
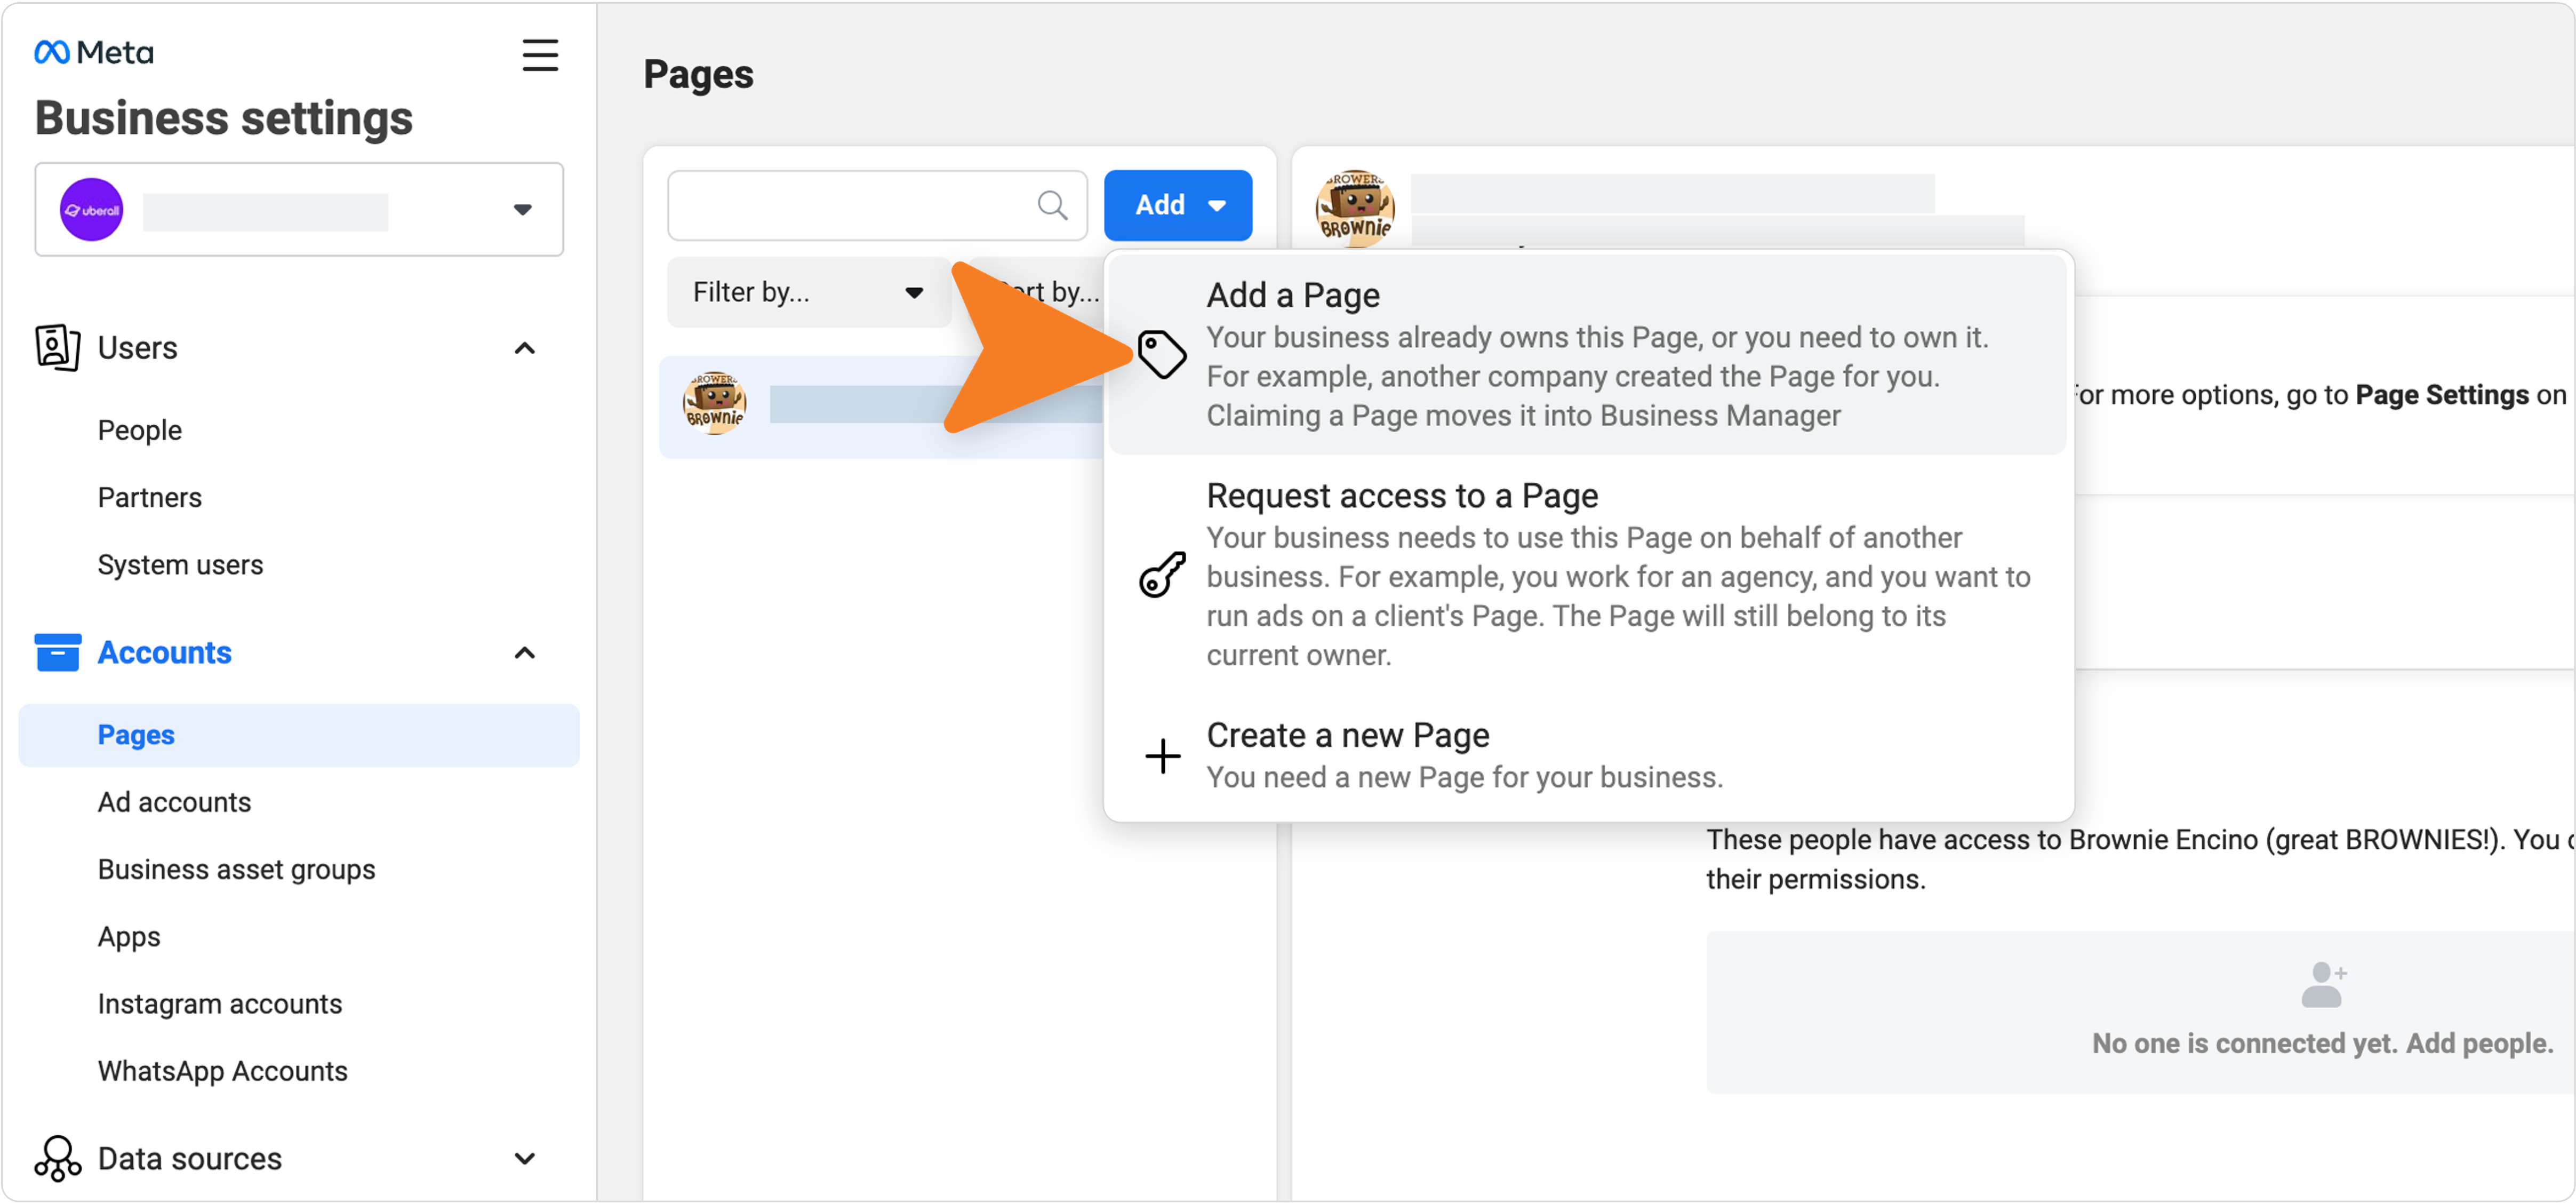
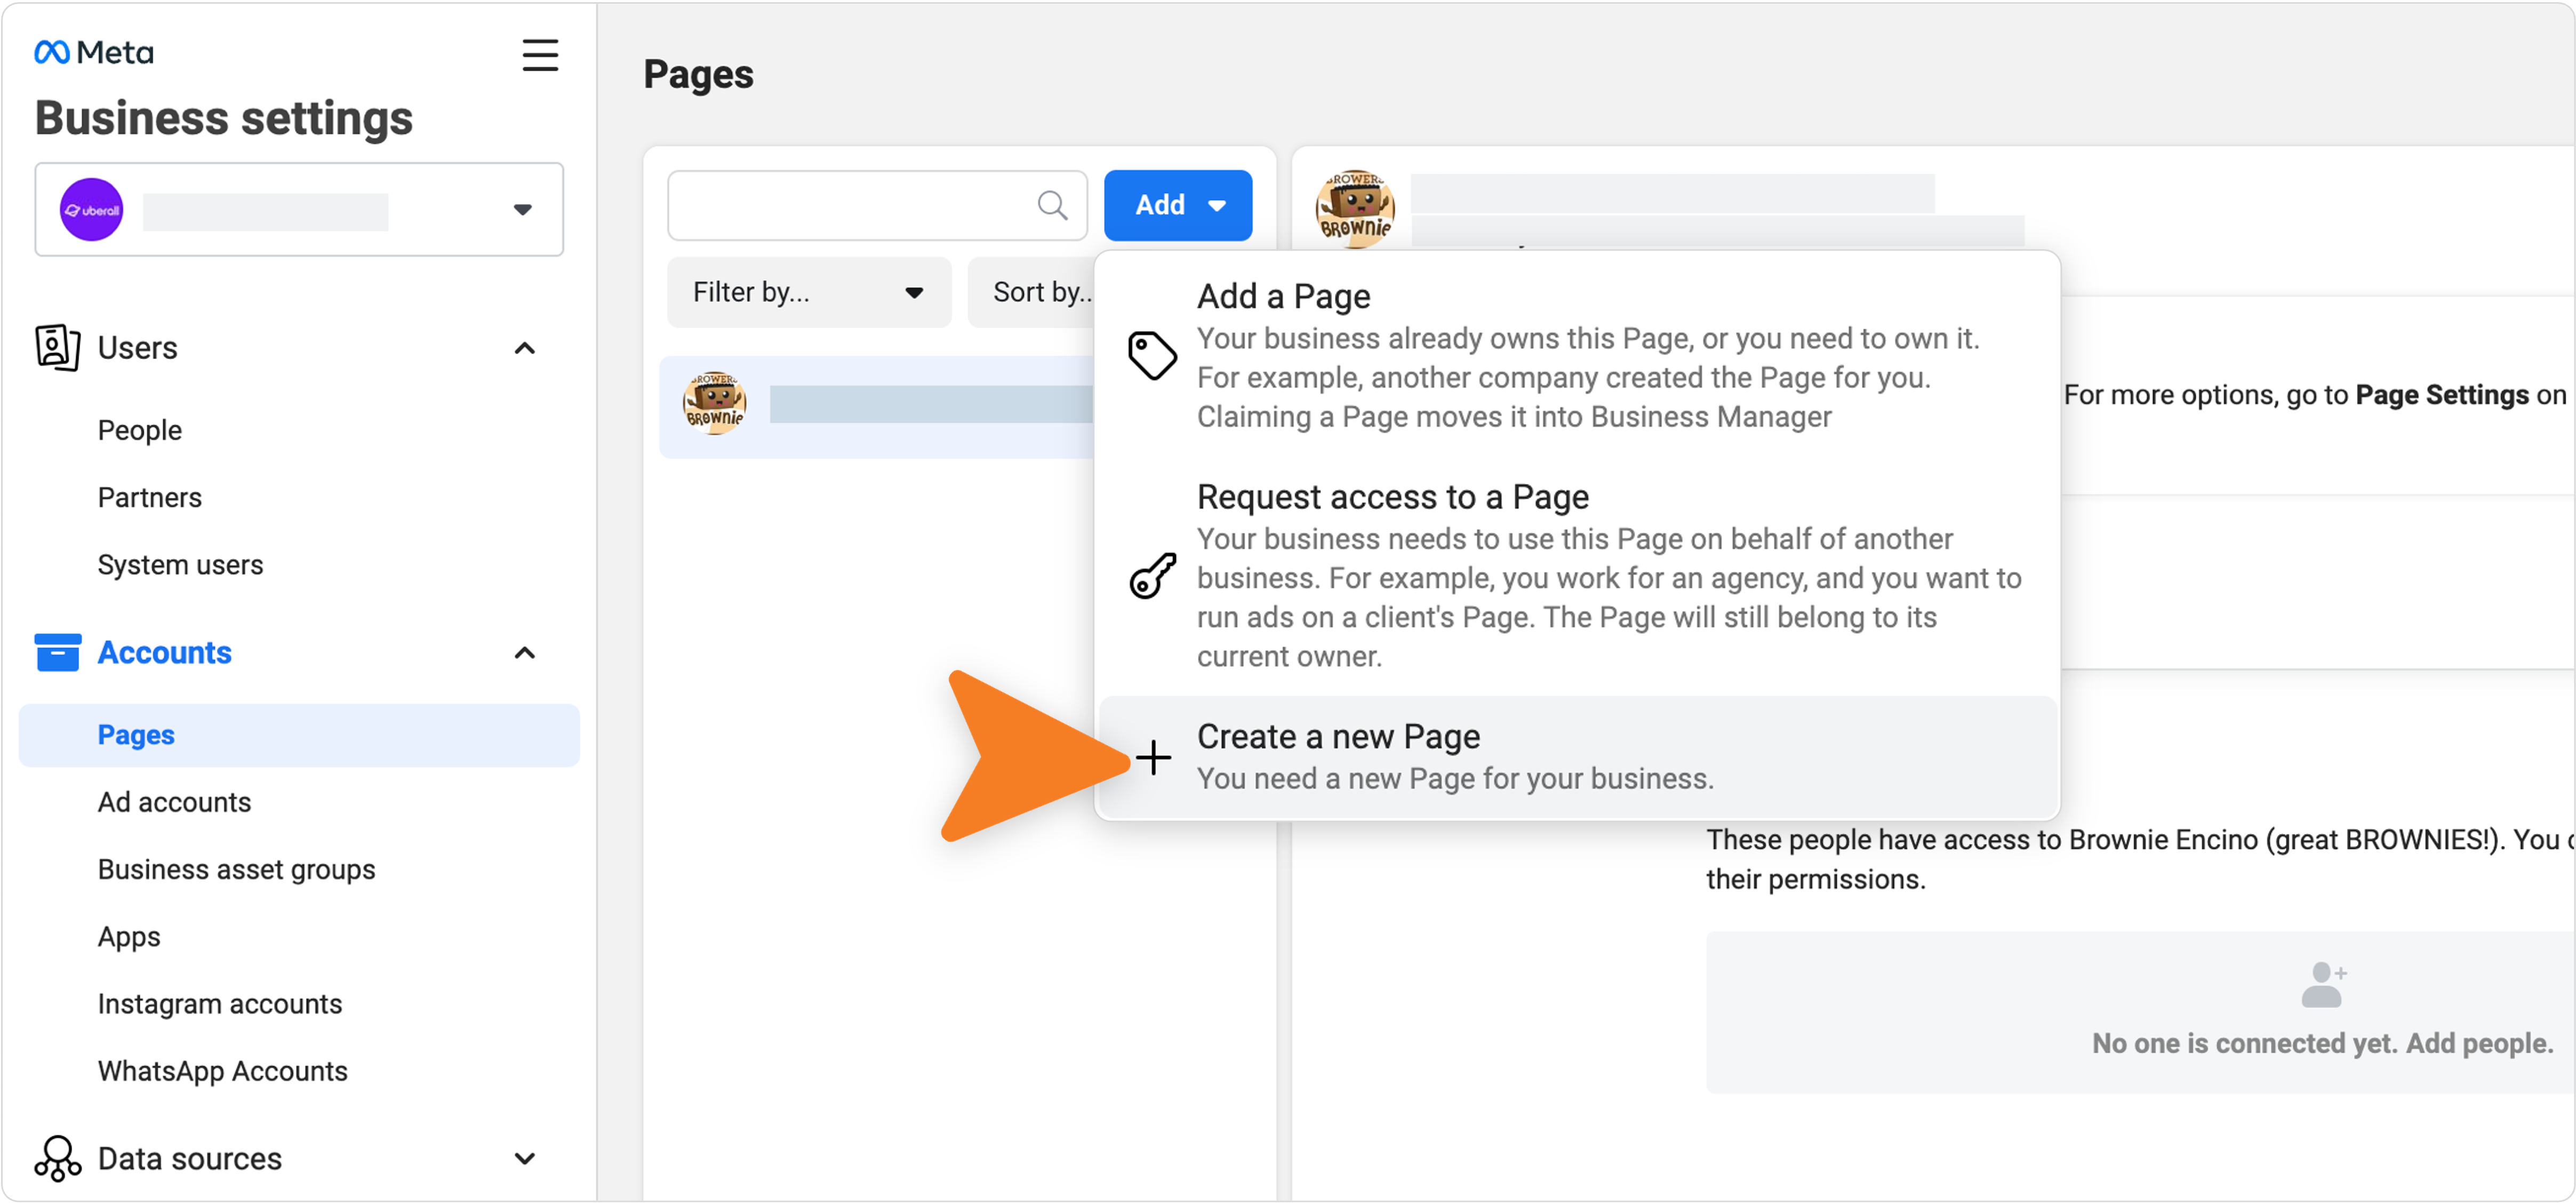
3. Add the Facebook Page On the page column, click the blue Add dropdown and select “Add a Page.” |
|
|
4. Add the Facebook Page In the dialog box, enter the new Facebook Page Name or URL that is provided and click Add Page. |
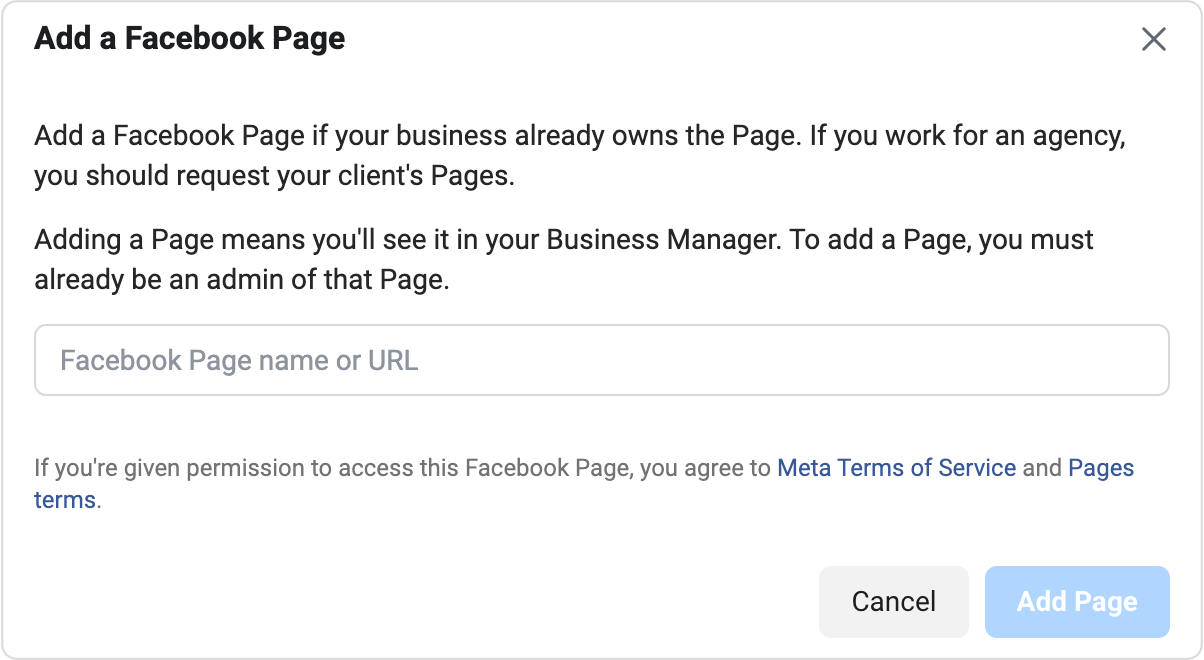 |
Self-Service
Alternatively, you have the option of creating the page within your own business manager and then moving it to your location structure. Expand the sections below to learn more:
1. Creating a new Facebook Page
|
1. Visit your Meta Business Suite Start by visiting https://business.facebook.com/settings and navigate to Account > Pages on the left navigation.
|
|
|
2. Click to Add New Pages On your Meta Business Suite, click the Add Pages button followed by “Create a new Facebook page” |
|
|
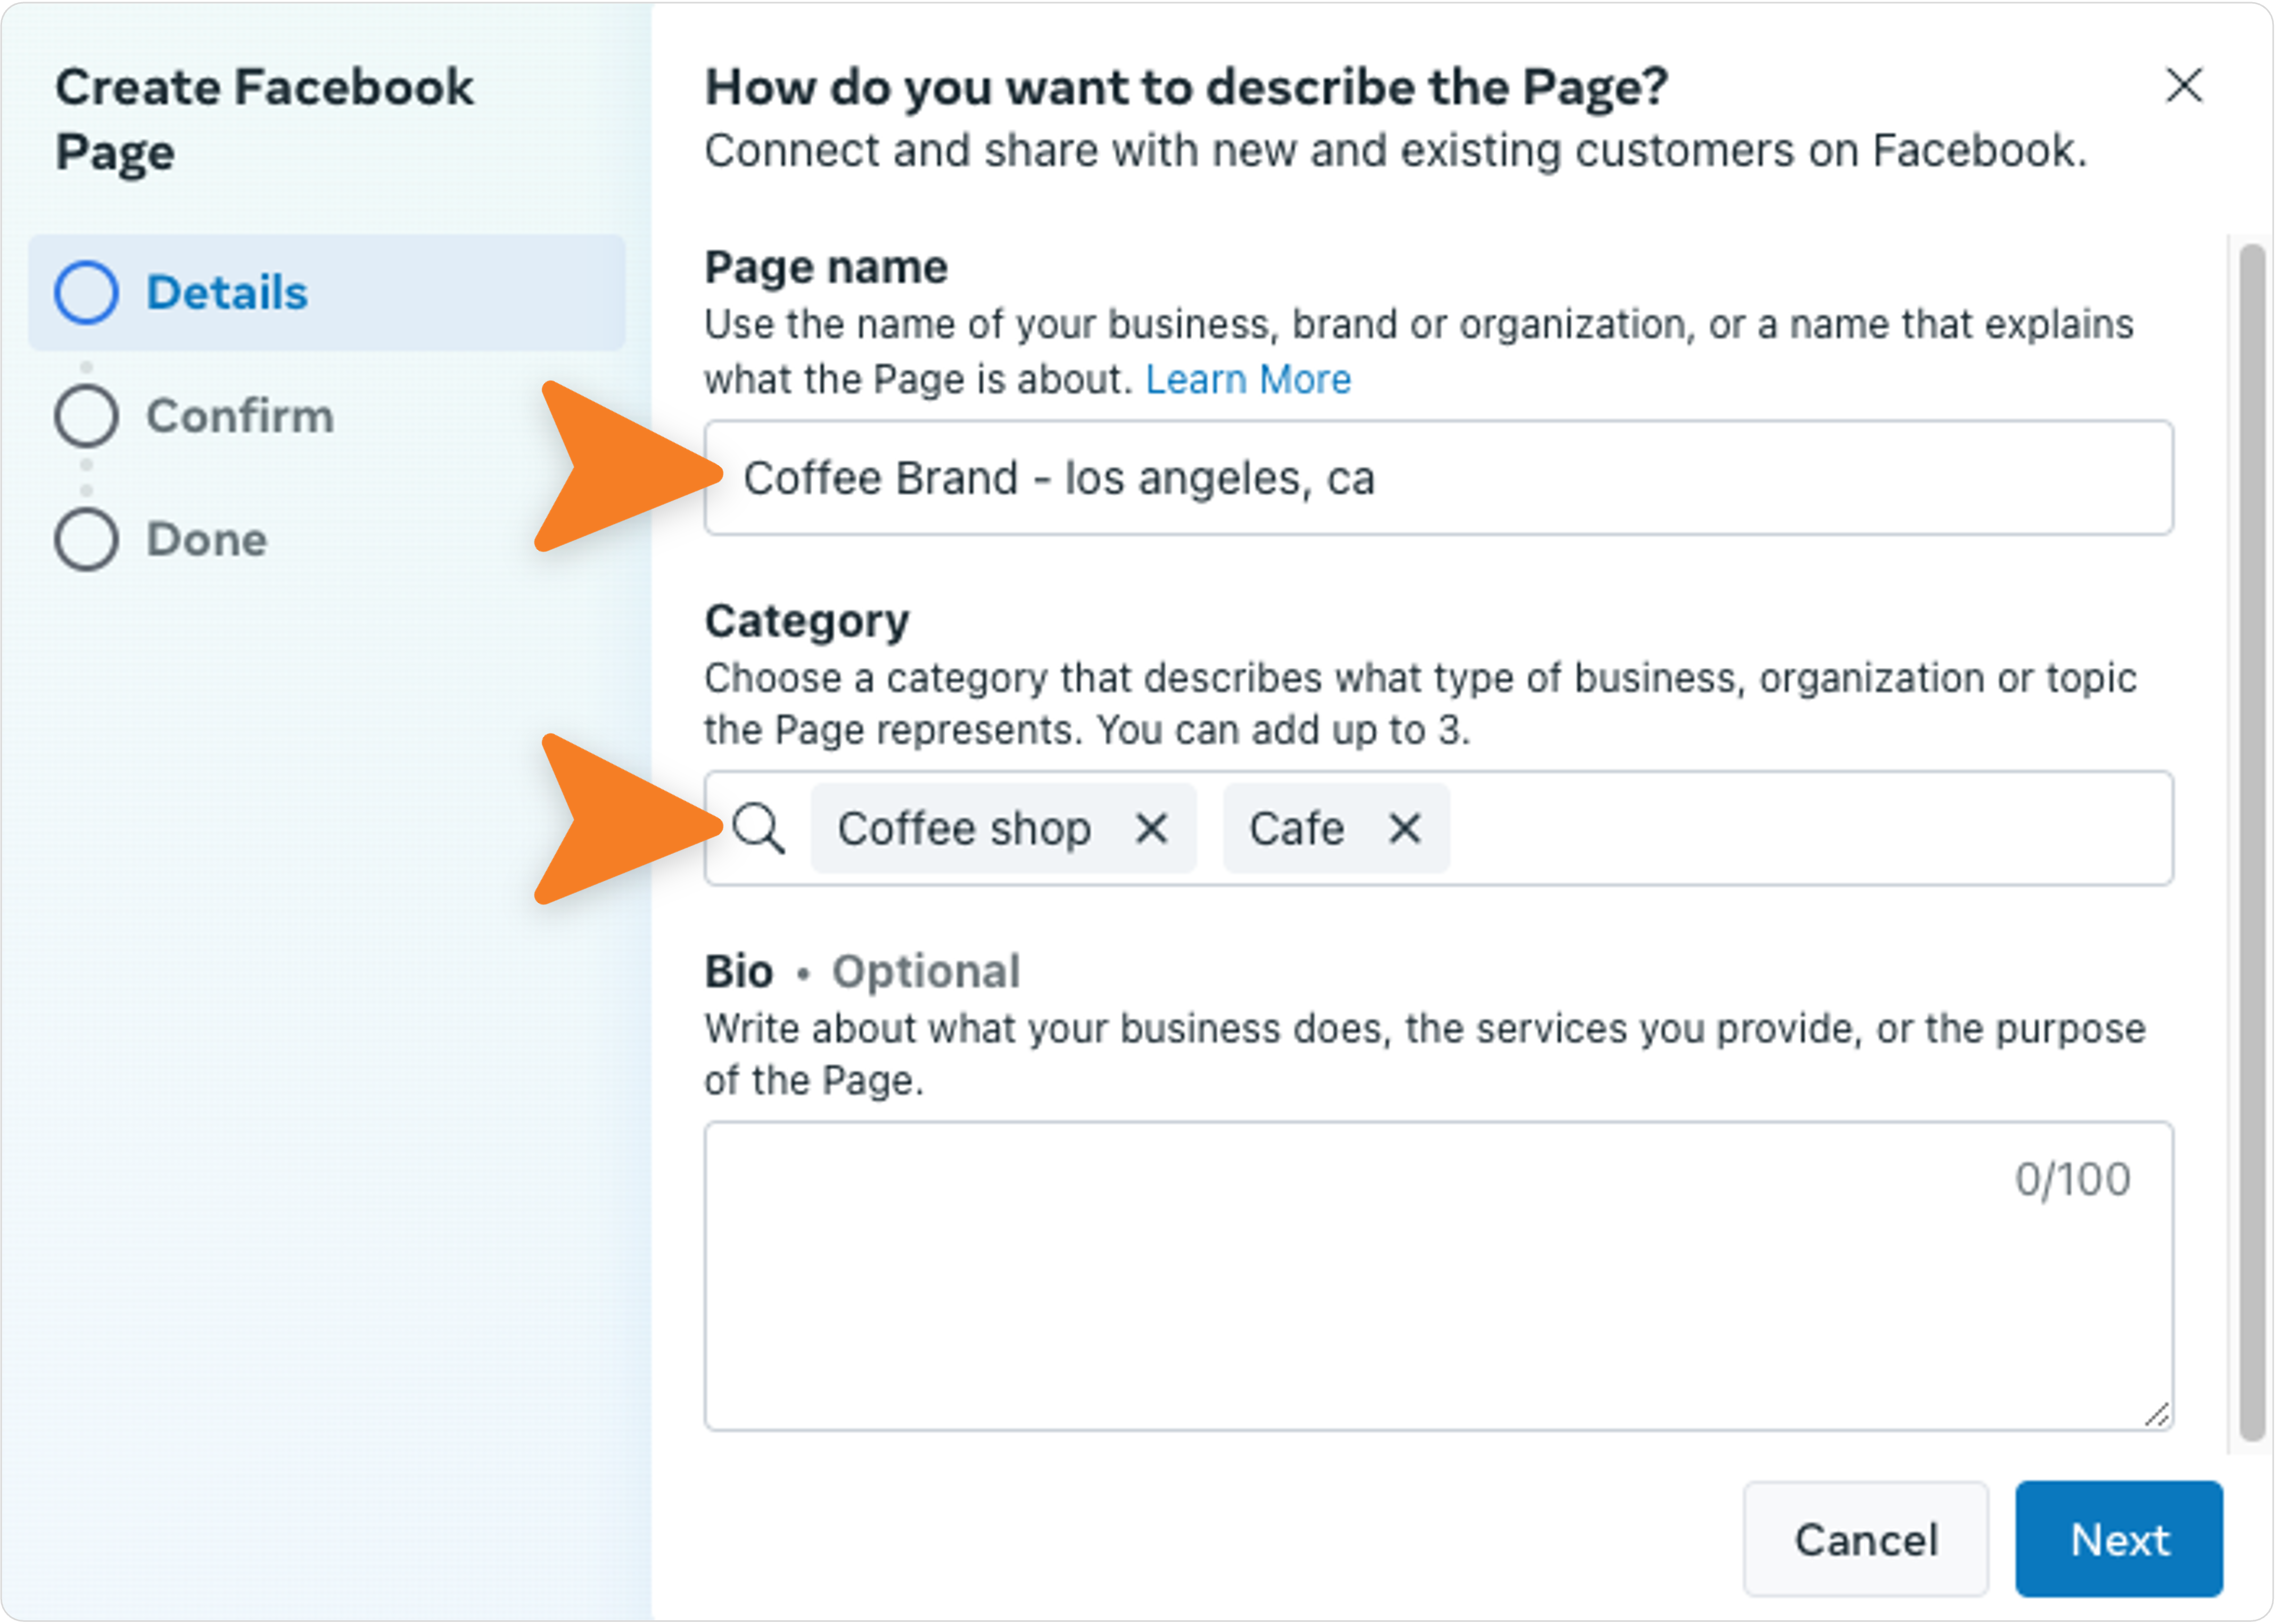
3. Add new location details Here you will need the required details of your location.
Note: you also have the option of adding a bio for the location. |
 |
|
4. Confirm your new page Check the box to agree to Meta's terms of service for the new page and click on Create Page to proceed.
|
 |
2. Adding a page to Location Structure
|
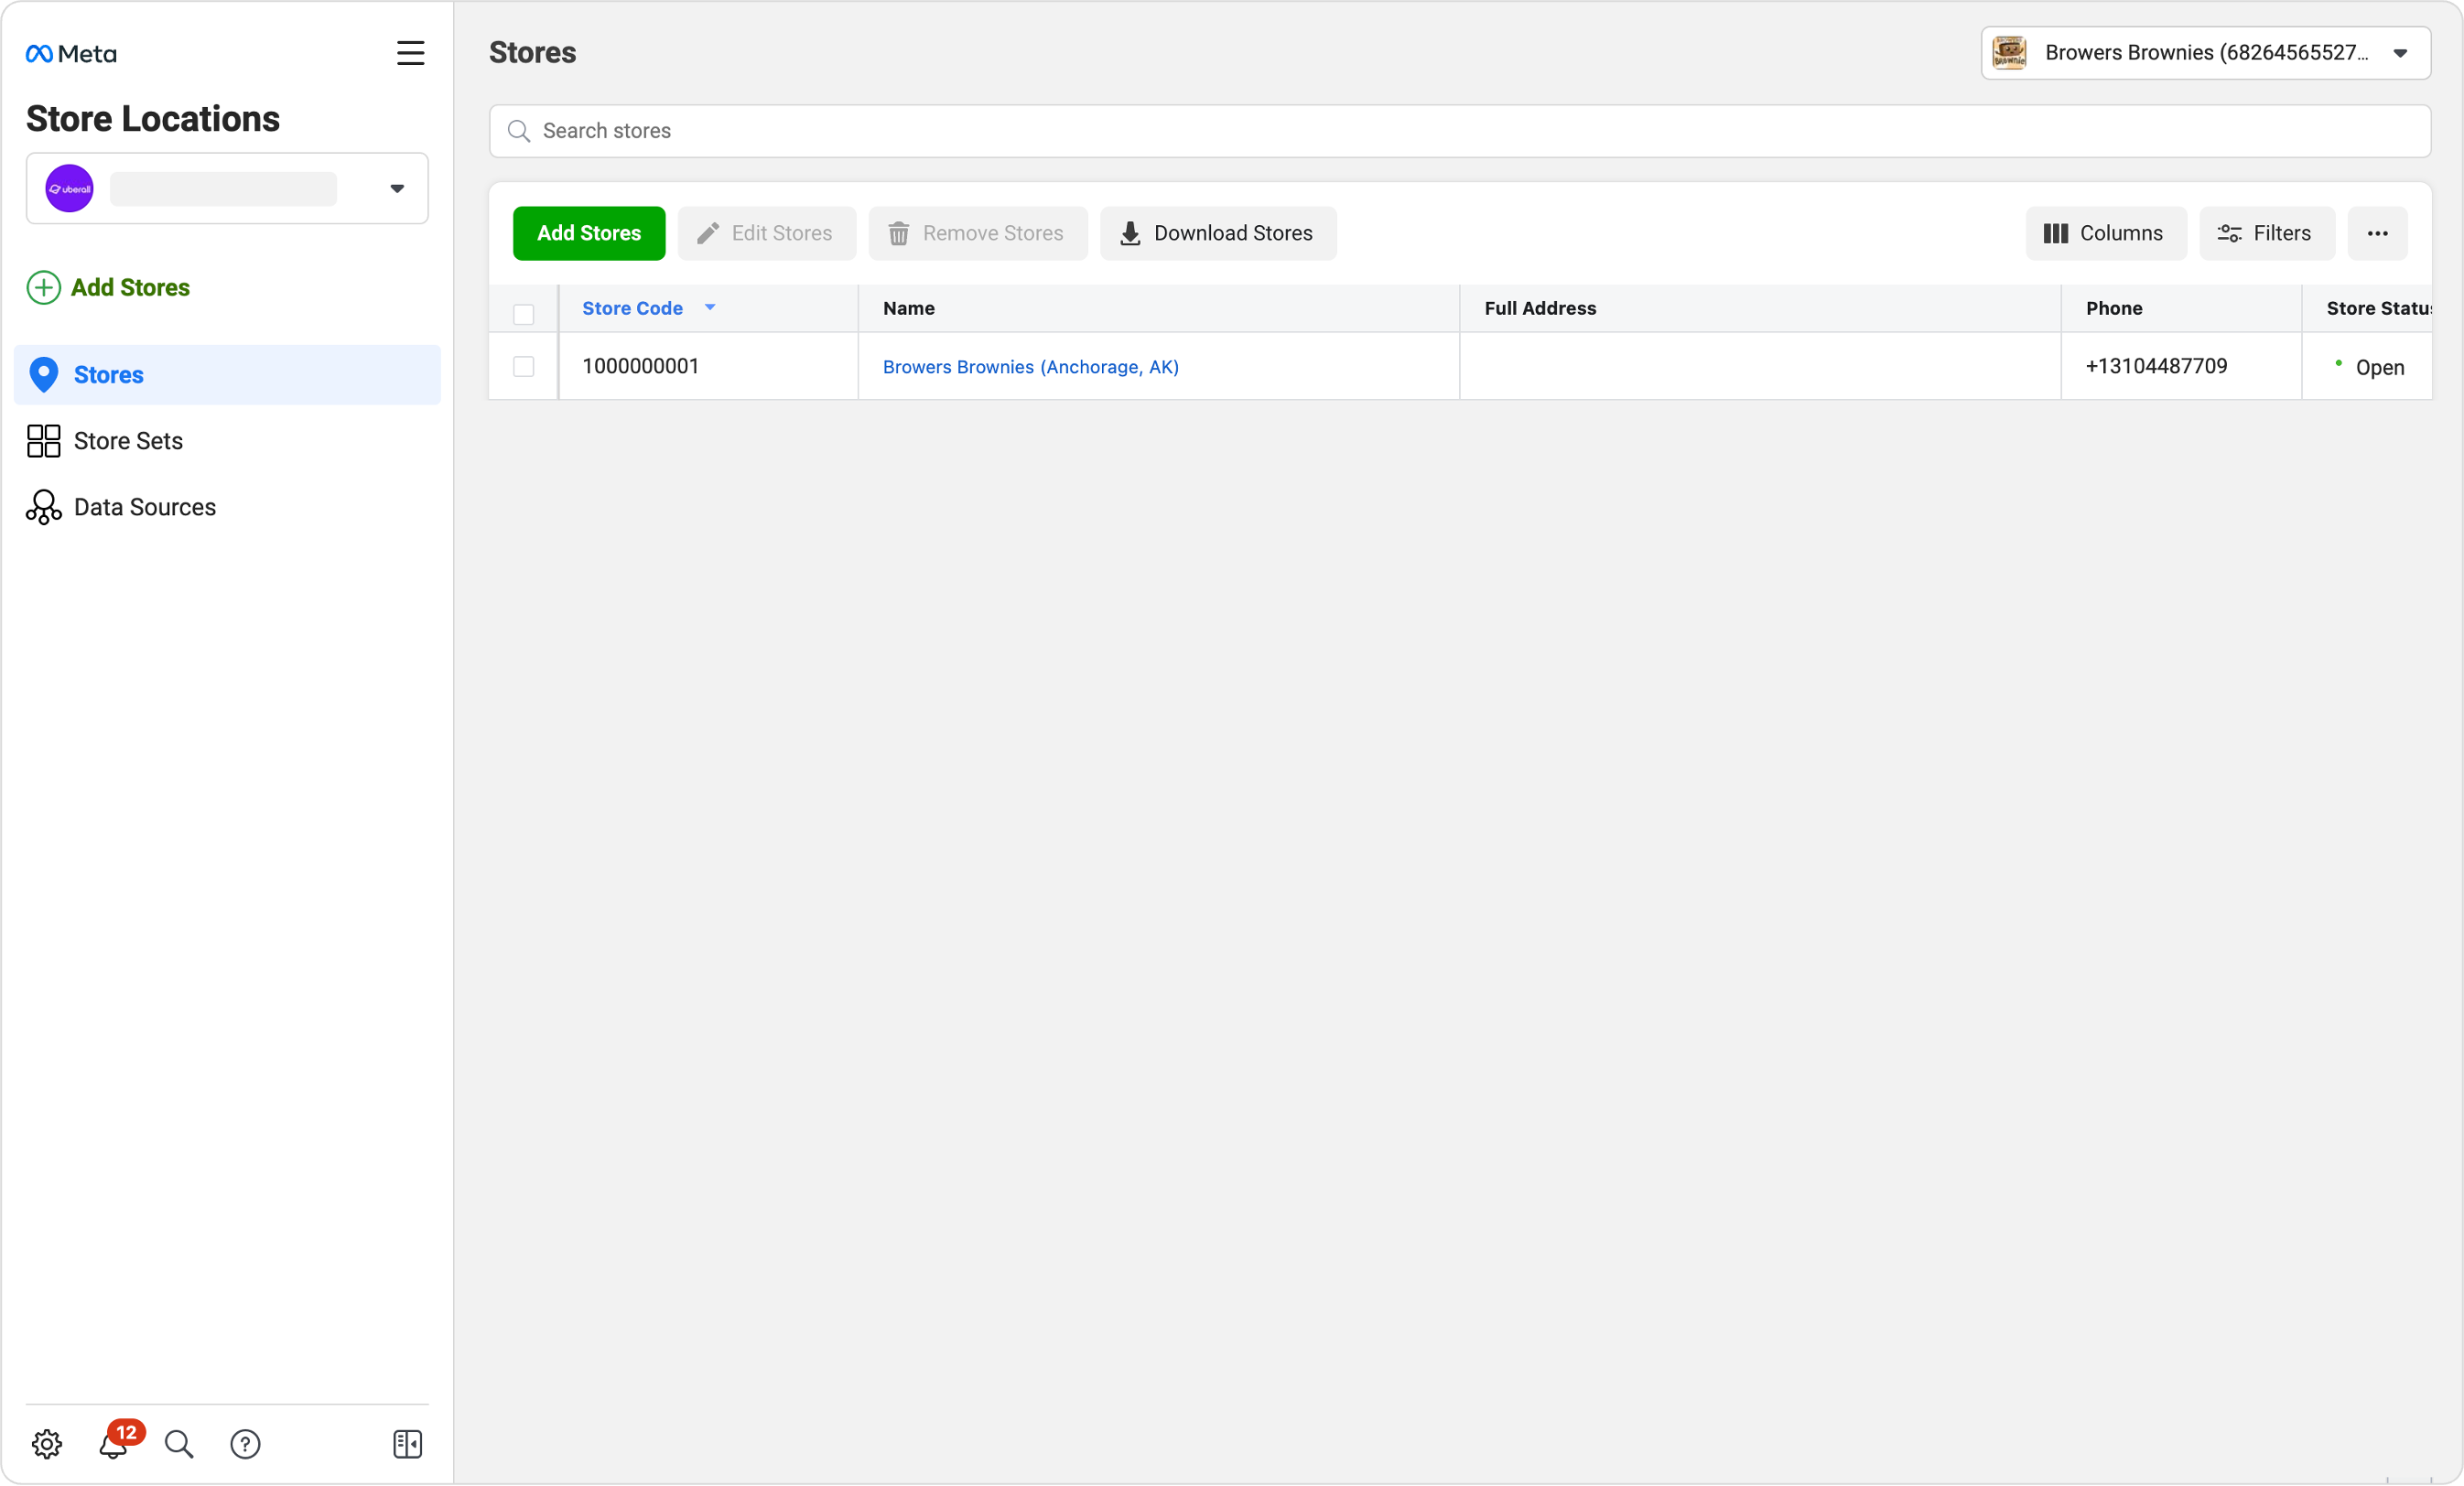
1. Visit Store Locations Page Start by visiting https://business.facebook.com/business_locations/ and make sure that you have your correct account selected. |
|
|
2. Connect the New Page On the Store Locations page, click on the Add locations button on the side navigation or the green one button in the main table. |
 |
|
3. Complete the Connect Page Flow Follow the steps through the connect flow. On the second page choose to “Connect a Page." You will then be prompted with a search option to locate the new page. Select the page and click next to |
 |