How to set up Locator + Pages?
Use the L+P Builder to get started.
Table of Contents
The following article explains how to set up Locator + Pages within our Platform. It also provides an overview of the articles needed to complete the L+ P implementation.
Locator + Pages Builder
You will find a dedicated section for Locator + Pages within the left side navigation bar in our platform.
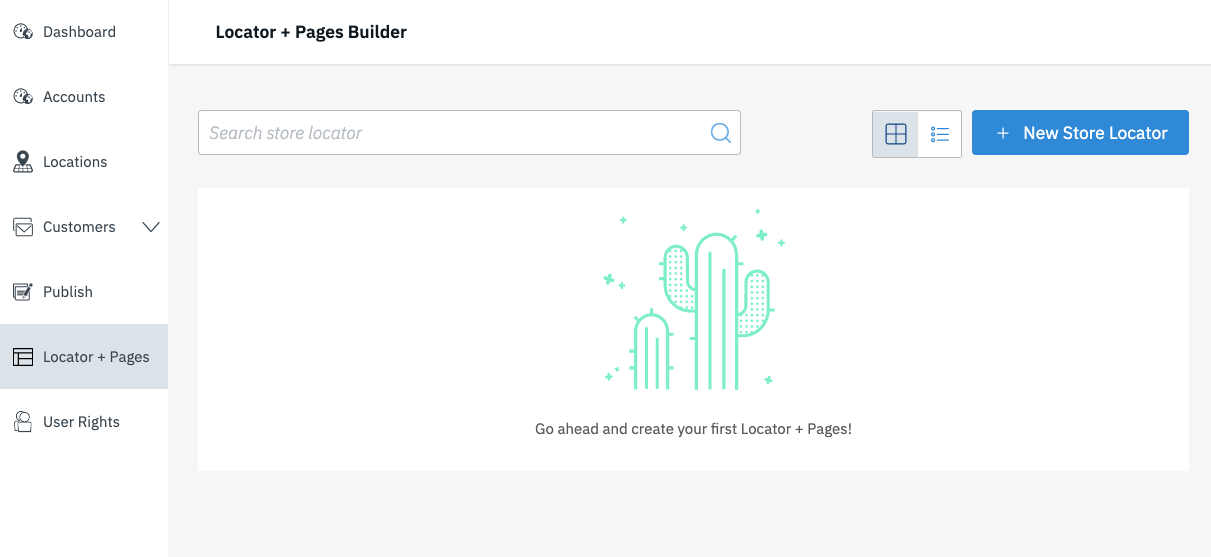
With a click on "Locator + Pages" you can create your first Locator or Edit existing ones.
Create your first Locator
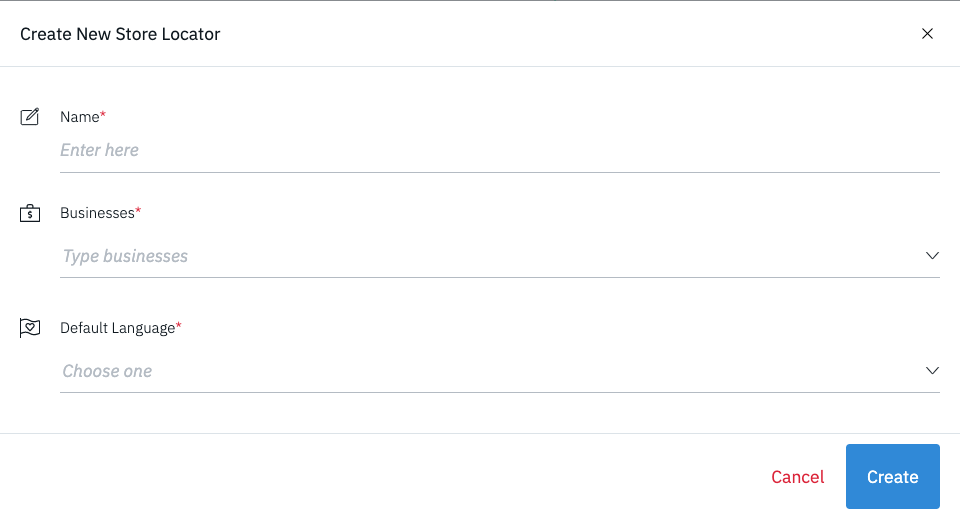
To create a brand new, fresh Locator you will need to click the dedicated button "+ New Store Locator". This button opens a popup in which you will need to set the first basic settings:
- Name: Choose a meaningful name for your Locator. Think about uniqueness, when you are about to set up multiple Locators
- Businesses: Select those accounts, whose locations you want to be displayed on this Locator
- Default Language: Set the language the Locator should be displayed in. If left blank, default language will be English
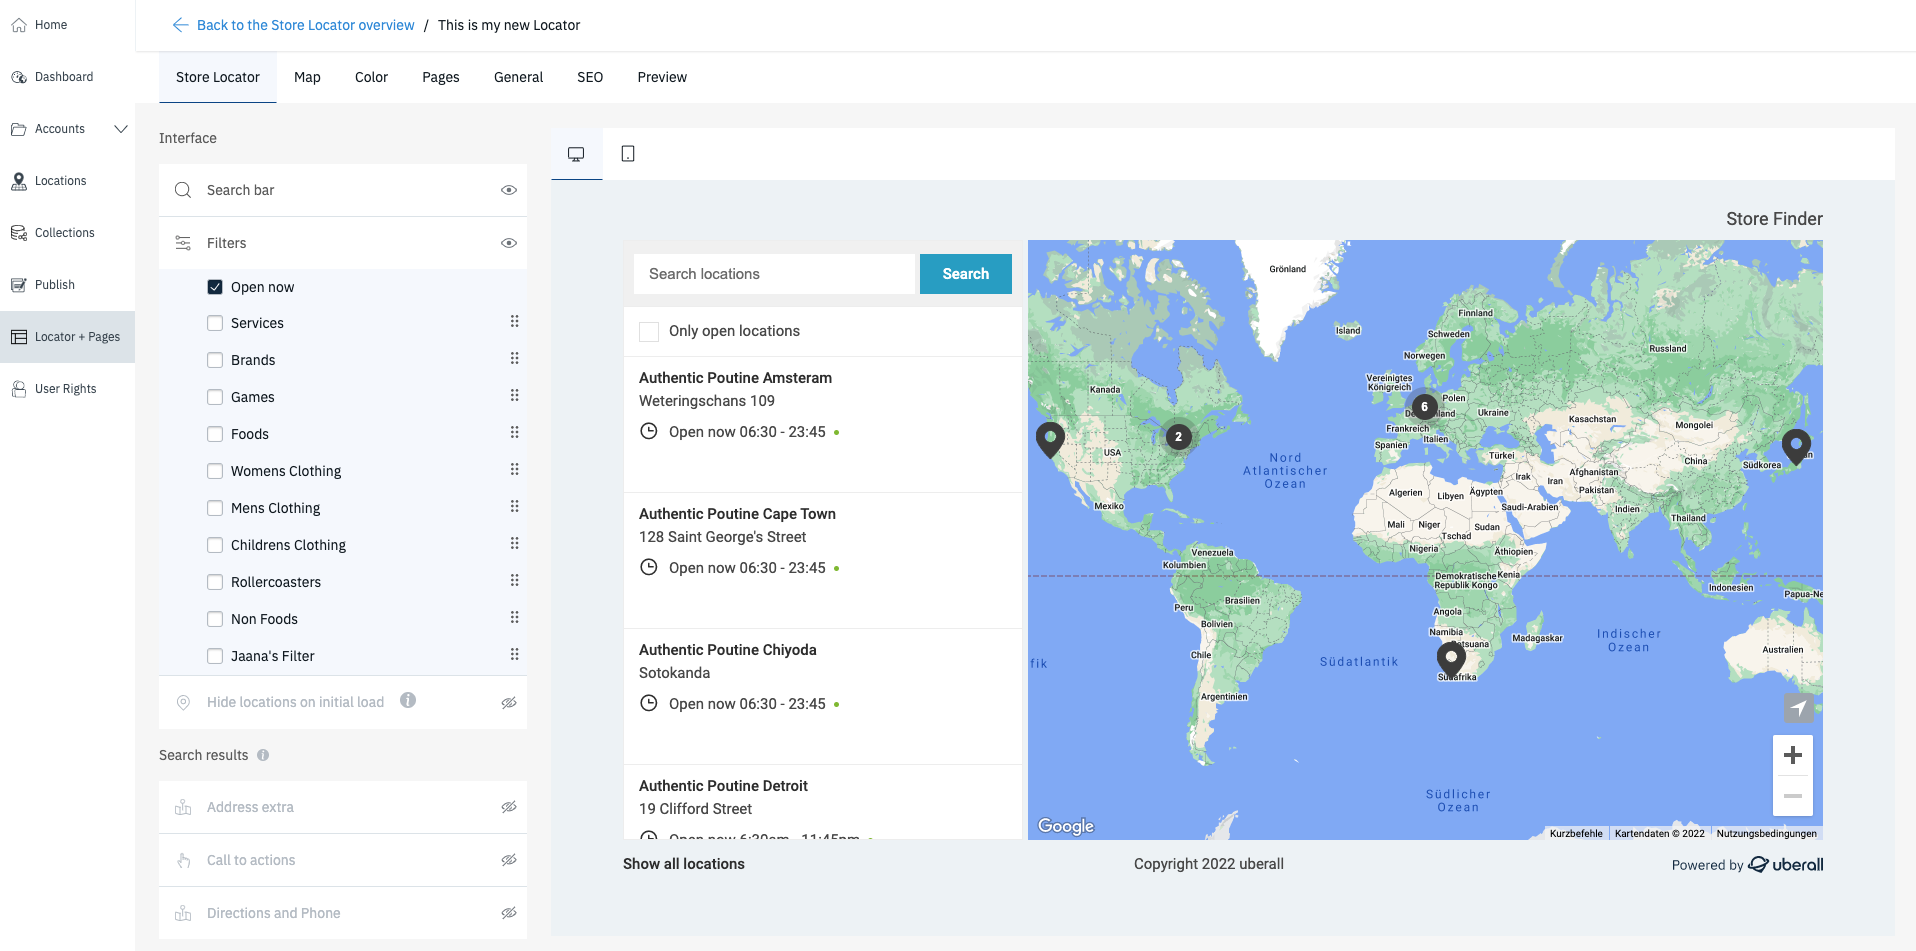
After clicking the "Create" button you will be taken to the actual Locator + Pages builder tool:

The Locator is now created. There will be default settings applied to each feature and attribute. You can alter and design features to your liking and to fit the locator into your website.
Learn more about the various options in this article.
Manage and Maintain Locators + Pages
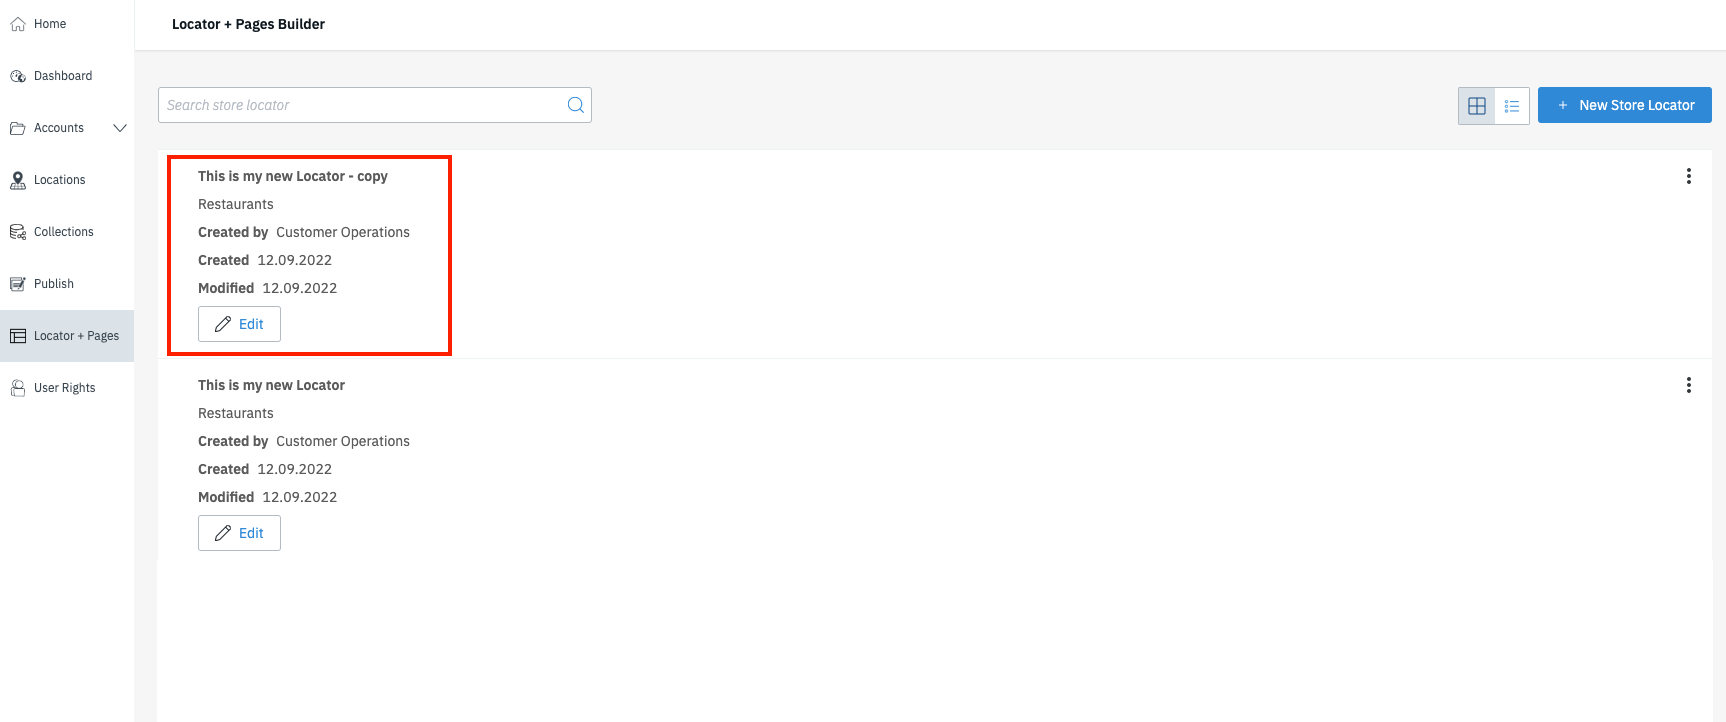
Once you've created at least one Locator you will see this view when clicking on "Locator + Pages" in the navigation bar on the left:
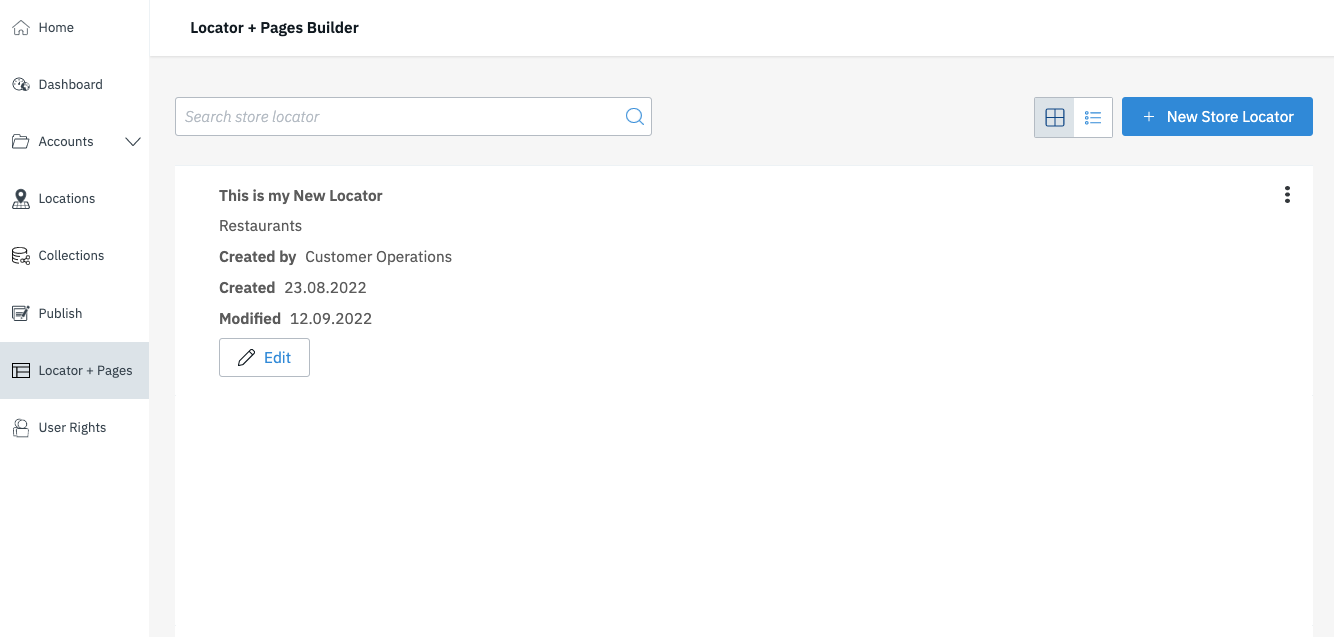
Here you have the option to create new Locators, but also to manage and maintain existing ones.
Edit Locator + Pages
By clicking the "Edit" button you will be directed to your Locator's configuration in our L+P Builder.
In here you can adjust the existing configuration to your liking.

Global Options
By clicking on the three dots on the right, you will expand the global menu for the locator: 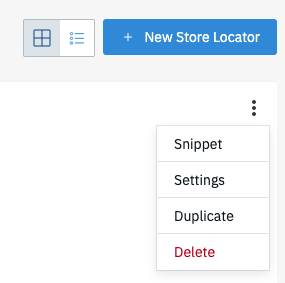
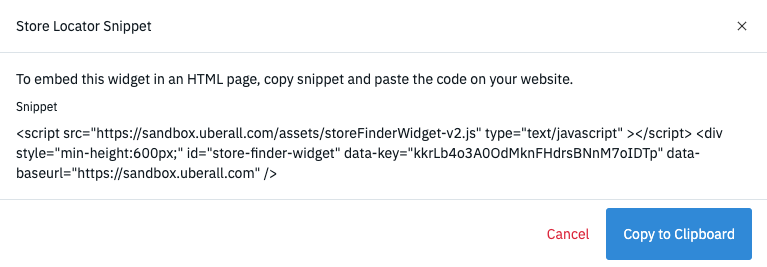
Snippet
Here you can expose the HTML "Snippet" to get the actual code, which needs to be embedded in your website:
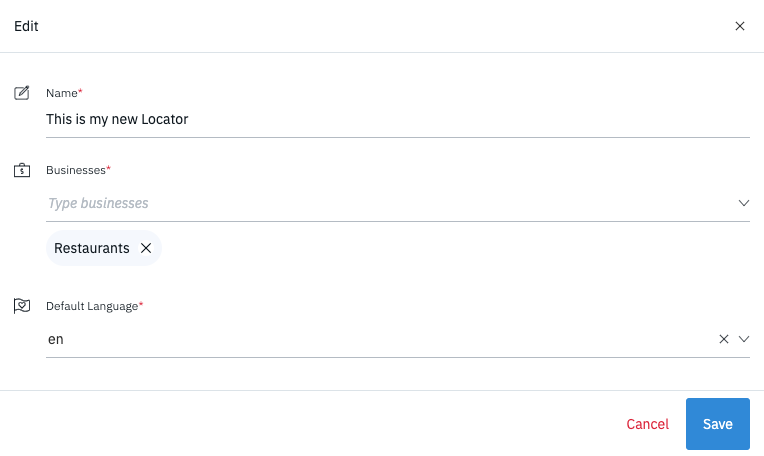
Settings
In "Settings" you can change the name of the Locator, (un)assign Accounts from/to the Locator or change the default language:
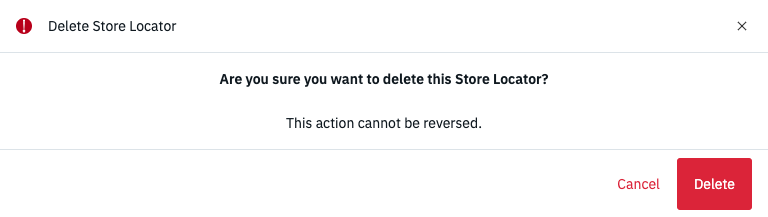
Duplicate
A click on "Duplicate" will instantly create a copy of your initial Locator. This Locator will receive a new data-key and is an independent object in our database with its own configuration. Therefore the "Duplicate" feature is a great way to copy an initial Locator setup, when you are planning to have multiple Locators, which are identical in their core settings.
Use cases could be: Multi-Language Locators, Different set of Accounts (Locations), No index Locator for Intranets.
Read next: Implement the Locator & Pages widget