Table of Contents
Step 1 Take a look at your accountsStep 2 Add/modify locationsStep 3 Manage locations in bulkStep 1 Take a look at your accounts
1. Go to the Accounts tab. Here you will find the current accounts where your locations are stored.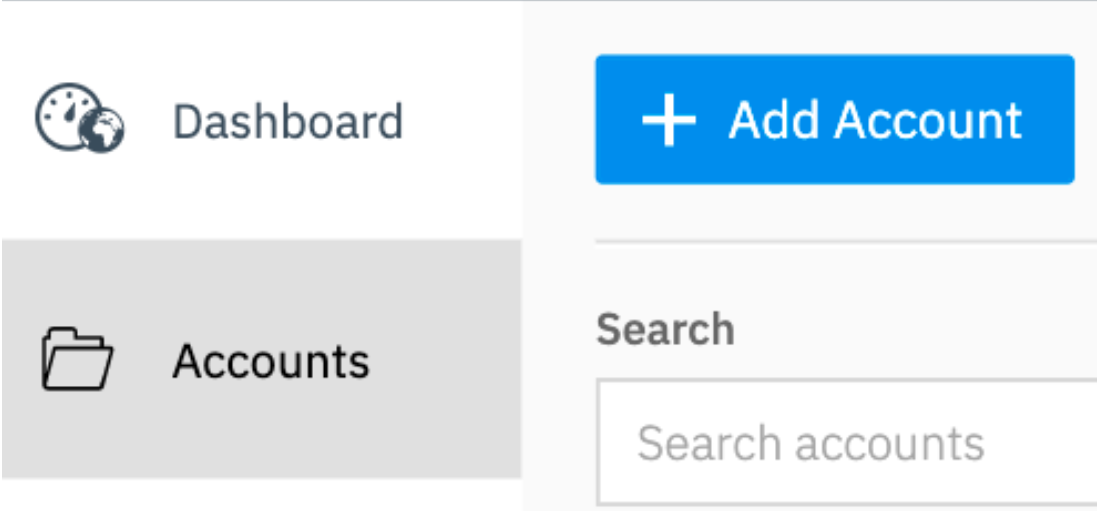
2. If you would like to add more locations you can do so in the same account or create a new account. When adding an account, ensure you appoint an 'Account Identifier'.
This is a crucial step for managing your locations via the import function.

Step 2 Add/modify locations
You can find all your location data already in the platform!
If you wish to add additional locations, feel free to add them at this point by following the steps below.
1. Go to the Locations tab and click on "Add location" on the top left > Manual
If you want to lean more about the fields available, click here.

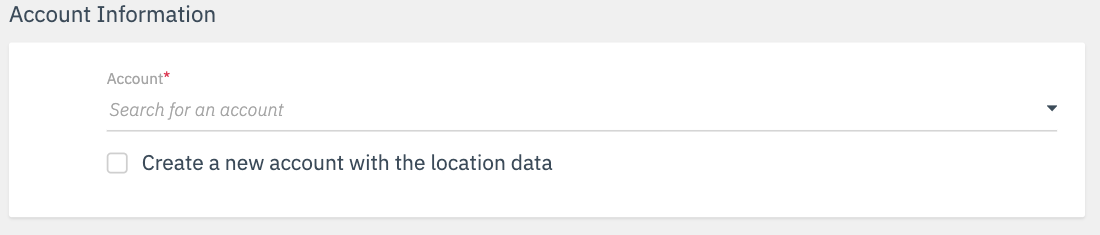
2. To add the location to an existing account, select the relevant account from the drop-down.
To create a new account, mark the checkbox "Create a new account with the location data".
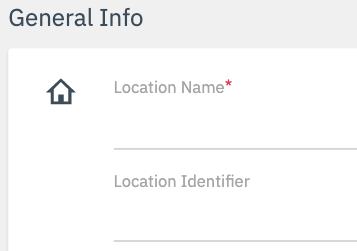
The 'Location Identifier' is not a mandatory field, however, we recommend you appoint one to all of your locations to be able to modify your location data in bulk with the import function.
Address
Note that the address must contain explicitly street and street number.
4. After saving your data entry by clicking on “Save changes”, a pop-up window will appear.
This is where you confirm the location by clicking on “Buy now”.
Note: Every newly created location will be invoiced according to your contract terms and conditions.
5. The new location is now created and you can review all the information you have provided.
To modify the data, update the field and click on “Save changes”.
Step 3 Manage locations in bulk
If you would like to add multiple locations at once, please do so as described below by using our import function.
1. Navigate to the Locations tab within the Location Hub, select the locations you wish to update by checking all or some of the checkboxes on the left-most side of the location list, then click "Export".

2. An excel will be generated containing your location data.
Important:
- The first two columns contain the identifiers
- The location identifier must match the Google Store Code before connecting your Google account.
- Location Identifiers must be unique within each Business.
- DO NOT change the identifiers with the import function.
Changing an identifier must be done on the location directly in the platform.
If the existing locations do not have an identifier, you will not be able to use the import function. Otherwise you will end up creating duplicates.
3. When adding new locations with the import function, make sure you add the correct Business Identifier (Column A) for the Business where you wish to add the location, and a unique Location Identifier (Column B) for each new location.
When creating new locations, ensure the following fields are filled out:
- status (Column C): set you location to ACTIVE or CLOSED
- addressDisplay (Column AJ):
true = your location has a physical address
false = you would like to hide the address of your location on the listings.
- autosync (Column AK):
true = your location's data will be synced as soon as you click "Save"
false = you will be required to manually click on "Sync" every time you change location data.
- Address format: streetandnumber / address line 1 (Column E) - must only contain street and street number.
Any additional information must be stored in addressextra (Column L).
If you have questions on how to populate this document, you can refer to this link and this checklist.
Important:
Do not remove the additional sheets (Events/Products/Menu/People)
Tip: If you are performing location updates, you are able to import only the relevant columns and remove the rest, except for the businessidentifier (Column A) and identifier (Column B).
4. When your locations are ready, navigate to the Locations tab within the Locations Hub and click on 'Add location' > 'Excel'.

5. Click 'Select File' and choose the file with your new and/or updated location data from your computer.
6. You will be asked to match the columns and fields from your file with the fields in Uberall. If you haven't changed or added any new column headers, all matches should be made by default.
7. Import preview allows you to review how many entities will be created and/or updated as a result of your import. Ensure this matches your expectations.
8. Click 'Start Import'. Your locations will be created/updated as soon as the file has finished importing.
Error Messages
If there were any issues when importing the locations you will be notified.
To read more about common error messages and how to fix click here.
If you want to learn more about tips and tricks when using the import function click here.
If you would like to use your own file format, please follow the instructions specified here.