Take Our Self Build Locator for a Test Drive
Quick and easy to build, learn to create a store locator that helps customers find the shopping locations nearest to them.
Why Do You Need a Store Locator?
Store Locators help customers easily find the nearest locations from your website and mobile apps, while the associated Local Pages provide location-specific information and a clear path to purchase.
Store Locators play an important part of the customer journey with 6.2% of views resulting in an intent-based action.
In addition a Store Locator and Local Pages provides a positive SEO influence, allowing search engines to find specific information about each location
Follow the steps below to build your own store locator.
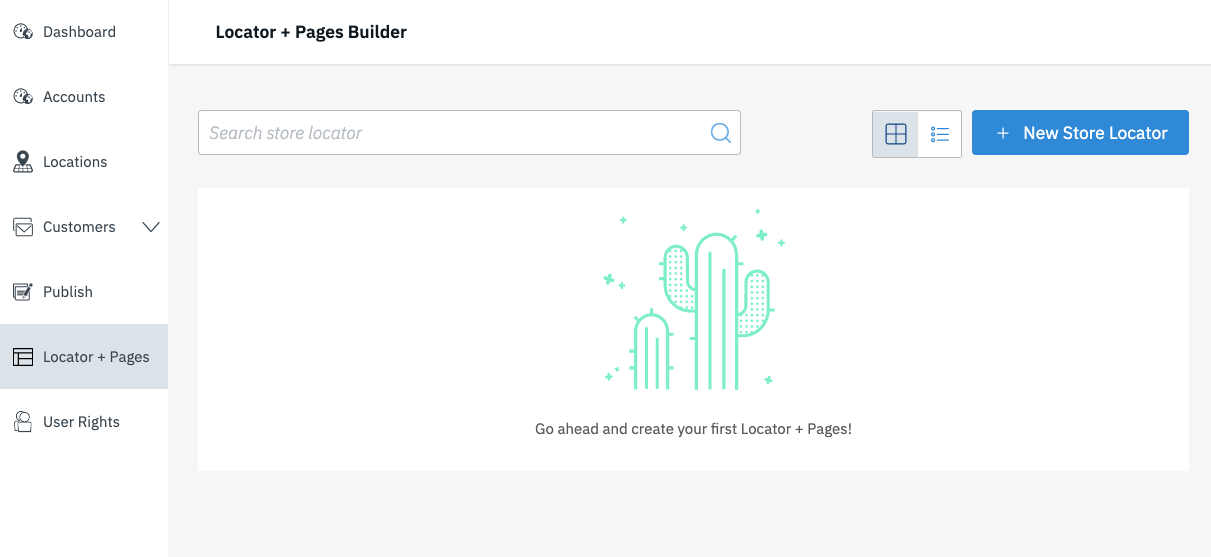
Step 1. Access the Locator + Pages Builder
You will find a dedicated section for Locator + Pages within the left side navigation bar in our platform. Here you can create your first Store Locator or edit an existing one.

Step 2. Build Your Store Locator
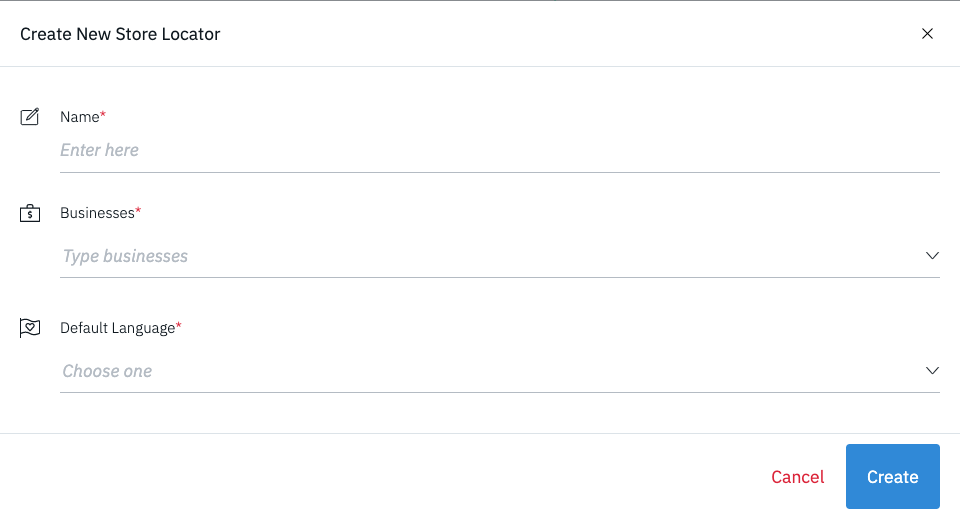
To create a new Store Locator you will need to click the "Create New Store Locator" button, which opens a popup where you will need to set these first basic settings:
- Name: Enter a new name for your Store Locator.
- Businesses: Select the accounts which have the locations you'd like to include on your Store Locator.
- Default Language: Set the Language the Locator should be displayed in.

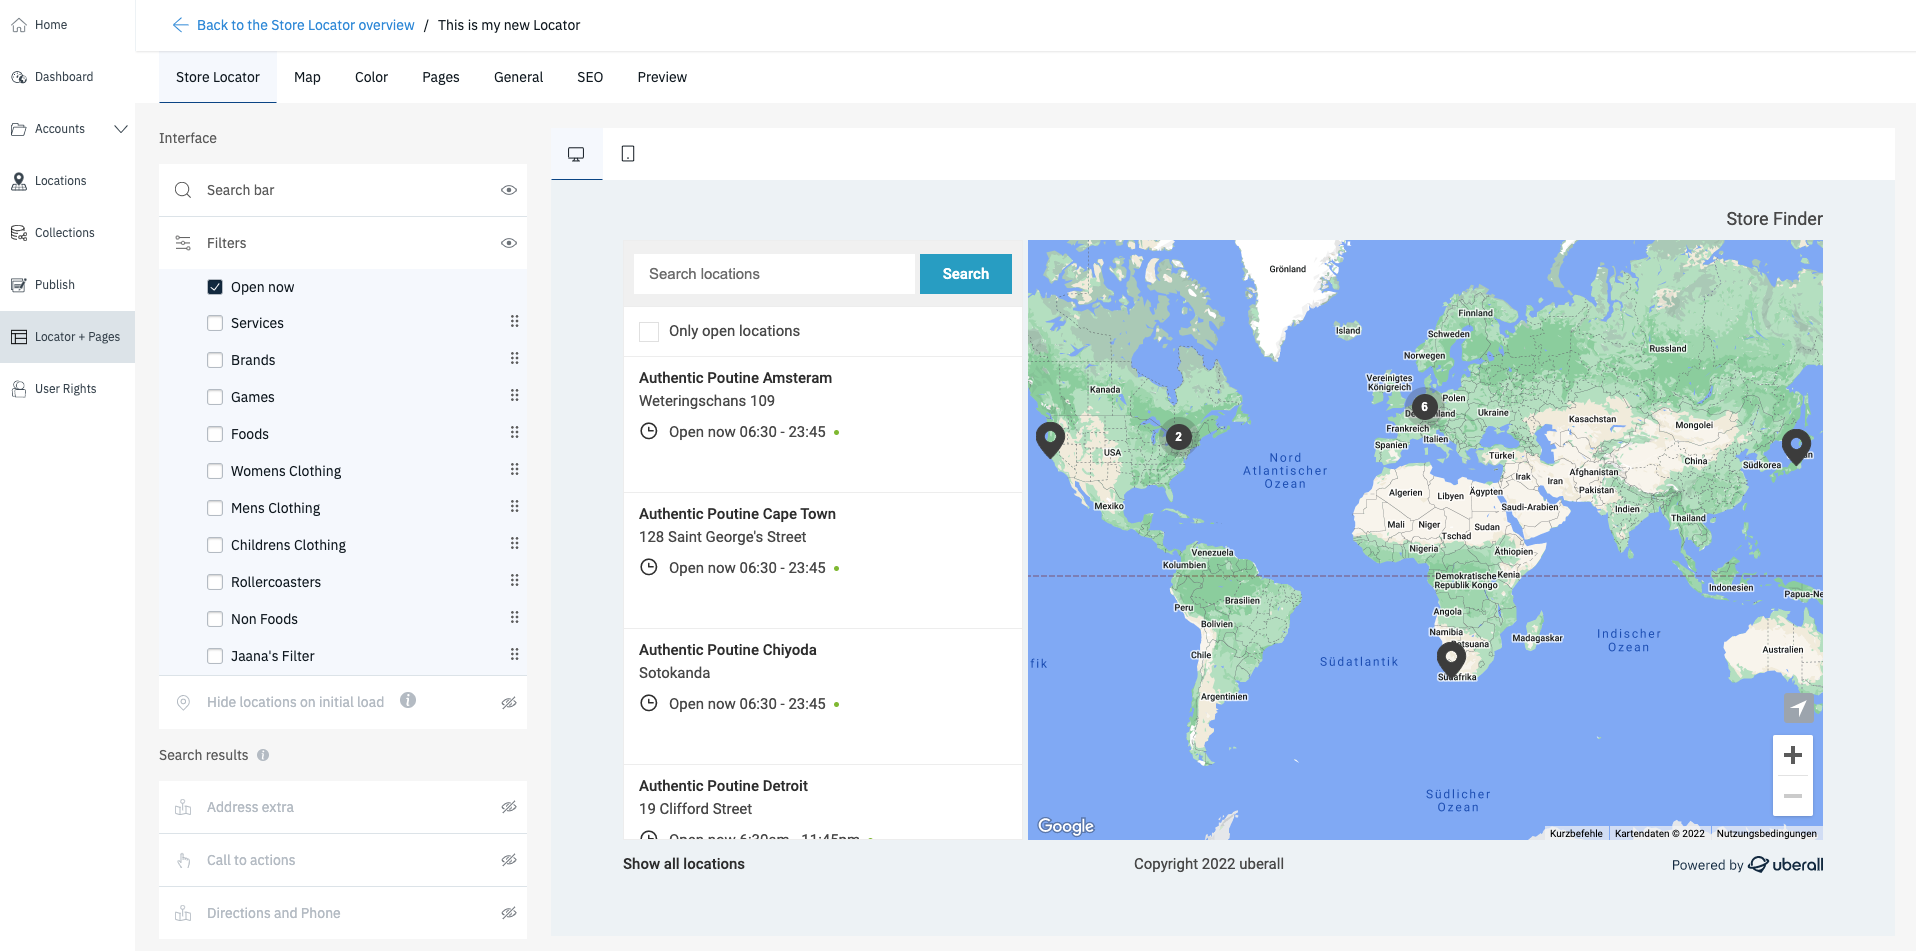
After clicking the "Create" button you will be taken to our Self Build Locator tool:

The Locator is now created. There will be default settings applied to each feature and attribute. You can alter and design features to your liking and to fit the locator into your website.
Step 3. Designing Your Store Locator
The Builder allows you to select from an extensive choice of settings, which are categorized into different tabs.

Store Locator
The Store Locator section allows you to select all of the settings on the search page. This is where your customers will search for a location in their desired area and receive a list of results that match.
Map
The Map section allows you to choose from a variety of map styles, map coordinates and the display of the location pins on the map.
Design
The Design section allows you to enter colors that match your brand guidelines.
In the design section there is also a custom CSS field. Advanced users can add any custom CSS here, which will affect the design of the page.
Pages
Included in the store locator are all of the pages associated with each location. The builder automatically creates a local page for each location in the accounts you selected when creating your Store Locator.
Here you can choose the layout of the page and all of the elements that will display on each local page. Drag and Drop the elements you want to show up in both the primary and secondary column.
General
The General section allows you to select from a variety of settings that affect how your Store Locator will be displayed.
SEO
The SEO (Search Engine Optimization) section allows you to create the settings for how search engines read your pages.
You can enter the titles and descriptions for your Store Locator search page and local pages as well as choose from the most representative local business type.
Step 4. Editing Your Store Locator
You can go back anytime you'd like to make changes to your Store Locator. Simply click the ‘Edit’ button and the Builder will automatically open.

Step 5. Adding the Store Locator to Your Website
Adding the Store Locator to your website requires adding a small snippet of code on your website.
Please contact our team to discuss upgrading your plan