SAML 2.0 Single Sign-On
Learn how to set up a secure, single sign-on experience for users with SAML 2.0.
Table of Contents
What is SAML 2.0 Single Sign On?
Security Assertion Markup Language (SAML) is a standard for logging users into applications based on their sessions from another platform. This single sign-on (SSO) login standard has significant advantages over logging in using a username/password:
- No need to type in credentials
- No need to remember and renew passwords
- No weak passwords
Most organizations already know the identity of users because they are logged in to their Active Directory domain or intranet. It makes sense to use this information to log users into other applications, including our platform, and one of the more elegant ways of doing this is by using SAML.
How does it work?
SAML SSO allows for the transfer of a user's identity from one location (identity provider) to another (service provider) through a digital exchange of XML documents. The process goes as follows: a user logs into an identity provider and attempts to access a remote application, the application redirects the user back to the identity provider for authentication, after which the identity provider sends a signed XML document containing the user's information to the service provider. The service provider, already familiar with the identity provider, verifies the document with a certificate fingerprint and grants the user access to the app.
1. Activating SAML SSO in the platform
Only a platform ADMIN user can configure the SSO. To do this you will need to:
- At the bottom left find Org settings
- Navigate to the Single Sign-On tab
- Click on Add new configuration

No Single Sign-On tab?
If you're an Admin user and still do not see it, contact your success or account manager to have the feature activated for you.
Afterwards, you have to fill the following details.
2. Filling the SSO parameters
Mandatory Configuration Parameters
These are to be provided by the Identity Provider (IdP) of your choice and set in our platform:
- IdP Entity Id: A unique name for the SAML entity (ex: Azure). This name will be added to the SP Response URL, which needs to be input into the IdP service provider. The name must be alphanumeric and have no spaces. It is important to use the name that your IdP provides to pass the validation checks.
- IdP SSO URL: The location where users will be redirected for logging in. This should be the client's platform URL.
- Certificate: The client should provide the certificate information from their IdP provider, in the form of an alphanumerical string (x.509 certificate).
- Base URL: This should be https://uberall.com unless there's a whitelabel setup, in which case it should be the base URL of the active Whitelabel domain.
Platform-provided Configuration Parameters
These are to be consumed by the IdP provider:
- Metadata Endpoint: The application-defined unique identifier that is the intended audience of the SAML assertion.
- SSO URL or ACS Endpoint: The location where the SAML assertion is sent with a HTTP POST request and where the client's IdP will redirect an authenticated user after successful sign-in.
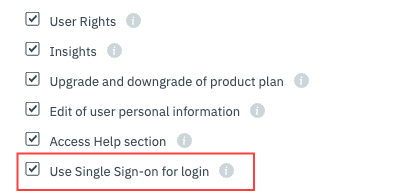
Activating SSO for users
Once you have set up the SSO details, you need to activate it for Users, who will be able to log in with SSO. To do that go to a User's profile (settings) and activate the Single Sign-on feature.
Going forward, that User will be able to log in with SSO through the login page:
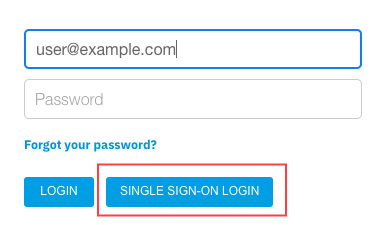
Using a password to log in
Even if the SSO feature is activated for a User, they will still be able to use their old passwords to log in. If you wish to enforce more governance and mandate only login with SSO, check the “Enforce SSO” section below.
3. Creating and updating users via Just-in-time (JIT) provisioning (optional)
The platform allows creating or updating users on the fly. To achieve this, you will need to adjust your IdP settings so that the following attributes are provided in the XML assertion.
Mandatory fields
These are required to identify the user
- FirstName – string – user's first name
- LastName – string – user's last name
- Email – string – user's emails
- Identifier – string – a stable and unique user identifier according to your internal system
- Role – one of ADMIN, ACCOUNT_MANAGER, BUSINESS_MANAGER or LOCATION_MANAGER – the Uberall user role. If the role is present, we do not make any role assumptions outlined under “Extra rules” section.
- if you set an ACCOUNT_MANAGER you need to also pass one or many Businesses (internal platform ids of the Businesses) in the assertion
- if you set a BUSINESS_MANAGER you need to also pass one or many Businesses (internal platform ids of the Businesses) in the assertion
- if you set a LOCATION_MANAGER you need to also pass one or many Locations (internal platform ids of the Locations) in the assertion OR one or many Groups (internal platform ids of the Groups)
Optional fields
These can ensure the user gets the intended access control and product module permissions
- Features – list – a list of the features that need to be enabled for the user, check the User model for full list of features. Not sure which features you have access to? Log in the platform and open this URL, under features you will see the list
- Locations – list – Assign location ownership. You need to pass the Uberall location ids which need to be assigned. Applicable for Users with Role LOCATION_MANAGER.
- Businesses – list – Assign business ownership. You need to pass the Uberall business ids of the businesses which need to be assigned. Applicable for Users with Role ACCOUNT_MANAGER or BUSINESS_MANAGER.
- Groups – list – Assign group belonging. You need to pass the Uberall group ids which can be associated with the user.
- WLIdentifier – string – the Uberall whitelabel identifier that needs to be assigned to the user in case of multiple WLs in the SP. We will fall back to the default white labeled ID if none is provided.
Extra rules (automation)
These are to be considered and make User creation and automation easier for your workflow.
- Passing multiple values in Businesses → creates a BUSINESS_MANAGER and assigns the businesses.
- Passing a single value in Businesses → creates a BUSINESS_MANAGER and assigns the business.
- Passing Locations OR Groups → create a LOCATION_MANAGER and assigns the location(s) or group(s)
Client-initiated login
If you would like to initiate a login directly from your own platform, and not have to go to our login page, you can embed the following link in your system:
https://uberall.com/api/sso/saml/authenticate/$salesPartnerId
- Your salesPartenrId is the numerical value at the end of the SSO URL and Audience URL
- If you have a Whitelabel setup, the base URL need to be switched too with your own domain
Troubleshooting
To ensure a successful SSO setup, we have developed a specialized endpoint to validate the SAMLResponse (the XML) that you send. This endpoint provides detailed information on any incorrect or missing fields.
Using the Debug Endpoint
You must set the Assertion Consumer Service (ACS) URL in the following format to use the debug endpoint:
https://$base_url/api/sso/saml/verify/$sales_partner_id
This URL format allows us to validate the assertion you sent during the login and return a JSON response with a message indicating either:
- Verification Successful
- Human-readable errors specifying the incorrect or missing fields
Example of a possible success message
{
 "verificationId": "2d67a84d-b9b8-4498-b5a1-6f3772531caf",
 "success": true,
 "message": "Verification successful",
 "details": [
   {
     "key": "Email",
     "value": [
       "john.smith@uberall.com"
     ],
     "passed": true
   },
   {
     "key": "FirstName",
     "value": [
       "John"
     ],
     "passed": true
   },
   {
     "key": "LastName",
     "value": [
       "Smith"
     ],
     "passed": true
   },
   {
     "key": "Role",
     "value": [
       "admin"
     ],
     "passed": true
   },
   {
     "key": "Identifier",
     "value": [
       ""
     ],
     "passed": true
   },
   {
     "key": "Locations",
     "value": [
       ""
     ],
     "passed": true
   },
   {
     "key": "LocationIdentifiers",
     "passed": true
   },
   {
     "key": "Businesses",
     "value": [
       ""
     ],
     "passed": true
   },
   {
     "key": "Groups",
     "value": [
       ""
     ],
     "passed": true
   },
   {
     "key": "Features",
     "passed": true
   },
   {
     "key": "WlIdentifier",
     "passed": true
   }
 ],
 "userRequest": {
   "email": "john.smith@uberall.com",
   "firstname": "John",
   "lastname": "Smith",
   "role": "ADMIN",
   "managedBusinesses": [],
   "managedLocations": [],
   "managedLocationsIdentifiers": [],
   "locationGroups": [],
   "status": "VERIFIED",
   "salesPartner": {
     "id": 1926
   }
 }
}
Example of a possible error message
{
 "verificationId": "3d9b2501-7d72-4012-8697-4cac0a1a2ae8",
 "success": false,
 "message": "SAML Attribute 'Role' is not one among [ADMIN, LOCATION_MANAGER, BUSINESS_MANAGER, BUSINESS_MANAGER_INBOX, ACCOUNT_MANAGER] and cannot be determined via Locations, Businesses, or Groups attributes. Received value for Attribute 'Role': ''",
 "details": [
   {
     "key": "Email",
     "value": [
       "john.smith@uberall.com"
     ],
     "passed": true
   },
   {
     "key": "FirstName",
     "value": [
       "John"
     ],
     "passed": true
   },
   {
     "key": "LastName",
     "value": [
       "Smith"
     ],
     "passed": true
   },
   {
     "key": "Role",
     "value": [
       ""
     ],
     "passed": true
   },
   {
     "key": "Identifier",
     "value": [
       ""
     ],
     "passed": true
   },
   {
     "key": "Locations",
     "value": [
       ""
     ],
     "passed": true
   },
   {
     "key": "LocationIdentifiers",
     "passed": true
   },
   {
     "key": "Businesses",
     "value": [
       ""
     ],
     "passed": true
   },
   {
     "key": "Groups",
     "value": [
       ""
     ],
     "passed": true
   },
   {
     "key": "Features",
     "passed": true
   },
   {
     "key": "WlIdentifier",
     "passed": true
   }
 ]
}
In this error example, the error message indicates that the 'Role' attribute in the SAMLResponse is either missing or has an invalid value. The message lists the acceptable values for the 'Role' attribute and provides the received value, if any.
Other common issues
Error: sso.user.error.invalidRole
Possible explanation
- the role that has been passed in the assertion does not have the right name. Make sure the name matches exactly what's in the API documentation
- if you are passing non-admin roles, such as
LOCATION_MANAGERorBUSINESS_MANAGERyou also need to provide a list of managed locations/businesses respectively OR Groups. We cannot create a “shell” user and later assign the objects.
Error: Verification failed before assertion, error: https://$base_url/api/sso/saml/metadata/$salesPartnerId is not a valid audience for this Response
Possible explanation
You probably missed the audience restriction segment in your SAML Response. The error message means we are expecting this but that’s not in the SAML response.
Enforce SSO
If you want complete control over setting user details and permissions, and want users only with Single Sign-On (SSO) to access the app, you can enable the 'Enforce SSO' feature. You can locate this option within the SSO setup section.

If you want to take advantage of this, you must ensure that all necessary data (user details, user features, user location/business ownership) are passed in the SAML assertions (via the just-in-time provisioning). Once activated, any User changes done outside the SAML provisioning will be rejected – Users cannot be updated via the user interface or API.
Other FAQs
Q: Can we add a redirectUrl after?
A: Yes the authenticate endpoint supports a redirectUrl param so the end of the flow the user will land on that page. The redirectUrl is fully dynamic it just needs the URL part ex: ?redirectUrl=/dashboard