Facebook & Instagram Business Connect Guide
A step-by-step guide to connect your Facebook pages
Table of Contents
A step-by-step guide to connecting your Facebook and Instagram business pages to the Uberall Listings platform.
For us to keep your location data updated, your Facebook pages need to be connected to the platform. This guide covers two ways to connect: one location at a time, or your whole brand account in a single flow.
Before you start
Check these points before connecting. They are the most common reasons a connection fails or a page can't be found.
- You have full control of the page. The person connecting must have full control (Facebook access) of every page being connected, including the brand page.
- The page is published and visible to the public.
- The address matches. The address on the Facebook page must match the address of the location in the platform. Otherwise, the system may not recognize the location and could create a duplicate.
- Your platform data is complete. When you connect, some Facebook fields are overwritten with the data from the platform. If you want to keep existing Facebook information, add it to your locations in the platform first. See What happens to your existing Facebook data at the end of this article.
- Existing unclaimed pages are claimed. If your business already has location pages that you don't manage yet, claim them through Facebook first.
Who can connect on the platform: Admins, Business Managers and Account Managers can access the Listing Connections page. Admins see all users. Business Managers and Account Managers see only the users linked to the businesses they manage.
Two ways to connect
- Connect an individual location. Best when you want to connect one specific location, or when a page is managed by someone else (for example a franchisee).
- Connect at the account level. Best when you want to connect a brand page, or connect many locations at once. This flow no longer requires a Main (Brand) page structure.
Pick the section that matches what you need.
Connect an individual location
Step 1: Connect
Go to the Listings tab of the location and click Connect on the Facebook widget to start.

Step 2: Start
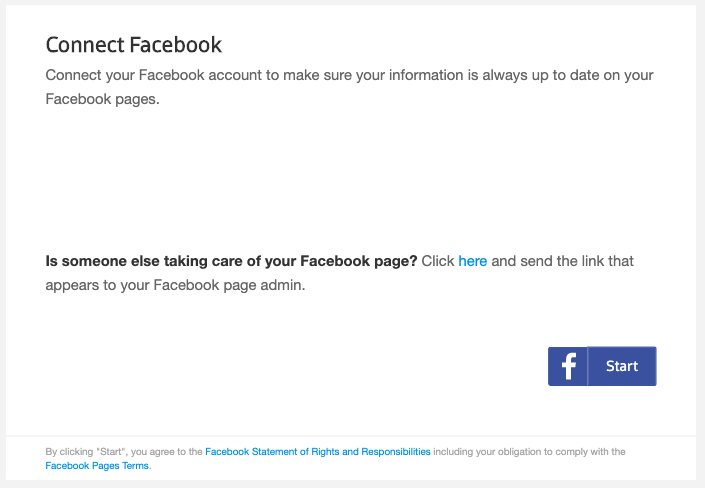
A pop-up opens showing the details of the location you are about to connect.
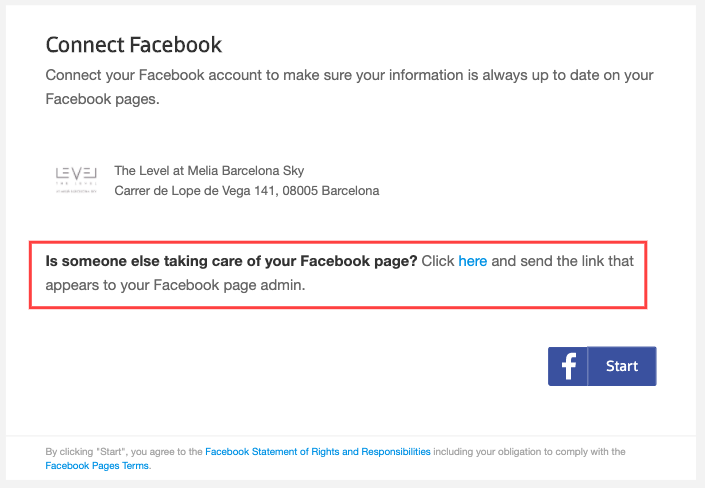
If you want to connect a page managed by someone else, go to Step 4C. Otherwise, click Start.
Step 3: Sign in and allow access
Log in with the Facebook account you manage the location with, or want to manage it with. If you don't have a Facebook account yet, create one first.
Grant the Local Listing Connector access to your Facebook account by clicking Allow. If you have allowed access before, this step is skipped.
Step 4: Select your location
What you do next depends on the state of the Facebook page:
- 4A: An existing page you manage. Find the Facebook location in the list and click Confirm.
- 4B: An existing unofficial (unclaimed) page. Claim the page through Facebook first, then follow 4A.
- 4C: A page managed by someone else. If the page is owned by one of your businesses (for example a franchisee), send them the link in the connect flow under "Someone else is taking care of your Facebook page?". They sign in to their Facebook account and confirm the connection in a few clicks. Once they approve, the connection is complete.
Connect at the account level
This is the fastest way to connect a brand page or many locations at once.
You can now connect any brand page (a parent page or a standalone page), or connect all your locations with no brand page. The flow starts by connecting your Facebook user, then searches that user's full account for the pages you can link.
Step 1: Add a Facebook user
Go to Businesses > Listing Connections, open the Facebook section, and click Manage Users.
If no user has been added yet, you'll see a prompt to add one. Click Add New User and log in with the Facebook user that has access to the pages you want to connect.

Step 2: Choose your Facebook user
Click Connect to open the flow and select the user account to connect through. If you have just logged in, we preselect that user for you. The number next to each user shows how many businesses that user already has connected.

Step 3: Choose your connection type
- Brand Level Connection: connect a page to represent your brand. This unlocks brand features (social posting and reviews). Choose this if you have a brand page, whether it's a parent page or a standalone page.
- Location Level Connection: connect all your locations without a brand page. This is a bulk connection and does not include brand features.
Which should I choose? If you want to post and reply to reviews from a brand page, choose Brand Level. If you just want all your locations connected and don't need a brand page, choose Location Level.

Step 4: Select your page and finish
What you see depends on the connection type and the page you pick.
Reading the page list
After you choose Brand Level, we show every page your user has access to:
- A parent page appears as "Brand + X location pages", with the number of locations and the page's follower count.
- A standalone page appears as a "Single page", with its follower count.
- Use the follower count as a quick hint: your real brand page is usually the one with the most followers.
- Use View Page to open the page in Facebook and check it's the right one.
- Use Search to find a page by name.

Already connected pages are grayed out. If a page is already connected to another business or location, it's grayed out with a label showing where it's connected, so you don't connect it twice by mistake.

If you selected a parent page (Brand + locations)
You can turn Auto-create Facebook location pages on or off:
- On: we create Facebook pages for any of your locations that don't have one yet, nested under your brand page.
- Off: we connect only the pages that already exist.
Important: to auto-create location pages, the brand page must have a physical address. Without one, Facebook doesn't allow us to create the pages.
Click Connect & Confirm to finish.
If you selected a standalone (single) page
You can turn Connect remaining pages to locations on or off:
- On: we connect your single page as the brand page, then automatically match your remaining pages to your locations based on name and address.
- Off: we connect only the single page.
Click Connect & Confirm to finish.

If you chose Location Level Connection
You don't select a brand page. Review the summary and click Connect & Confirm. All pages are connected as individual locations, matched by store code and address.
If no match is found for a location, its page is not connected and not created. Location Level doesn't create any pages.
What happens after you connect
You end up with one of three outcomes. The Listing Connections page shows which connection type you have:
- Brand only: just your brand page is connected.
- Locations only: all your locations are connected, with no brand page.
- Brand and locations: your brand page plus the matched or auto-created location pages.

Connect Instagram
Instagram connections are inherited from Facebook, so the setup mirrors your Facebook connection.
Before you can connect Instagram:
- Add a Facebook user with access to your pages.
- Connect a Facebook page.
Until both are done, the Instagram section asks you to complete the Facebook steps first.
Once Facebook is connected, the business appears under Instagram with the same connection type, inherited automatically. Click Connect. You'll be asked to authorize Facebook for the additional Instagram permissions, and we link the pages for you.

Matching rules and important notes
How pages are matched to locations. If the Facebook store code matches the location identifier in the platform, the page is matched to that location, regardless of the address. If no store code matches, the system compares the addresses instead. That's why matching address data is so important: if the addresses are too different, the page won't be found, or a duplicate may be created.
Page names aren't overwritten. If your existing location pages have a different name than the brand page, the platform doesn't change those names. To rename a location page, switch into that page in Facebook and edit it there.
Keep your access active. If your full control of the page is removed, or your Facebook password changes, the connection stops working and must be set up again. The user must keep the granted permissions for updates to continue.
Facebook connect scenarios
You can connect multiple platform accounts to one Facebook brand page structure. You can't connect one platform account to multiple Facebook brand pages.
If you have several brands in a single platform account, split it into separate accounts before connecting, so each brand connects to its own brand page.
What happens to your existing Facebook data
When you connect, the platform starts managing these fields on your Facebook page:
| Field in Facebook | Field in the platform | What happens |
|---|---|---|
| Logo | Logo | Overwritten. The previous logo stays available on Facebook and isn't deleted. |
| Cover photo | Landscape | Overwritten. If there is no landscape photo in the platform, we use the main photo instead. If there are no photos at all, we remove (not delete) the cover photo. The previous cover photo stays available on Facebook. |
| Opening hours | Opening hours | Overwritten. |
| Impressum | Imprint | Overwritten. This field is mandatory for companies in the DACH region. |
| Website | Website | Overwritten. |
| Overwritten. | ||
| About | Short description | Overwritten. |
| "Customers visit my business at my street address" | "I don't serve at my location address" (address display) | Overwritten. |
| Location descriptor | Not available | Not managed by the platform. You can only change it in Meta Business Suite. |
Having trouble connecting?
If you can't find your page, get an error, or your page was disconnected, go through the Facebook connect troubleshooting guide. It covers the most common causes step by step.