This article provides a step by step manual to create, manage and delete Content List Items via the Location Import feature.
Content Lists via Location Import
Step 1 - Export
Download an export of the locations you want to manage Content Lists for from the Locations tab in the platform:

Step 2 - Create, Manage, Delete
Open the export and choose the Content List type you want to manage from the tabs at the bottom of the window - next to "Locations":

Find the header line and provide the information you want to add

...

Assign
Open the "Locations" tab of the Excel export sheet. Find the row of the location you want to assign Content List items to.

Then find the corresponding cell of the Content List type you want to assign the item for your location.

Enter the unique ID of the item you want to assign. Assign multiple items by listing the separated by comma.

Step 3 - Import
Save your Excel file and go back to the Locations tab in the platform and click on Import.

Select the Excel file you just saved.

The two windows you will see next will show a mapping of the data fields in our system and the import file.You shouldn't have changed the headers and therefore you can confirm the mapping.
The following screen gives you the chance to verify the mapping by giving an overview of the edited vs. created locations and Content List Items.
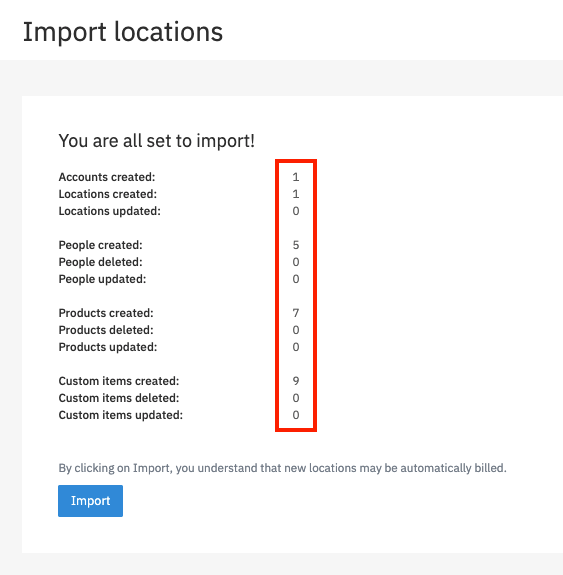
Make sure to not create any locations, nor Content List Items, in case your intention was only to manage!
Questions about the Import feature? Check this article: Excel Import Tips & Tricks