[External] Messages - Webchat Channel
Table of Contents
What's Webchat?
Webchat is a widget that you can embed on your website or any web page of your liking. With the help of the human-like chatbot, you give large amounts of website visitors personalized answers at scale that help and convert them.
With Webchat you can achieve the following:
- Respond to location-based questions through your chatbot or your live agents
- Directly share menus or product catalogs
- Help visitors take action and convert
How to set up Webchat?
Eligibility:
To set up Webchat you need:
- Have Messages product as part of your Uberall Plan.
- Have a Business Manager/Admin role in the Uberall Platform
- Have Website access so you can embed Webchat Code Snippet.
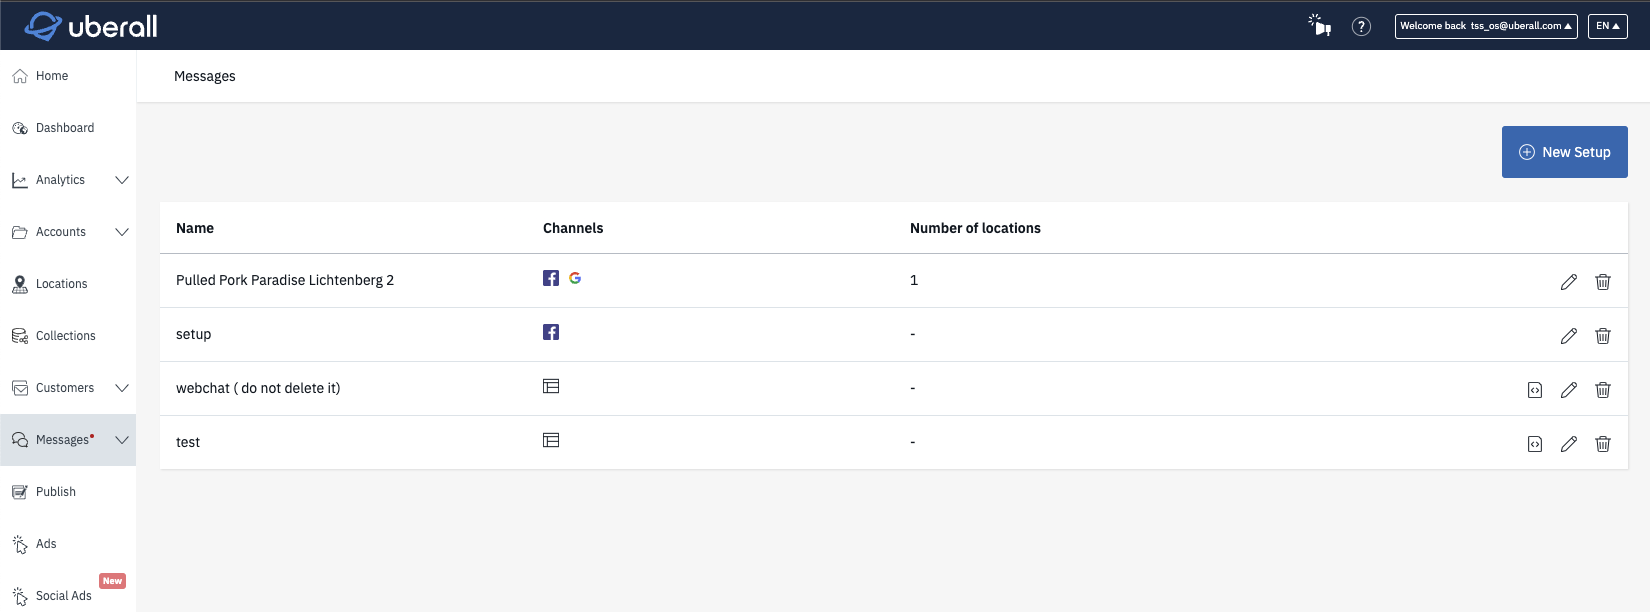
Create Webchat Setup Steps:
- Open CoreX Platform > Click Messages > Setup
- From the Setup Page, click on Create New Setup
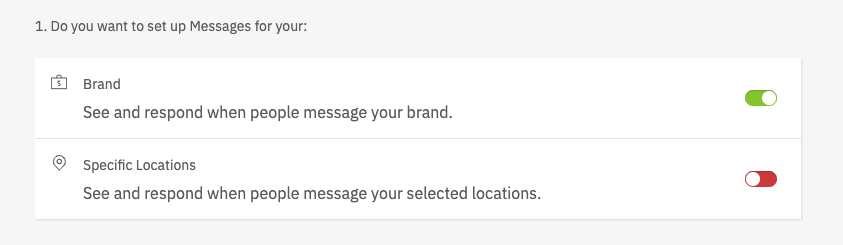
- Toggle on Brand Level Channel.
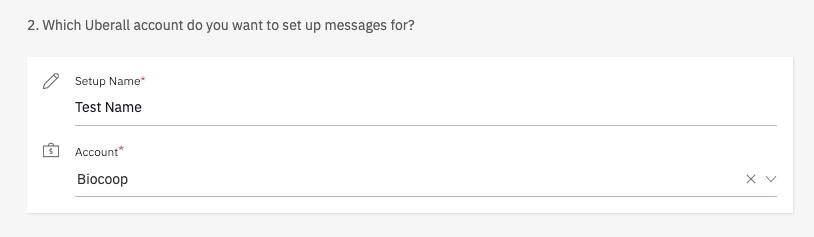
- Add a name to the setup and then select the account you want to create Webchat for.
- Toggle on the Webchat channel and then fill in the required fields
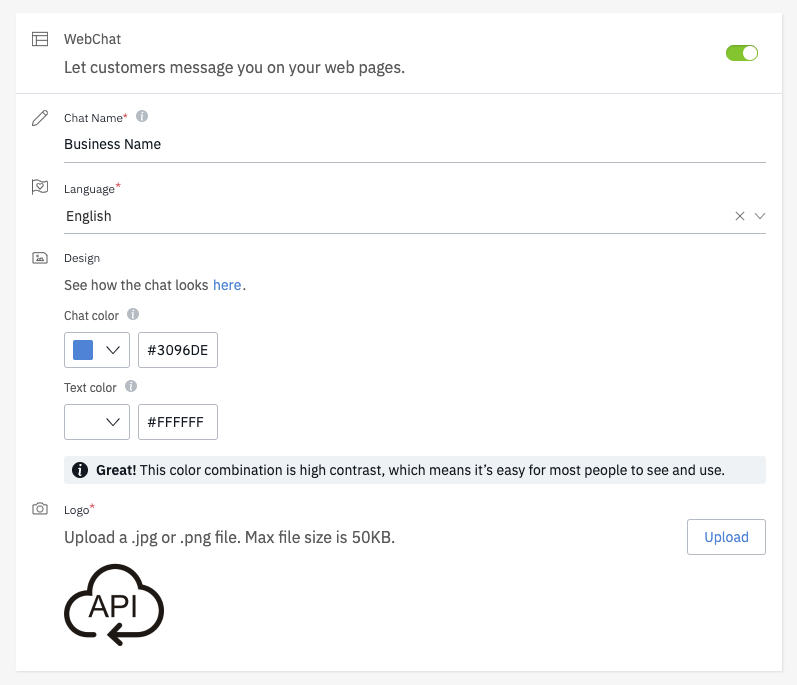
- Chat Name: The name that will be shown to the website visitors when clicking on the chat widget. This should match the Business name.
- Language: Select one of the languages that matches your website language. We support English, French, German, and Spanish.
- Design Colors: Select the chat and text color from the color boxes that match the design and color palette of your website.
- Logo: Upload the logo of your Business
-
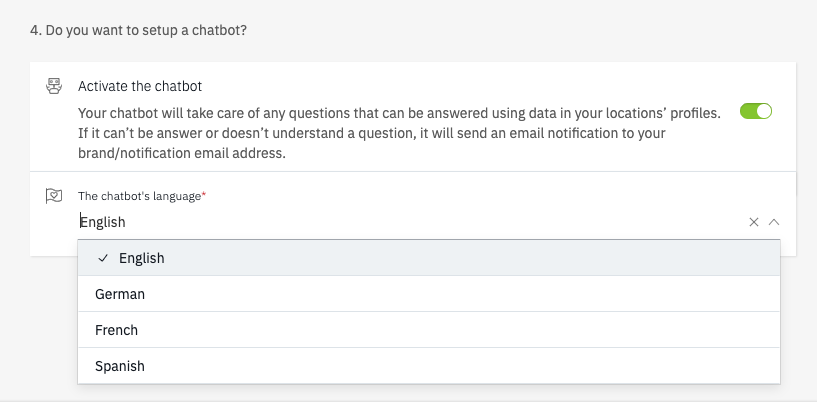
Activate the Chatbot: Select this field if you expect location-related questions to be asked by Website visitors where the chatbot can automatically answer them:
- ex: If the customer asks about Opening hours, the chatbot will ask the user to select the location he wants and then answer with the updated Opening hours that are stored in Uberall.
- ex: If the customer asks about Opening hours, the chatbot will ask the user to select the location he wants and then answer with the updated Opening hours that are stored in Uberall.
- Click Save
- Copy the Code snippet to your website Code: Once you click save, A modal containing the code snippet will be shown. You can add this code snippet to the whole website or any page you want the webchat to be available at (e.g.: Checkout - Local Page…)
Edit Webchat Setup
Once you create the Setup, you will find it in the Setups list where you can do the following:
-
Edit the Setup: Change any of the mentioned fields on the Creation process
- Note: You don't need to change the Code Snippet. Any updates on the Webchat will be reflected normally with the existing code snippet
-
Delete the Setup: Deleting the Setup would disconnect the webchat from sending or receiving messages.
- Note: You need to remove the Code Snippet as well because we won't receive anything related to this webchat after the deletion for a better customer experience.
-
Copy the Code Snippet

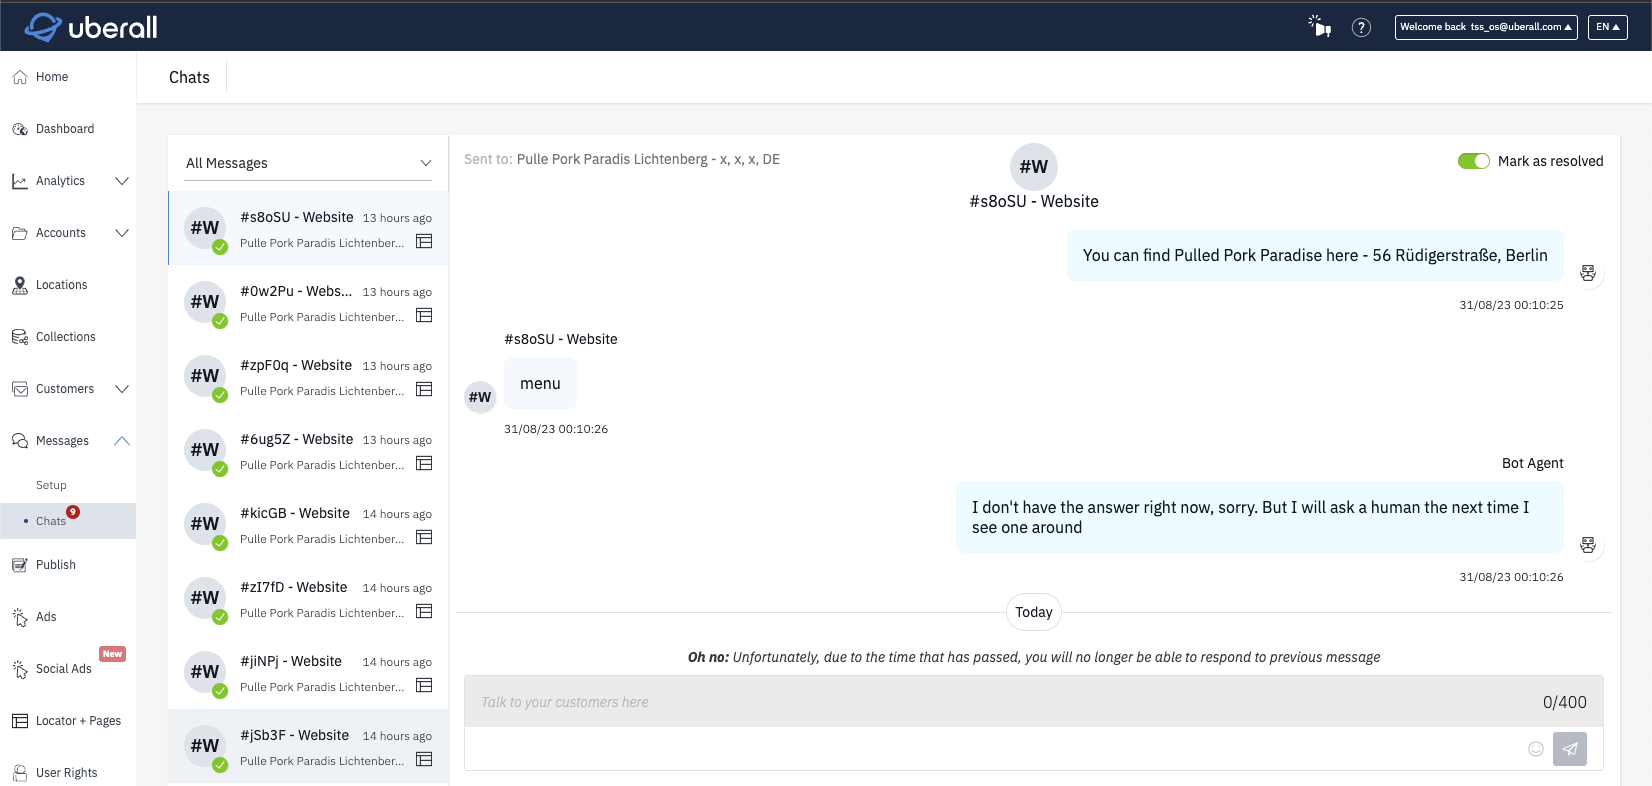
How to reply to Webchat Conversations?
- Go to Messages > Chats
- You will find new messages coming from the Webchat in the Chats highlighted with the Webchat icon:
- Website Conversation will be assigned a random ID since we don't collect any data about your Website Visitors.
- Since Website visits are short. You can only reply to the conversation if the user hasn't ended the session or if 24 hours have passed from the last message.
- Website Conversations are available to Business Managers and Admins roles only.