How to Create Contact Forms and Manage Requests
Table of Contents
Introduction
Uberall's Contact Forms enable businesses to setup a widget on owned websites to ingest customer inquiries. This offers a solution for those that may not have the bandwidth (or may not prefer) to manage direct customer chats, but still want to be able to engage with their customers. By offering a contact form, customers and prospects can submit their contact information along with a reason for inquiry. The business can review these requests to choose when and how to engage (e.g., by phone, email, etc).
How does it work?
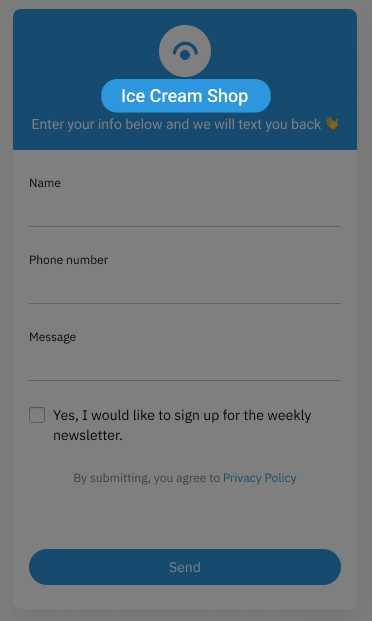
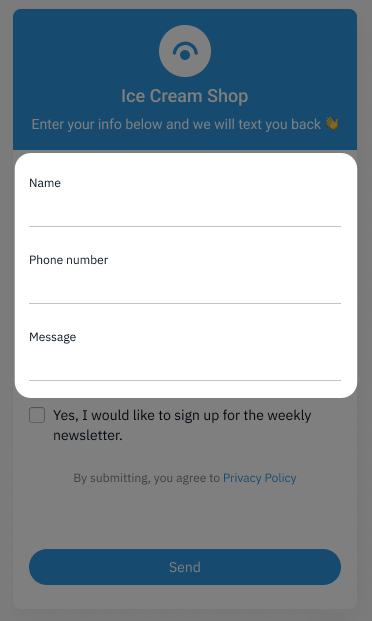
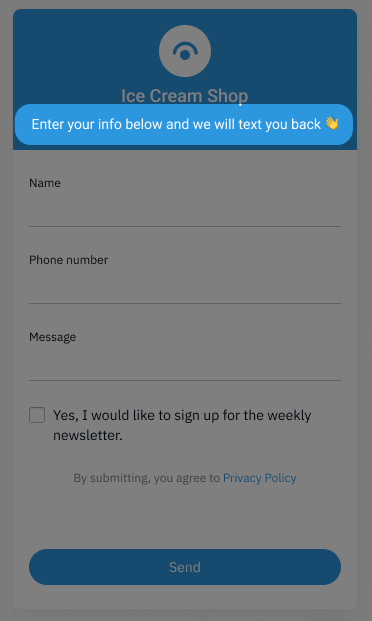
The Contact Form is setup within the Uberall platform and a code snippet is provided to apply the widget to a website. All submissions from the Contact Form are collected within platform for easy management. Below is an example of how the Contact Form is displayed:
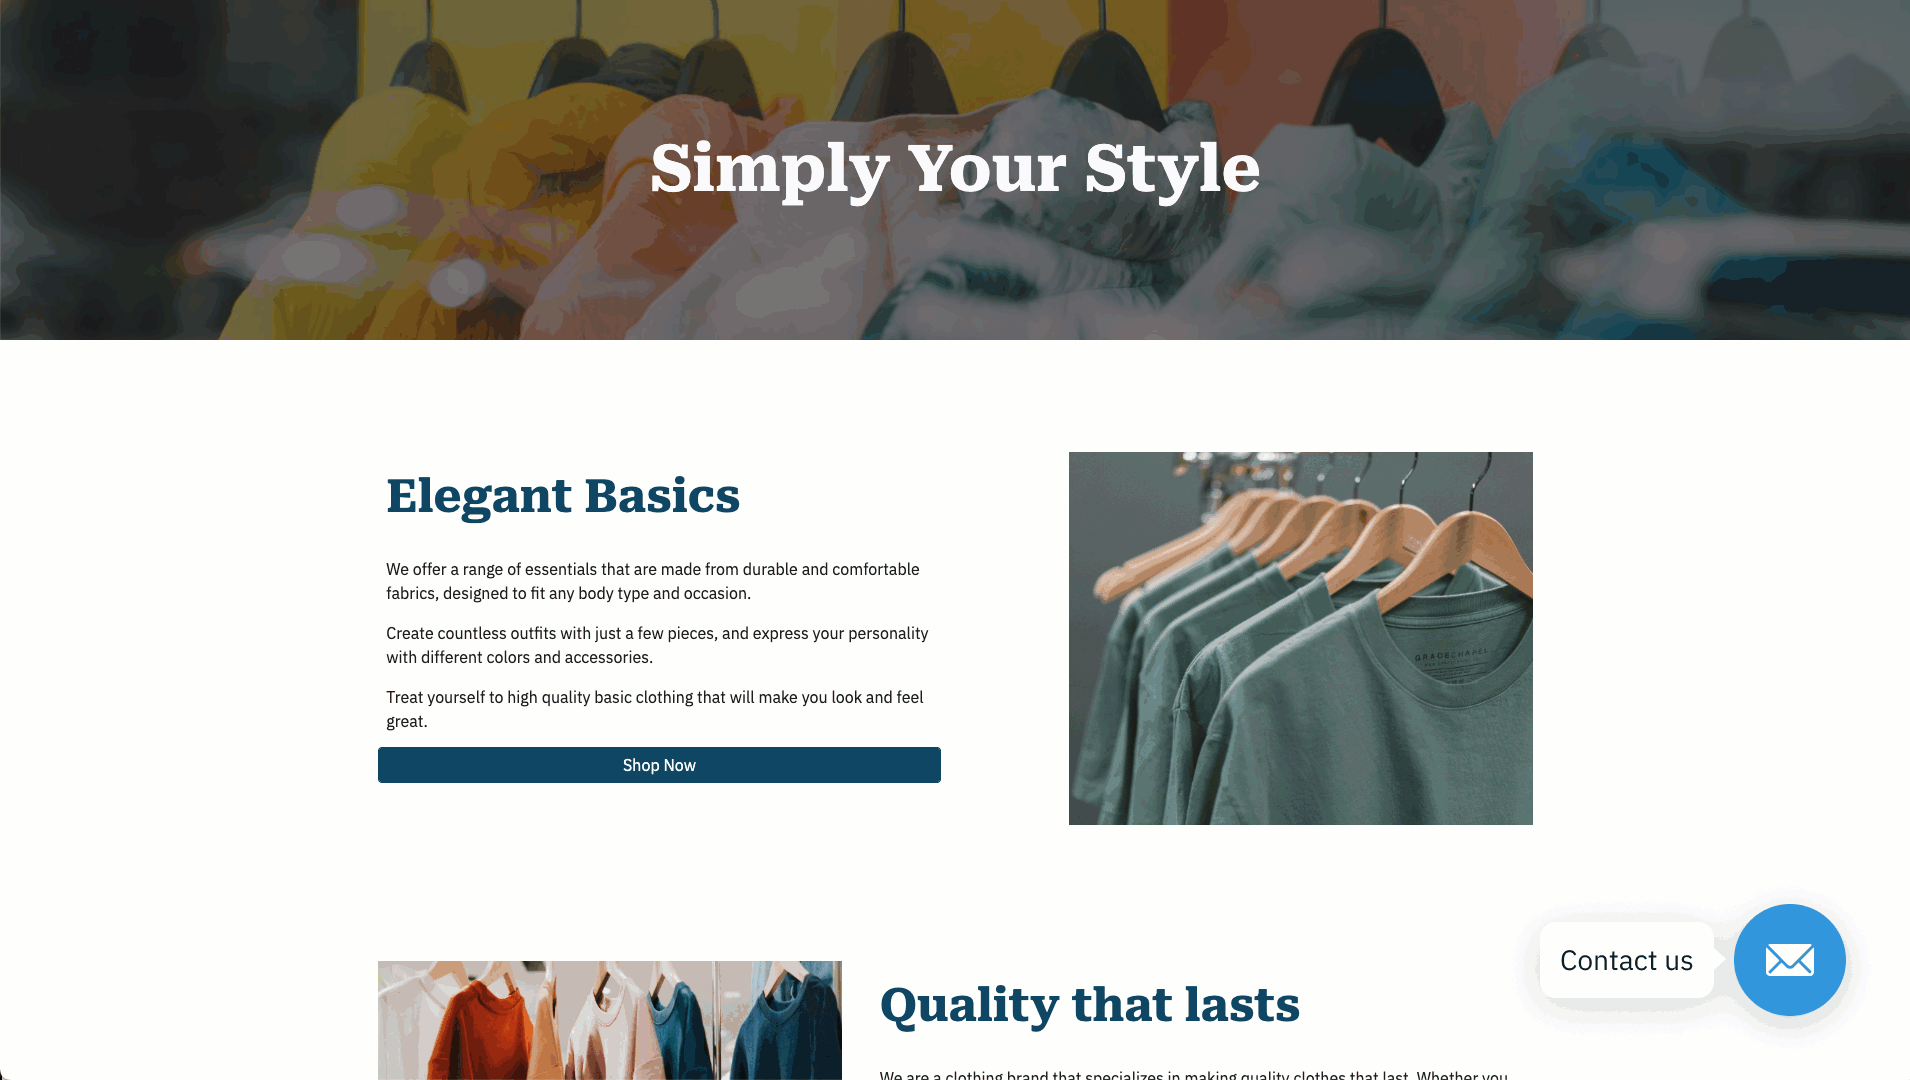
Contact Form Setup
First, a Contact Form will need be setup. Contact Forms can be setup from the Messages section of the platform. Only after a Contact Form is setup and applied to a website will you begin seeing submissions in the platform. This section covers how to setup a new Contact Form.
User Roles: Based on how contact forms are used, only Administrators and Account Managers can create a new Contact Form. For our partners, Location Managers have the option to create a Contact Form for their location.
Pro-tip: Uberall supports the creation of multiple Contact Forms making it easy to setup a unique form when managing multiple brands (accounts).
Expand for steps
Navigation | |
|
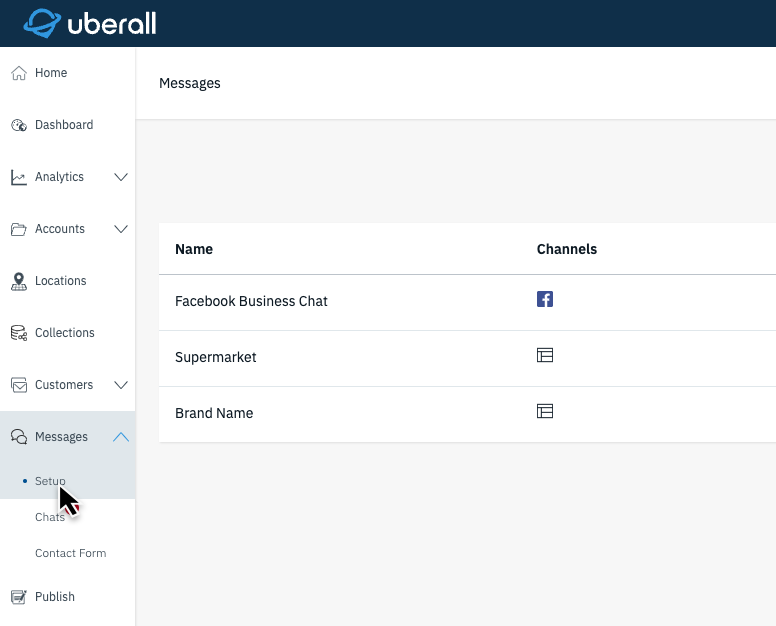
Step 1: Navigate to Messages > Setup From the main navigation select Messages and then click on the setup tab. |
 |
|
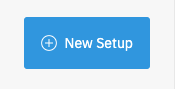
Step 2: Click "+ New Setup" On the Messages Setup page, click on the New Setup button on the top right side of the page. |
 |
|
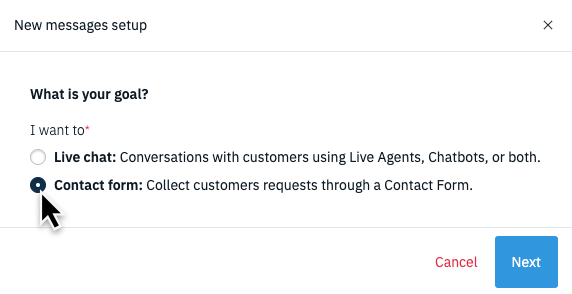
Step 3: Select Contact Form Select “Contact Forms” in the new window and click “Next” to proceed. |
 |
Contact Form Setup | |
|
Step 1: Define Setup Name The name here will be used as a way to identify this Contact Form amongst the various Messages configurations and Contact Forms created within the platform. |
 |
|
Step 2: Select an Account Choose the account that this Contact form is created for. One contact form will need to be created per each brand (account). |
 |
|
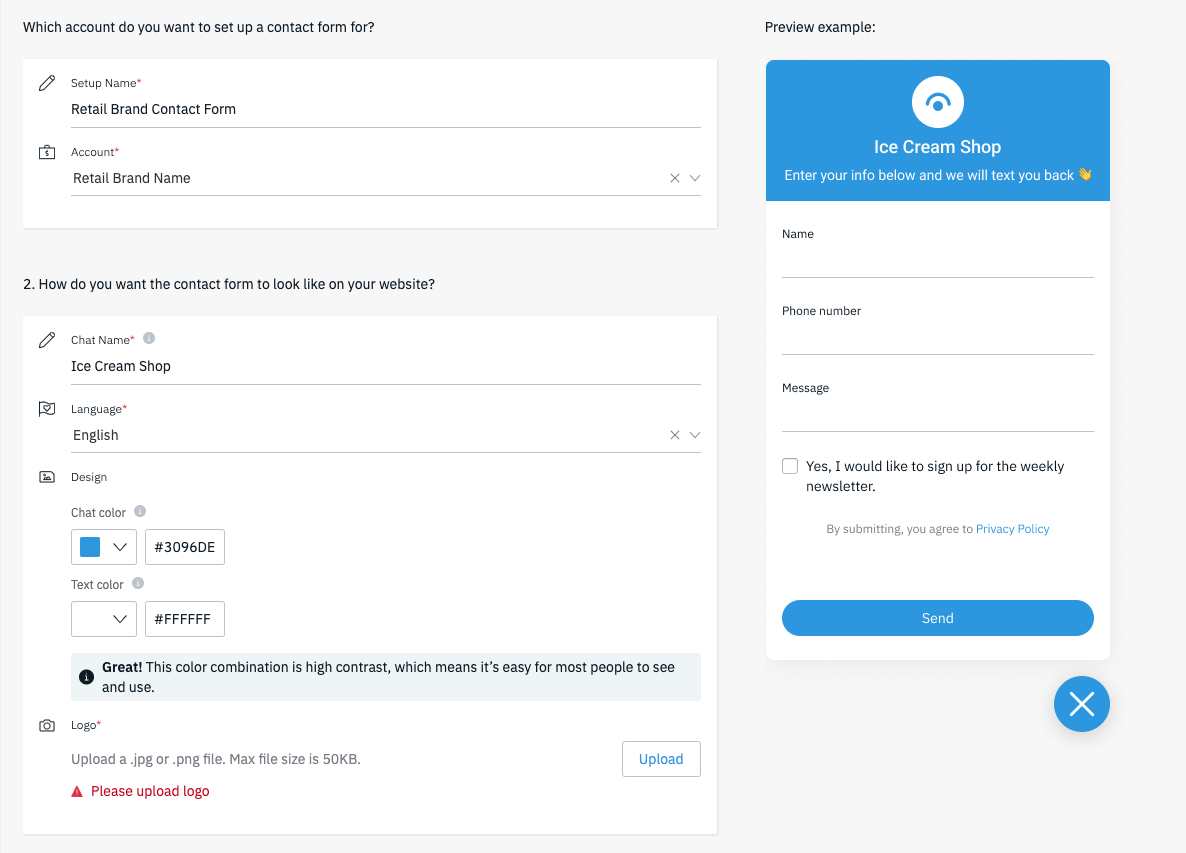
Step 3: Add the name of the business (Chat Name) The Chat Name is the name displayed in the Contact Form. It is recommended to add the brand name of the business in this field. |
  |
|
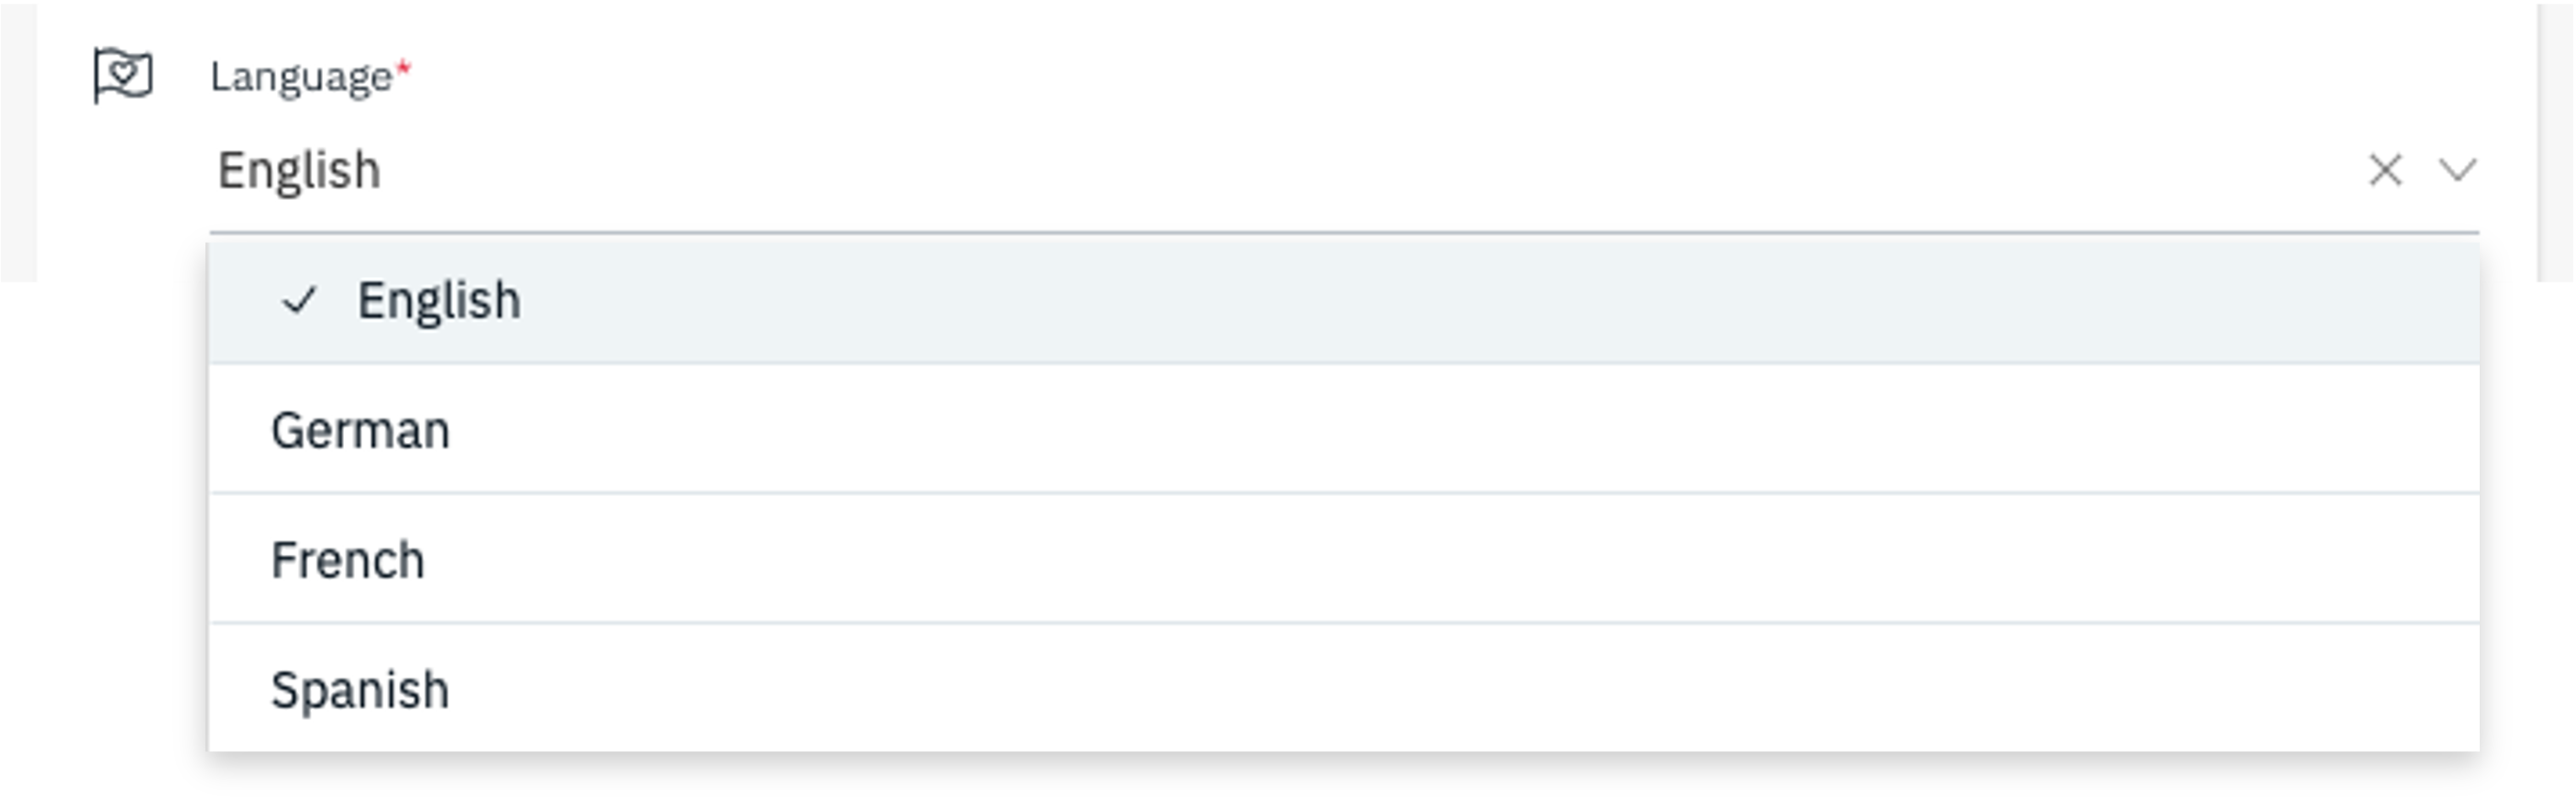
Step 4: Choose a supported Language There are four languages currently supported on the Contact Forms (English, French, German, and Spanish). Use the dropdown to select the language used on the Contact Form. |
 |
|
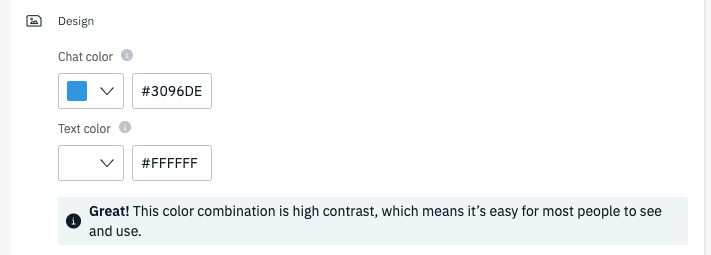
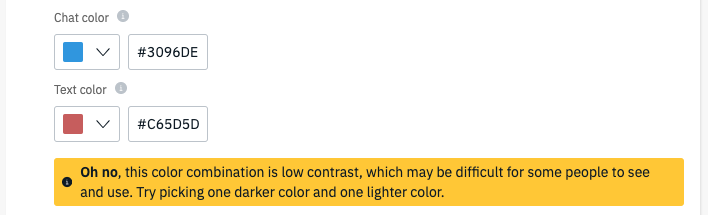
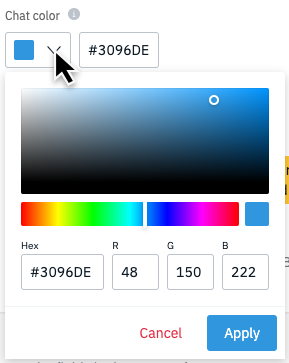
Step 5: Choose the Design Add the branding colors to the Contact Form:
Use the color dropdown to use the color picker, enter the HEX code, or RGB values to set the color. |
   |
|
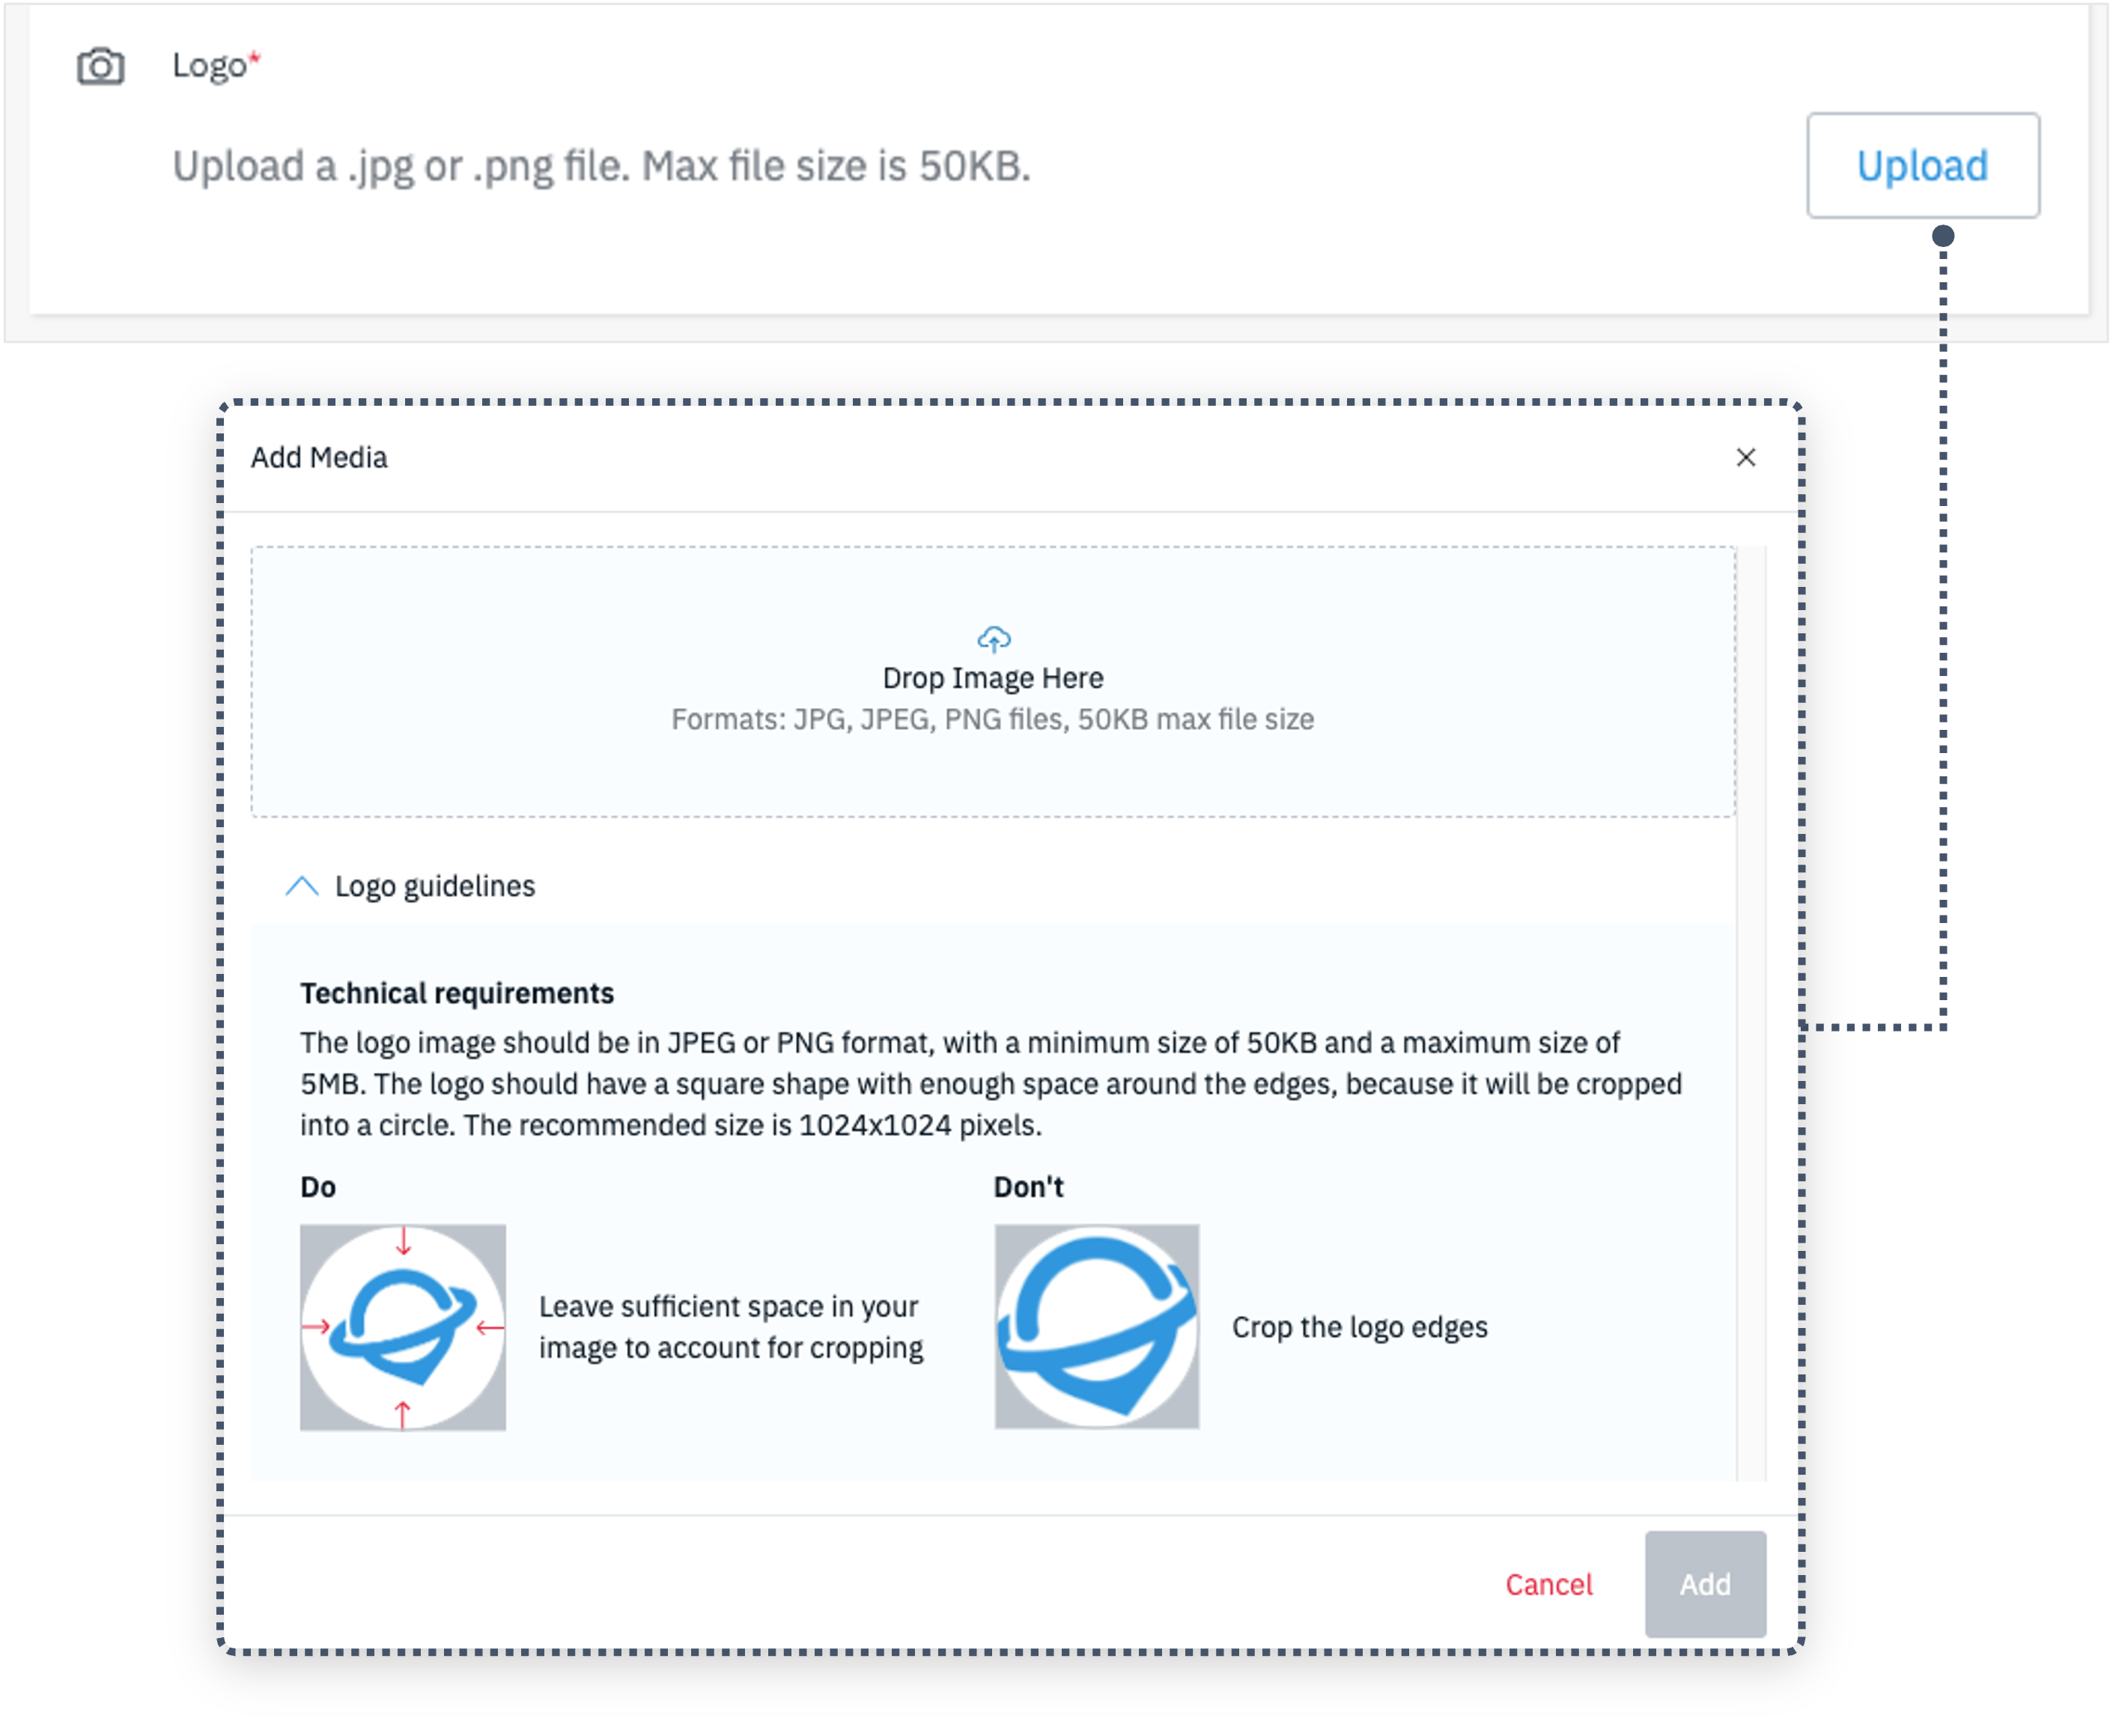
Step 6: Upload a logo The logo will display in the header of the contact form. A square logo is recommended. The image provided should account for the circular cropping and be a maximum size of 50KB.
|
  |
|
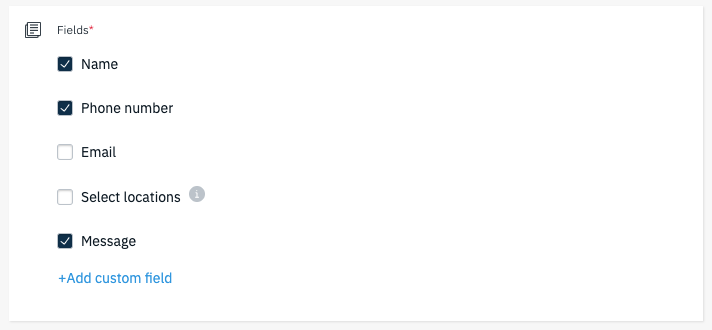
Step 7: Decide the Contact Form Fields These are the fields that will be displayed on the contact form. There are predefined form fields that can be enabled using the check boxes and an option to add one custom field.
|
   |
|
Step 8: Add an opening message The opening message is displayed in the header / top of the Contact Form. This is a freeform field that can be used to set expectations with customers or just inform customers what the form is for. Supports a maximum of 90 characters.
|
  |
|
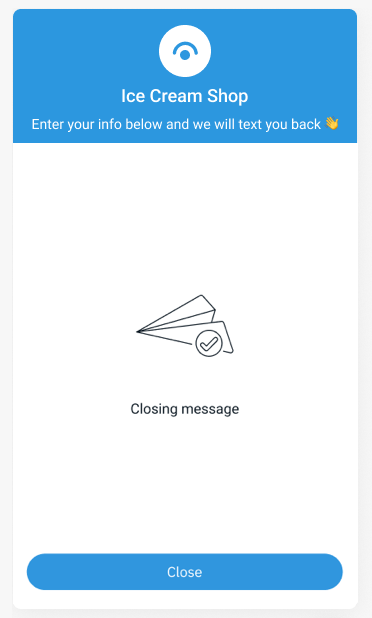
Step 9: Add a closing message This closing message is displayed after the customer finalizes the request by clicking “Send” on the contact form. This is a freeform field that can be used to set expectations for follow-up or to say “Thanks!” Supports a maximum of 150 characters. |
  |
|
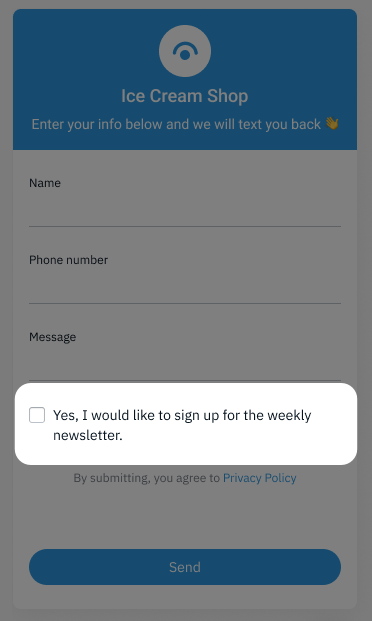
Step 10: Add marketing consent message This is displayed at the bottom of the Contact Form before the user submits their request and is accompanied with a checkbox to opt-in for marketing outreach. This is a freeform field for general marketing consent language. Supports a maximum of 150 characters.
|
|
|
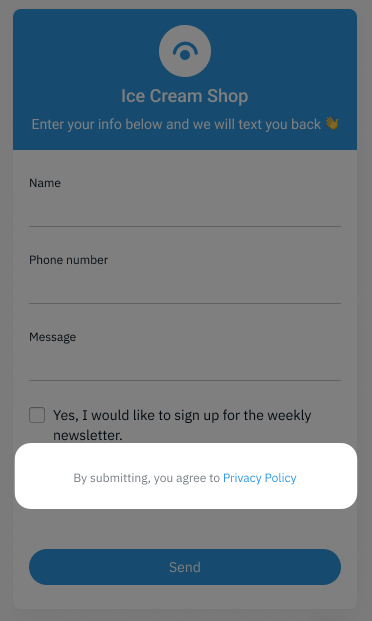
Step 11: Add Privacy Policy URL This is displayed at the bottom of the Contact before the user submits their request. This is a freeform field to provide a URL that links the customer to the brands Privacy Policy. |
  |
Finalizing Contact Form Setup | |
|
Step 1: Review Selections Take a moment to review the selections that you've made for the Contact Form.
For reference we have provided a sample of what the Contact Form looks like (on the right side of page), however, this is a static sample and will not dynamically update with your selections. |
 |
|
Step 2: Click Go Live! After reviewing your selections click on the Go live! button on the bottom of the page to complete the setup process. |
 |
|
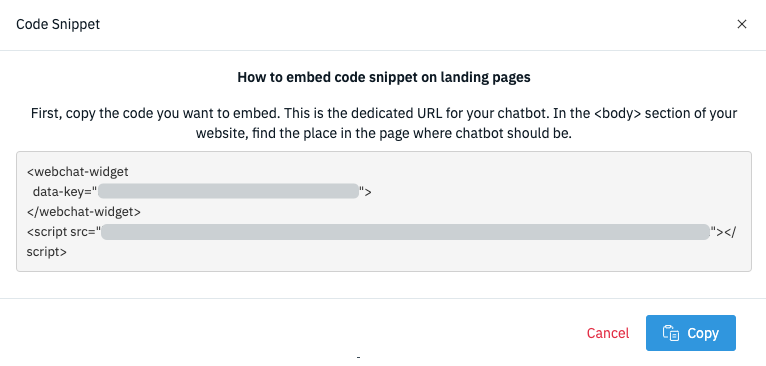
Step 3: Copy the Code Snippet Once the setup is complete, copy the code snippet that is provided and apply it to the <body> section of the website where you'd like the widget to display. |
 |
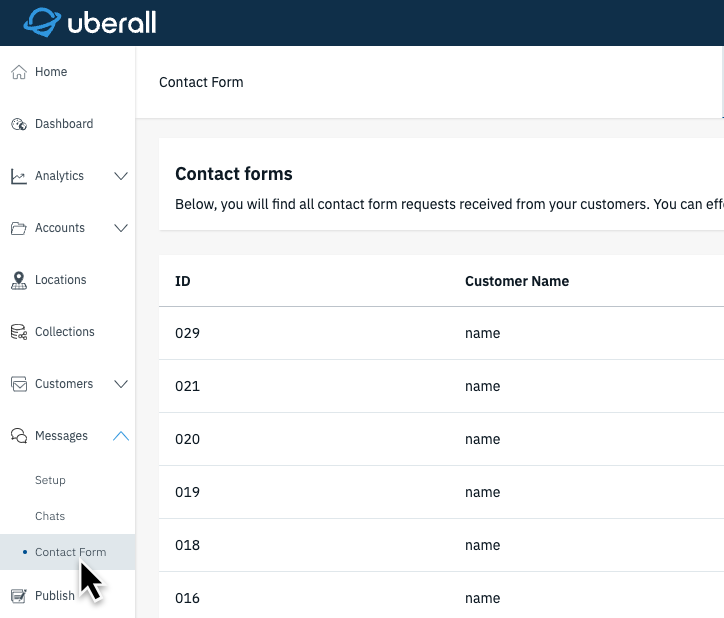
Managing Contact Form Submissions
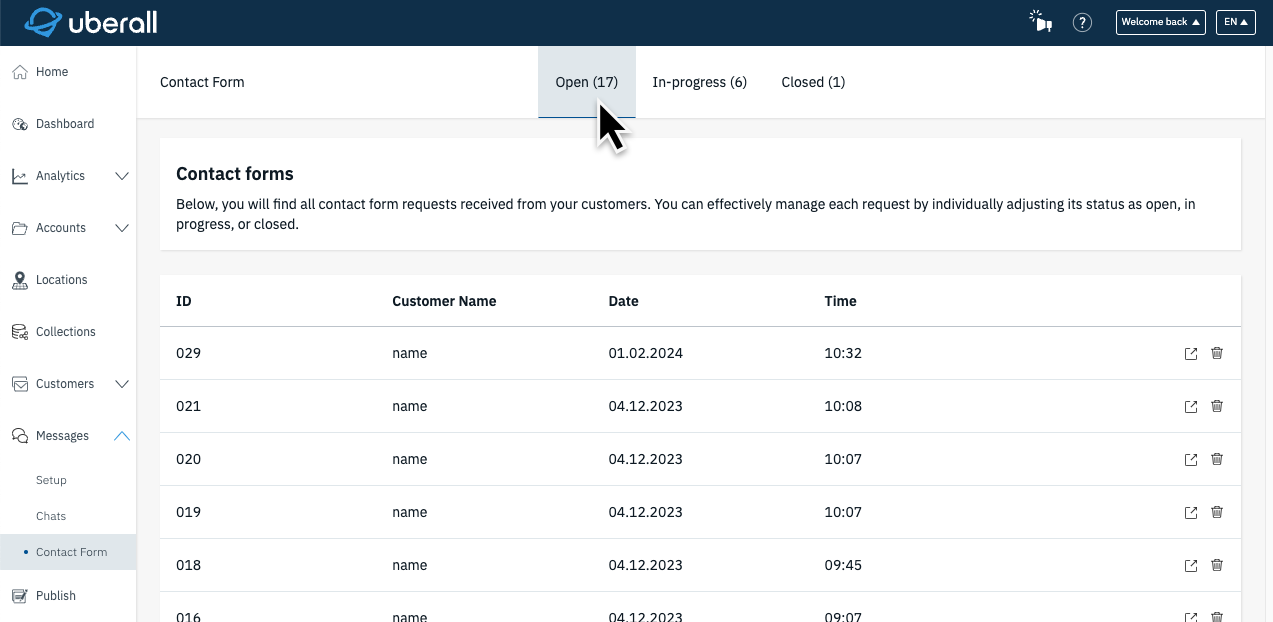
Requests from the Contact Forms will be stored in the Contact Forms tab under Messages. Here, they can viewed and managed. Management of the Contact Forms involves changing the status of the request from Open > In-Progress > Closed. This means that you can use your favorite tools to engage with customers while tracking the progress of the request in the platform.
Expand for steps
Navigation | |
|
Step 1: Navigate to Messages > Contact Form From the main navigation select Messages and then click on the setup tab. |
 |
|
Step 2: Choose Request Status Page At the top of the page, select the status that you would like to view the forms for (Open, In-Progress, or Closed). The default page is “Open” requests. |
 |
Request Management | |
|
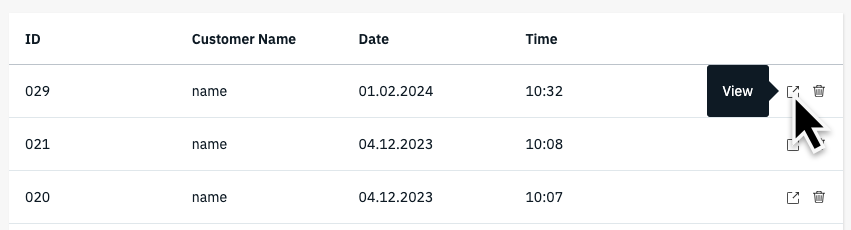
Step 1: Open a Request The Contact Forms main page will show the high-level details of each request. Click on the view button to open the full details of a request. |
 |
|
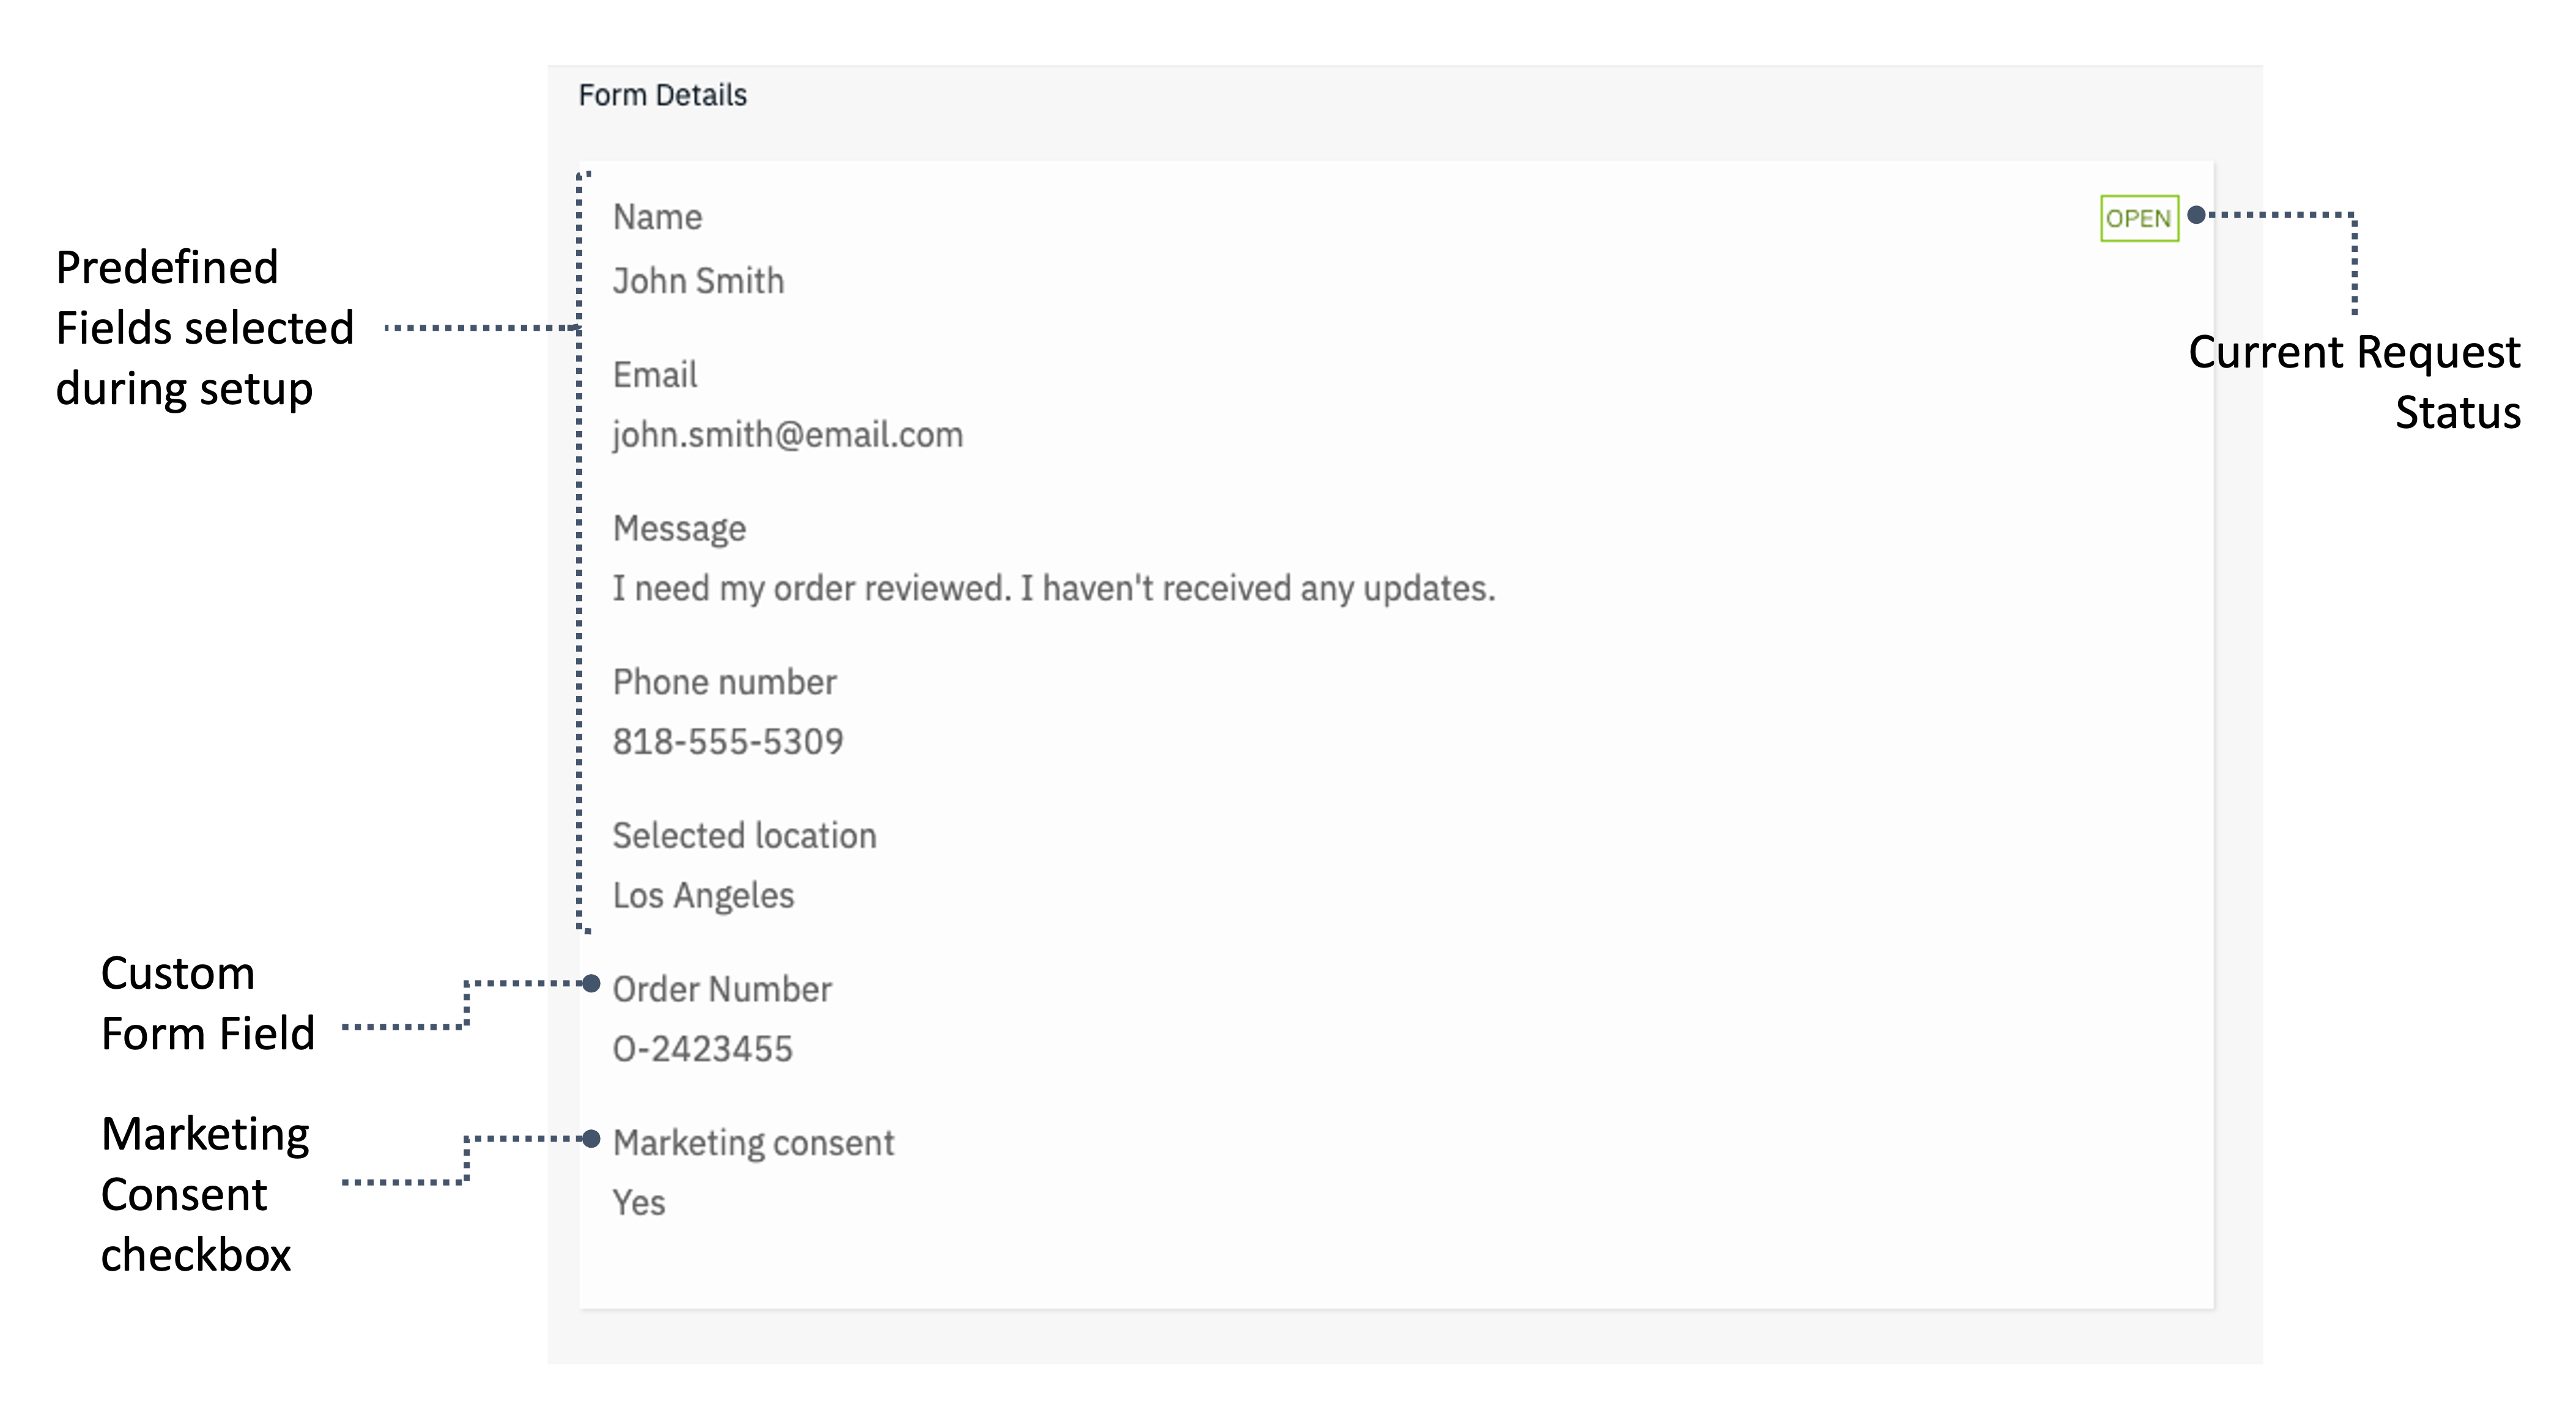
Step 2: Review Details of request The form details will show all of the inputs from the customer. The details will vary depending on the fields selected during the setup process. |
 |
|
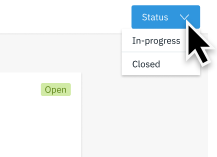
Step 3: Change request status Users can change the status of the request by clicking on the dropdown located in the top right side of the full details page. This enables the team to track the progress as the request is being fulfilled. The status can be set to any of one of the three options Open, In-Progress, or Closed.
When a status is set, the request will appear in the corresponding section of the main Contact Forms page. |
 |
Additional Management | |
|
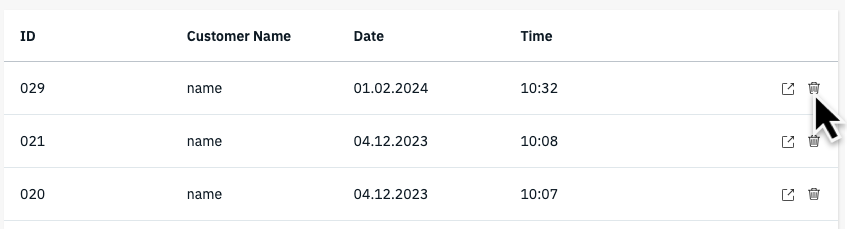
Delete a submission Requests can be completely removed from the list of submissions. This is a great option if there is a spam submission. Click on the trash bin icon to delete a submission. |
 |
Enabling Email Notifications
An email notification can be setup on a per user basis which will prompt users to check the platform when a new contact form has been submitted.
Expand for steps
Navigation | |
|
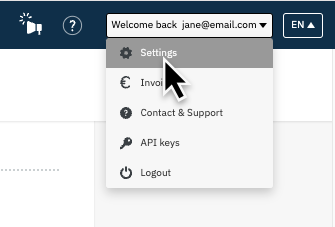
Step 1: Navigate to User Settings Click on the user dropdown on the top right side of the platform and select Settings from the dropdown. |
 |
|
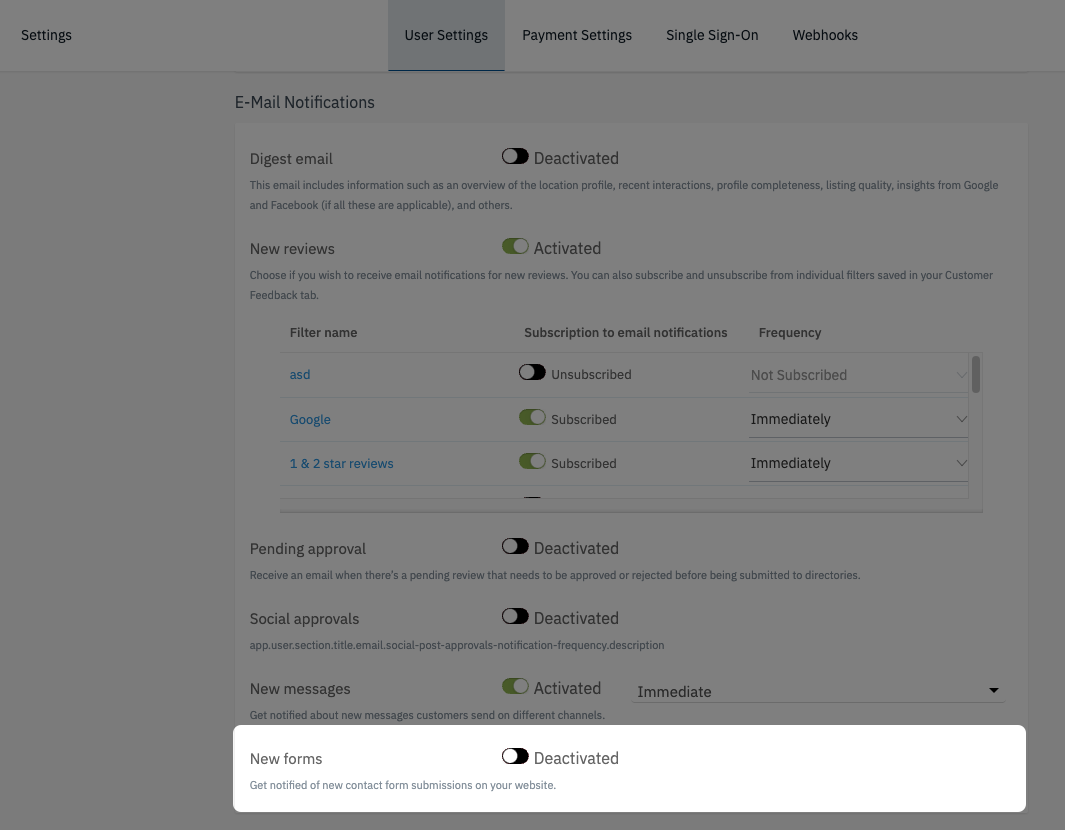
Step 2: Locate E-mail Notifications > New Forms Scroll down on the User Settings page until you reach the section to set up E-Mail notifications. In this section locate the “New Forms” option. |
 |
|
Step 3: Enable New Forms Notification Click on the slider to enable the New Forms notification and receive an email notification for new form submissions. Only the immediate email frequency is available to ensure that requests aren't missed and can be responded to in a timely manner. |
 |
|
Step 4: Save your changes Be sure to click on "Save Changes" at the bottom of the page to begin receiving notifications for new Contact Form submissions. |
 |