New Social Publisher
Comprehensive guide to understanding the decisions in the new organic social post publisher.
Table of Contents
Introduction
Welcome to the walkthrough guide for the new Social Publisher. The goal of this guide is to provide a comprehensive walkthrough of the Social Publisher so you can better understand the flow of creating a new social post across various directories. The Publisher simplifies the process of creating organic social content across social channels that are important to a brand and location
How to create a post
Use the guide below for a more comprehensive look at creating a post. Start by choosing the social channel that you want to create content for followed by the post type if applicable.
-
Google
-
Facebook
-
Instagram
-
Apple Showcases
-
News Tile
-
Other Directories
- Add Button
Which type of Google Post would you like to create?
-
News
-
Question & Answer
-
Offer
-
COVID-19
-
Event
- Add Button
Google News Posts are a great way to provide general updates about the business, showcase a product, or drive customers to a website where they can convert (e.g., ordering page).
Step 1
|
Start by choosing Google from the Directory List |
Step 2
|
Choose "News" from the Google Post Type list.  |
Step 3
|
Click on the "+ Add Locations" button to open the Location Picker.  In the location picker, determine which locations to opt-in for this publication by clicking the "+" button for each location or by choosing "Select All."  |
Step 4
|
Add an Image to your post by clicking the "Add Media" button.  In the new window, drag and drop your image into the uploader or click on the uploader space to search your files. 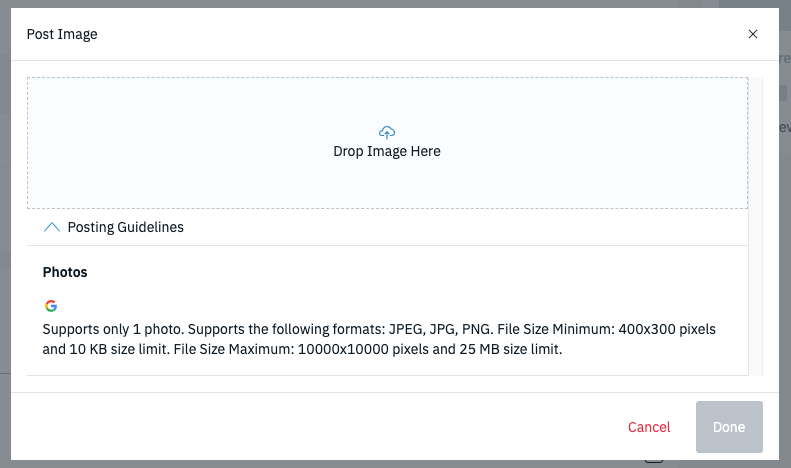 Tip: Expand the "Posting Guidelines" to see the photo specifications supported for Google Posts. |
Step 5
|
The title of the post is used to identify the post internally and can also be a quick way to grab a consumers attention. The title supports 128 characters. |
Step 6
|
The description is the body of the post and the main content that consumer will read. Here is where you can inform the consumers on the purpose of the post.  Tip: Click on the "+" button at the end of the description field to use dynamic Placeholders that localize your copy. Customers are more likely to engage with content that is locally relevant to them.  |
Step 7
|
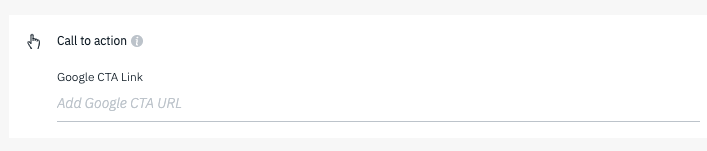
CTA Link CTA Button |
Step 8
|
Choose whether to publish your post immediately (Publish Now) or set a specific date and time using the calendar and time field.  |
Step 9
|
Review your selections and use the preview on the right side of the publisher to make sure that everything looks correct.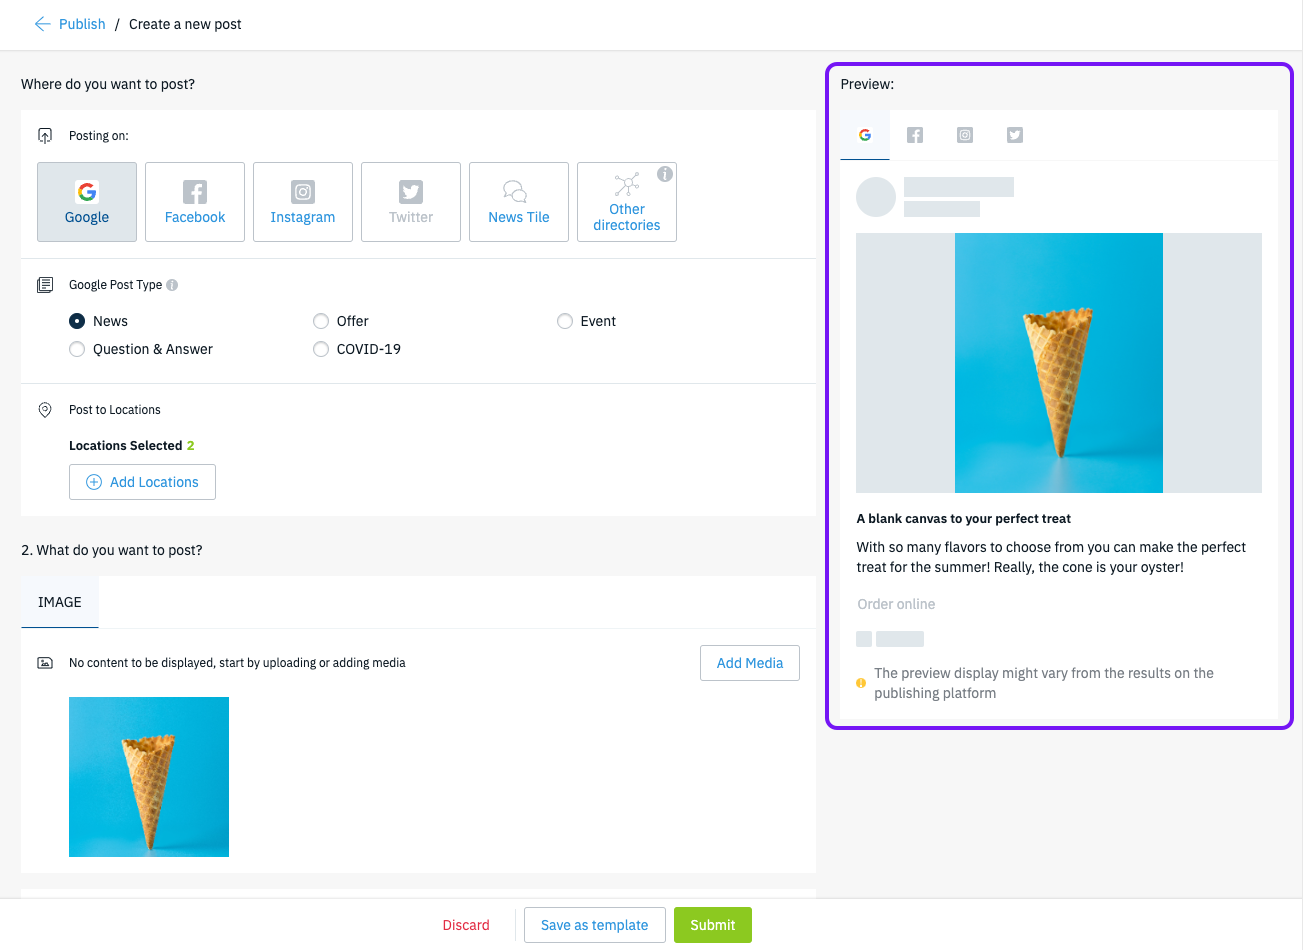 |
Step 10
|
Once you have confirmed that your post is ready to go, click on the 'Submit' button at the bottom to publish the post.  The post will go live on your profile based on the Publication Date you chose in Step 8. The post will go live on your profile based on the Publication Date you chose in Step 8. |
 Tip: UTM Parameters can be used in the URL to better track how many clicks your post is generating.
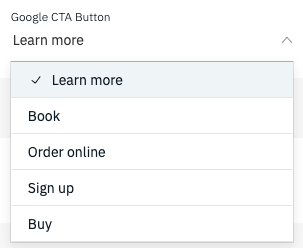
Step 1
|
Start by choosing Google from the Directory List |
Step 2
|
Choose "Questions & Answers" from the Google Post Type list.  |
Step 3
|
Click on the "+ Add Locations" button to open the Location Picker. In the location picker, determine which locations to opt-in for this publication by clicking the "+" button for each location or by choosing "Select All."
|
Step 4
|
The title of the post serves as the question you are asking the business.  |
Step 5
|
The description field is used to answer the question that is asked in the title.  Tip: Click on the "+" button at the end of the description field to use dynamic Placeholders that localize your copy. |
Step 6
|
Choose whether to publish your post immediately (Publish Now) or set a specific date and time using the calendar and time field. |
Step 7
|
Review your selections and use the preview on the right side of the publisher to make sure that everything looks correct. |
Step 8
|
Once you have confirmed that your post is ready to go, click on the 'Submit' button at the bottom to publish the post. The post will go live on your profile based on the Publication Date you chose in Step 8. |
Step 1
|
Start by choosing Google from the Directory List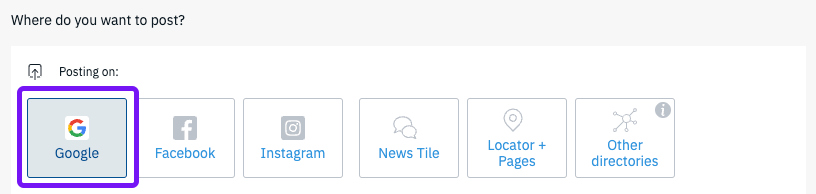 |
Step 2
|
Select "Offer" from the Google Post Type list.  |
Step 3
|
Click on the "+ Add Locations" button to open the Location Picker. In the location picker, determine which locations to opt-in for this publication by clicking the "+" button for each location or by choosing "Select All." |
Step 4
|
Add an Image to your post by clicking the "Add Media" button. In the new window, drag and drop your image into the uploader or click on the uploader space to search your files. Tip: Expand the "Posting Guidelines" to see the photo specifications supported for Google Posts. |
Step 5
|
The title of the post is used to identify the post internally and can also be a quick way to grab a consumers attention. The title supports 128 characters. |
Step 6
|
The description is the body of the post and the main content that consumer will read. Here is where you can inform the consumers on the purpose of the post. 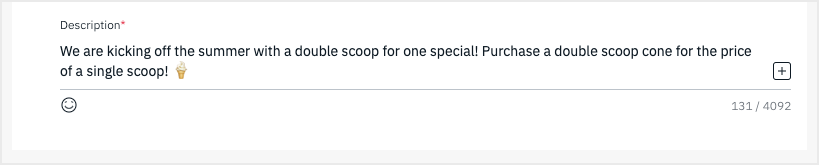 Tip: Click on the "+" button at the end of the description field to use dynamic Placeholders that localize your copy. Customers are more likely to engage with content that is locally relevant to them. |
Step 7
|
This link can be used to send a consumer to page where they can learn more about the offer.  Tip:UTM Parameters can be used in the URL to better track how many clicks your post is generating. |
Step 8
|
This is an optional field, however, it's beneficial to add a coupon code if required to take obtain the offer.  |
Step 9
|
Identify the date range to claim the promotional savings. Use the "Specify Time" toggle if you need to get granular and add specific times that the offer starts and stops. 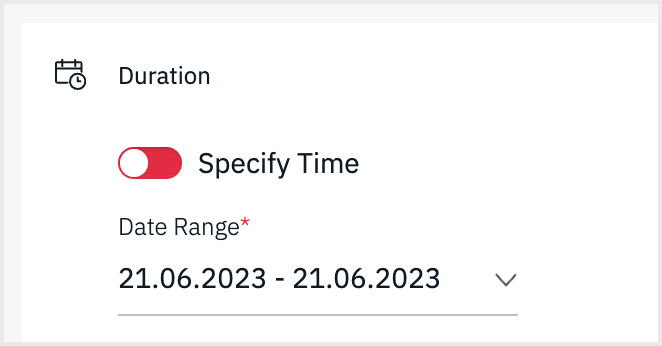 |
Step 10
|
Like with any promotional offer, adding Terms and Conditions to your offer post can help consumers to understand how they can best take advantage of the Offer. 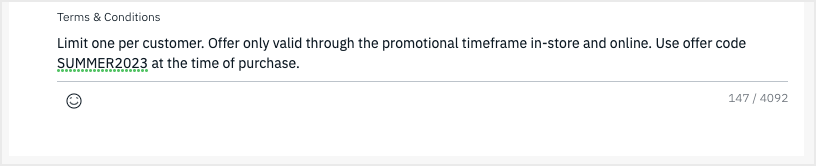 |
Step 11
|
Choose whether to publish your post immediately (Publish Now) or set a specific date and time using the calendar and time field. |
Step 12
|
Review your selections and use the preview on the right side of the publisher to make sure that everything looks correct. |
Step 13
|
Once you have confirmed that your post is ready to go, click on the 'Submit' button at the bottom to publish the post. The post will go live on your profile based on the Publication Date you chose in Step 11. |
|
This content will be shown (depending on) when button above is clicked This content will be shown (depending on) when button above is clicked |
Step 1
|
Start by choosing Google from the Directory List |
Step 2
|
Select "COVID-19" from the Google Post Type list.  |
Step 3
|
Click on the "+ Add Locations" button to open the Location Picker. In the location picker, determine which locations to opt-in for this publication by clicking the "+" button for each location or by choosing "Select All."
|
Step 4
|
The description is the body of the post and the main content that consumer will read. Here is where you can inform consumers on the purpose of the post. 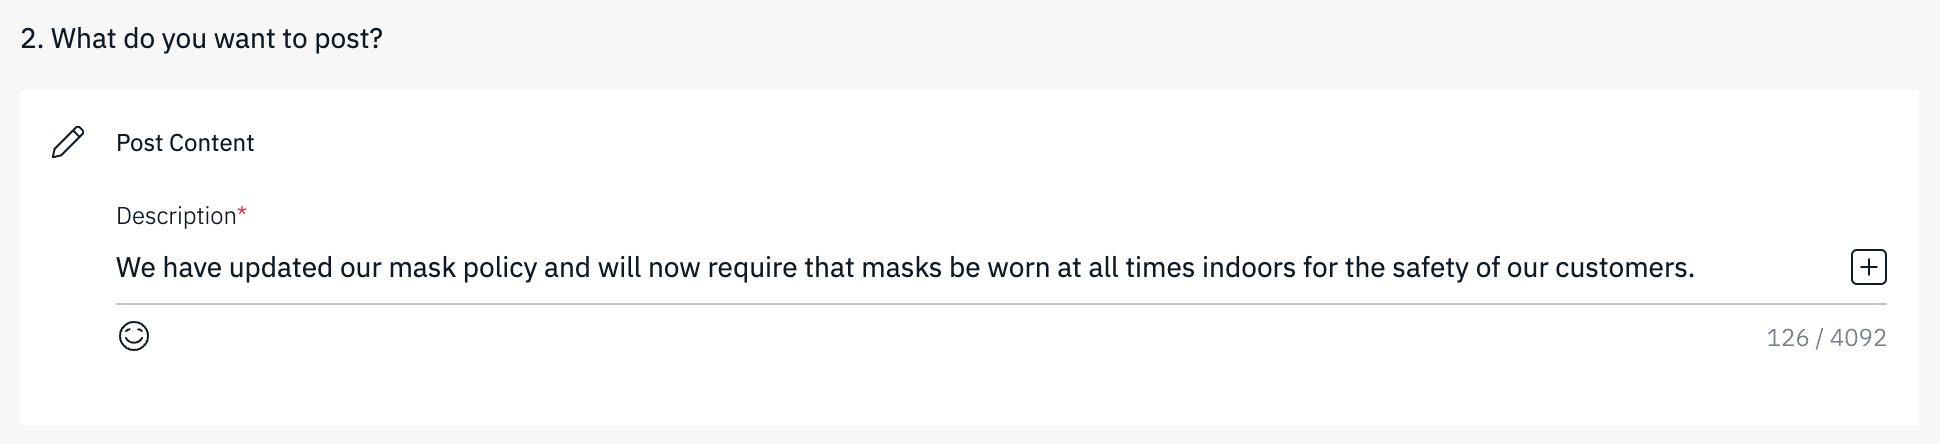 Tip: Click on the "+" button at the end of the description field to use dynamic Placeholders that localize your copy. Customers are more likely to engage with content that is locally relevant to them.  |
Step 5
|
An optional CTA can be used to send a consumer to page where they can learn more about the precautions the business is taking to ensure customers' safety.  |
Step 6
|
Choose whether to publish your post immediately (Publish Now) or set a specific date and time using the calendar and time field. 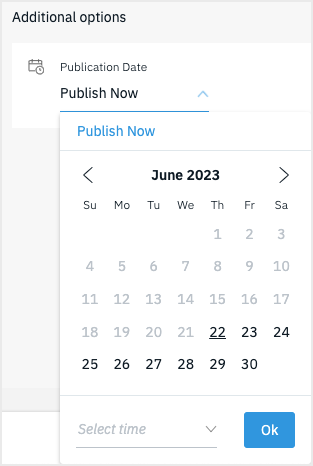 |
Step 7
|
Review your selections and use the preview on the right side of the publisher to make sure that everything looks correct.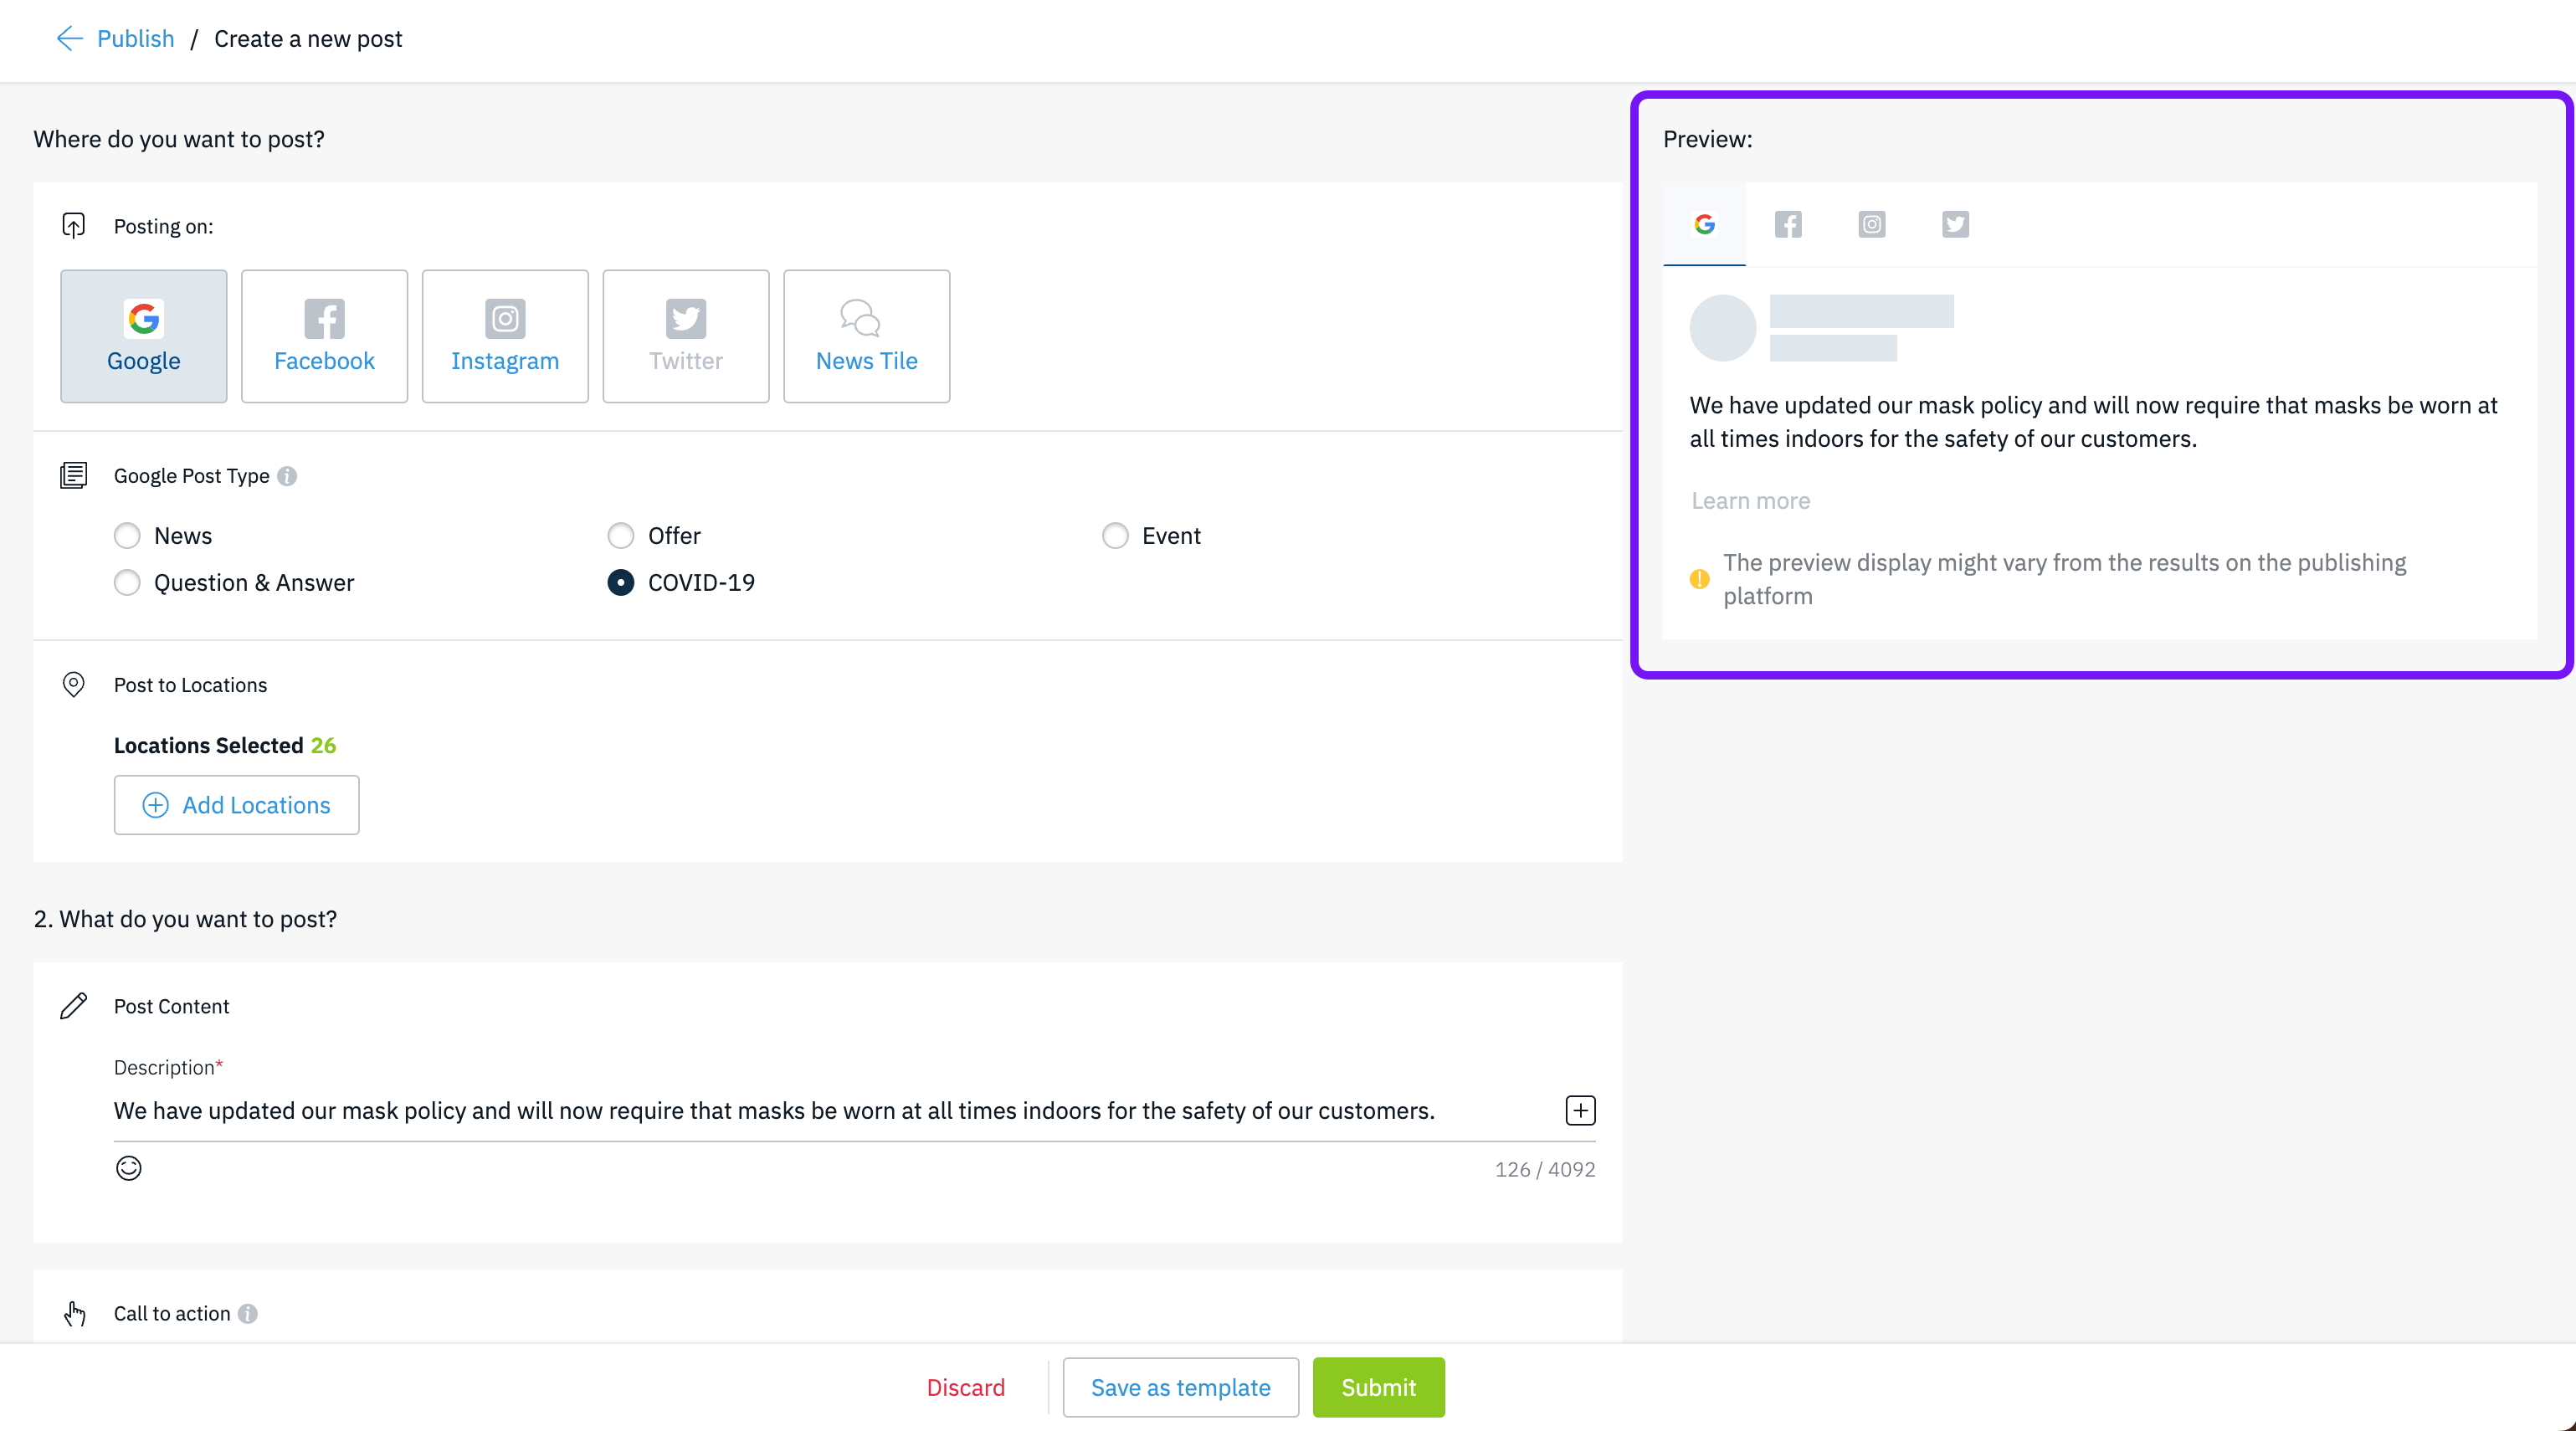 |
Step 8
|
Once you have confirmed that your post is ready to go, click on the 'Submit' button at the bottom to publish the post. The post will go live on your profile based on the Publication Date you chose in Step 6. |

Step 1
|
Start by choosing Google from the Directory List. |
Step 2
|
Select "Event" from Google Post Types. |
Step 3
|
Click on the "+ Add Locations" button to open the Location Picker. In the location picker, determine which locations to opt-in for this publication by clicking the "+" button for each location or by choosing "Select All."  |
Step 4
|
Add an Image to your post by clicking the "Add Media" button. In the new window, drag and drop your image into the uploader or click on the uploader space to search your files. Tip: Expand the "Posting Guidelines" to see the photo specifications supported for Google Posts. |
Step 5
|
The title of the post is used to identify the post internally and can also be a quick way to grab a consumers attention. The title supports 128 characters. |
Step 6
|
The description is the body of the post and the main content that consumer will read. Here is where you can inform the consumers on the purpose of the post. Tip: Click on the "+" button at the end of the description field to use dynamic Placeholders that localize your copy. Customers are more likely to engage with content that is locally relevant to them.  |
Step 7
|
An optional CTA can be used to send a consumer to page where they can learn more about the event. Choosing the right CTA button can help inform what action they should take when visiting the website. Tip:UTM Parameters can be used in the URL to better track how many clicks your post is generating. |
Step 8
|
Identify the date range to claim the promotional savings. Use the "Specify Time" toggle if you need to get granular and add specific times that the offer starts and stops. 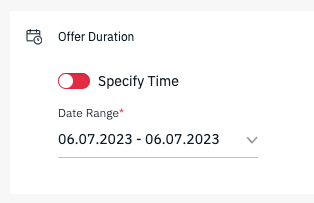 |
Step 9
|
Review your selections and use the preview on the right side of the publisher to make sure that everything looks correct.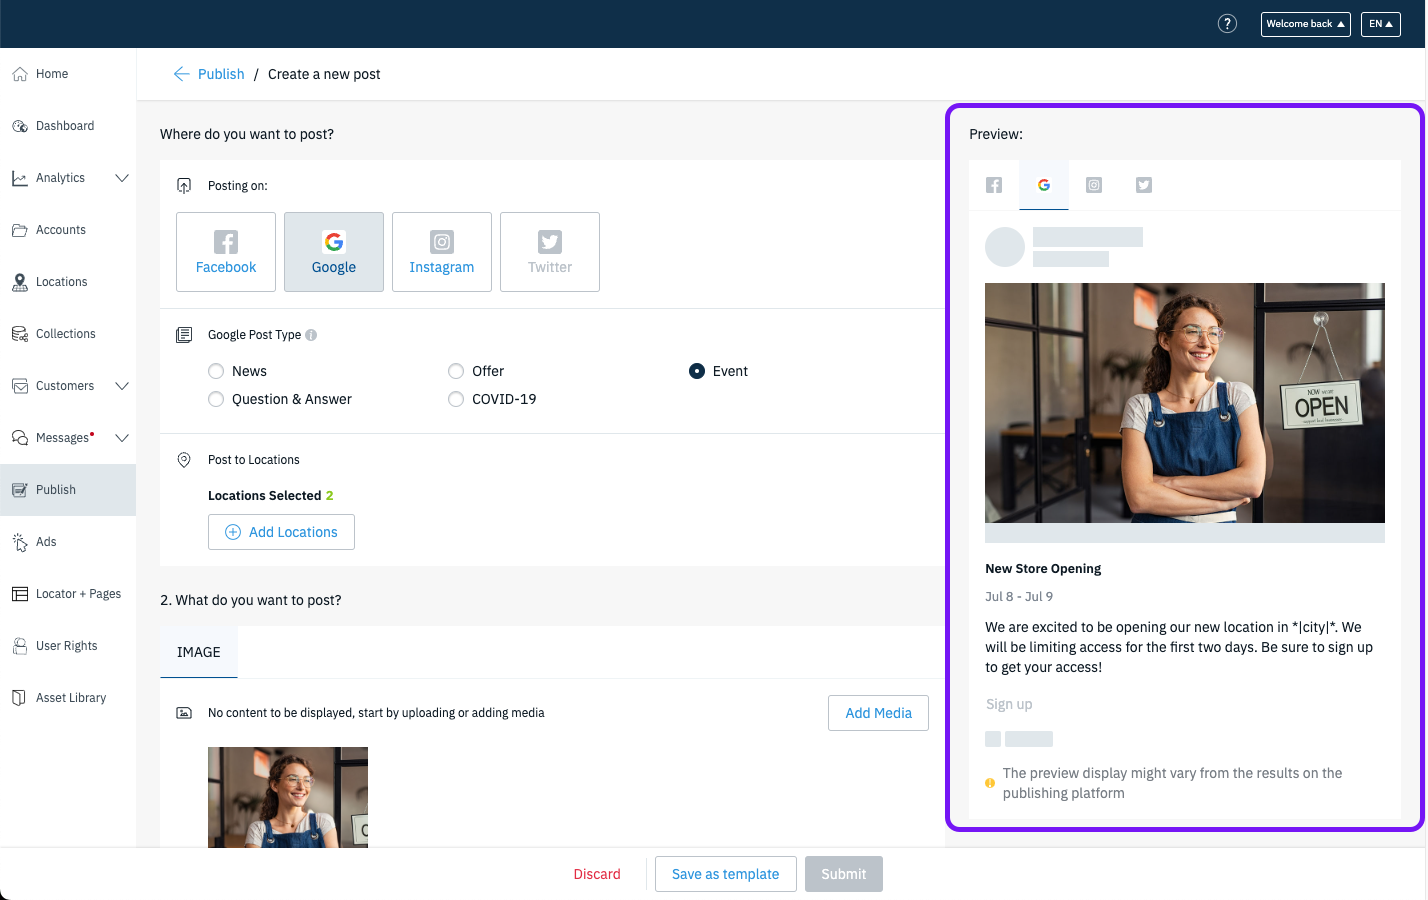 |
Step 10
|
Once you have confirmed that your post is ready to go, click on the 'Submit' button at the bottom to publish the post. The post will go live on your profile based on the Publication Date you chose in Step 8. |
What type of Facebook post would you like to create?
-
Post
-
Carousel
- Add Button
A general post on Facebook that is great for providing updates about the business, showcasing a product, community efforts, and more!
Step 1
|
Start by choosing Facebook from the Directory List |
Step 2
|
This is an optional step to include the Facebook brand page in the publication along with your local Facebook pages. This requires that the brand page has been connected in the Account Level Connections of the platform. Upon checking the box you will be required to choose a Facebook Brand Page from the dropdown provided 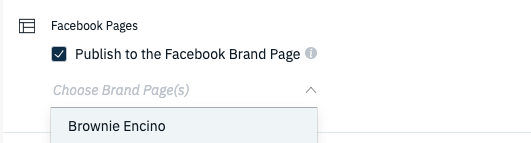 |
Step 3
|
Choose "Post" from the Facebook Post Type list. 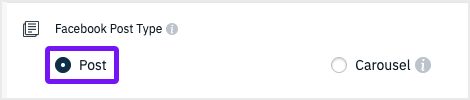 |
Step 4
|
Click on the "+ Add Locations" button to open the Location Picker.  In the location picker, determine which locations to opt-in for this publication by clicking the "+" button for each location or by choosing "Select All."  |
Step 5
|
Start by choosing if you would like to upload an image or video by click on the tab. Then, click on Add Media to proceed.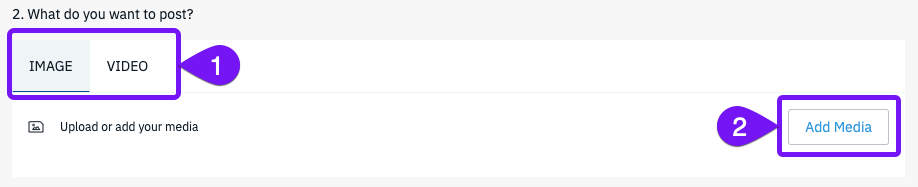 In the new window, drag and drop your image into the uploader or click on the uploader space to search your files.  Tip: Expand the "Posting Guidelines" to see the photo or video specifications supported for Facebook Posts. |
Step 6
|
The title of the post is used to identify the post internally. The title supports 128 characters. |
Step 7
|
The description is the body of the post and the main content that consumer will read. Here is where you can inform the consumers on the purpose of the post.  Tip: Click on the "+" button at the end of the description field to use dynamic Placeholders that localize your copy. Customers are more likely to engage with content that is locally relevant to them.  |
Step 8
|
An optional Call-to-Action link can be added to your post to encourage further customer engagement.  Tip:UTM Parameters can be used in the URL to better track how many clicks your post is generating. |
Step 9
|
Choose whether to publish your post immediately (Publish Now) or set a specific date and time using the calendar and time field.  |
Step 10
|
Review your selections and use the preview on the right side of the publisher to make sure that everything looks correct.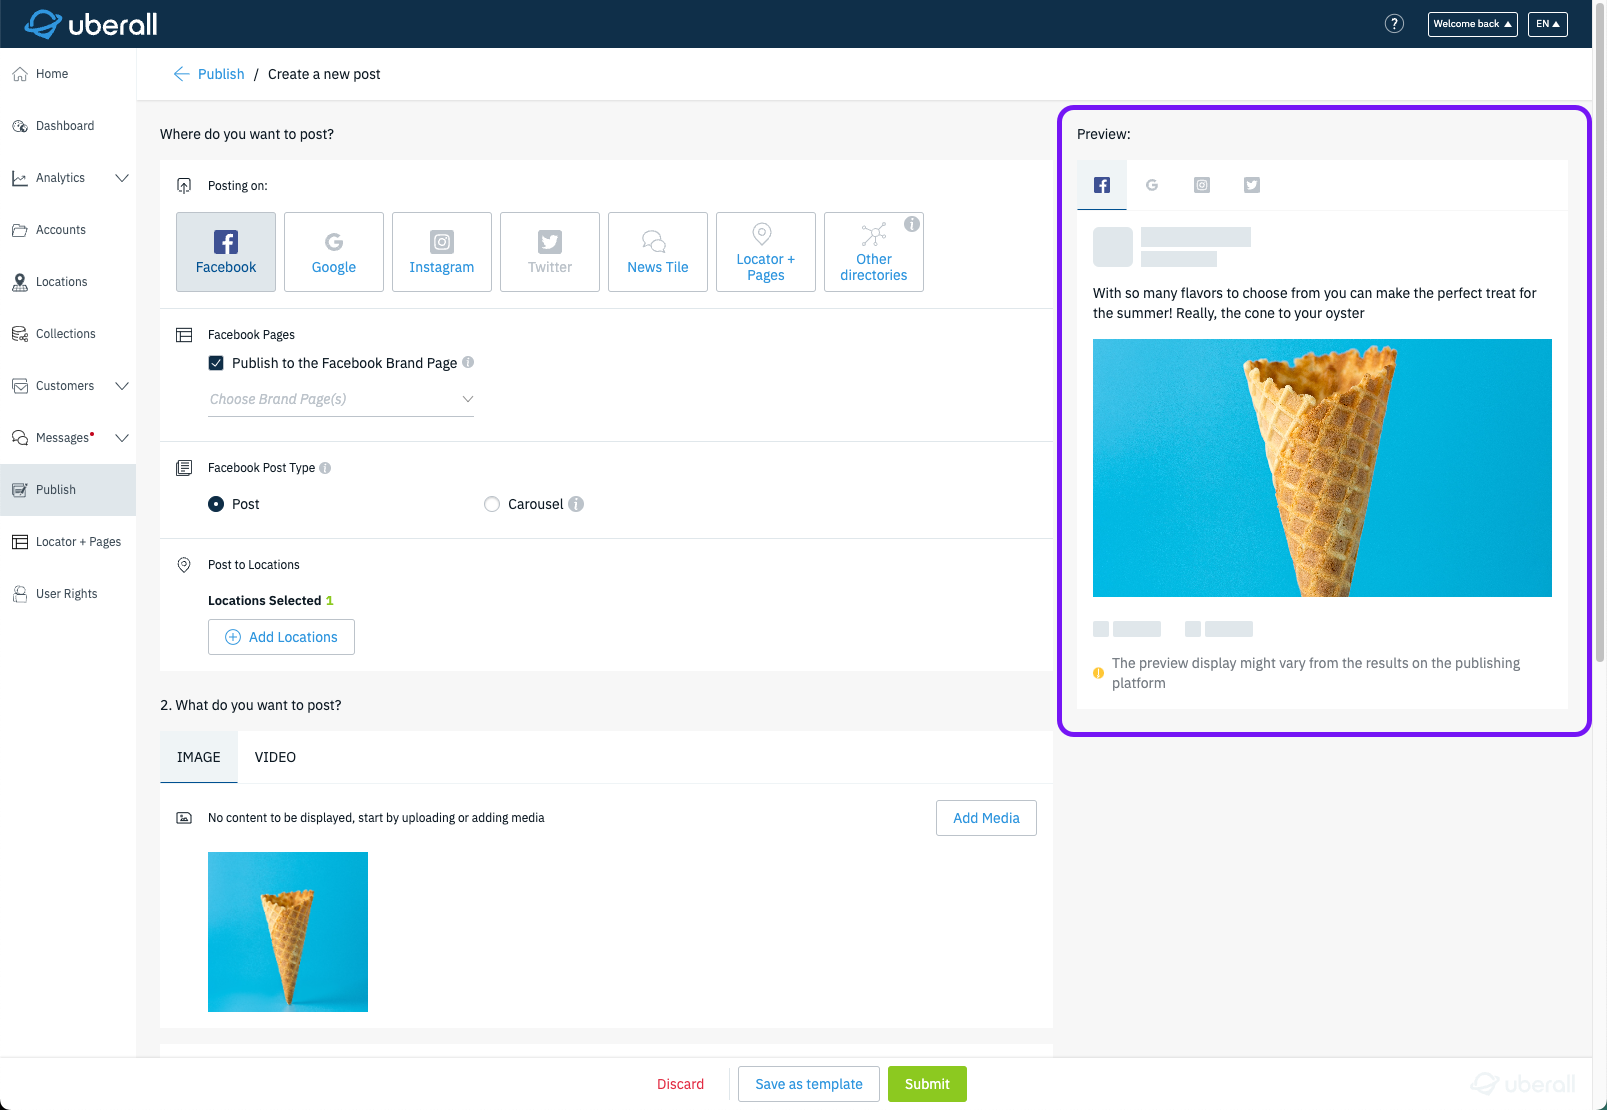 |
Step 11
|
Once you have confirmed that your post is ready to go, click on the 'Submit' button at the bottom to publish the post.  The post will go live on your profile based on the Publication Date you chose in Step 9. The post will go live on your profile based on the Publication Date you chose in Step 9. |
A carousel post is a great way to show off products or services. When published, carousels are displayed as a swipeable gallery of content cards (2-5 cards) that include an image, description, and link. You can use each card to showcase individual products or as a way of telling a story to encourage customers to learn more about your offerings.
Step 1
|
Start by choosing Facebook from the Directory List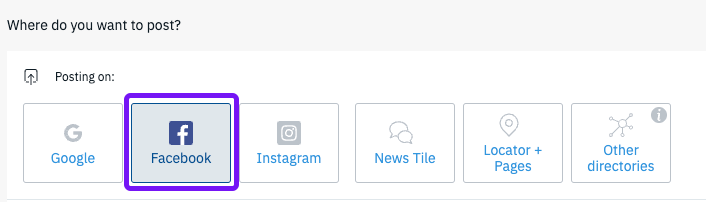 |
Step 2
|
This is an optional step to include the Facebook brand page in the publication along with your local Facebook pages. This requires that the brand page has been connected in the Account Level Connections of the platform. Upon checking the box you will be required to choose a Facebook Brand Page from the dropdown provided. Upon checking the box you will be required to choose a Facebook Brand Page from the dropdown provided. |
Step 3 |
Choose "Carousel" from the Facebook Post Type list.  |
Step 4
|
Click on the "+ Add Locations" button to open the Location Picker.  In the location picker, determine which locations to opt-in for this publication by clicking the "+" button for each location or by choosing "Select All."  |
Step 5
|
Add an Image to your post by clicking the "Add Media" button.  In the new window, drag and drop your image into the uploader or click on the uploader space to search your files. You will need to add a minimum of 2 images to a maximum of 5. 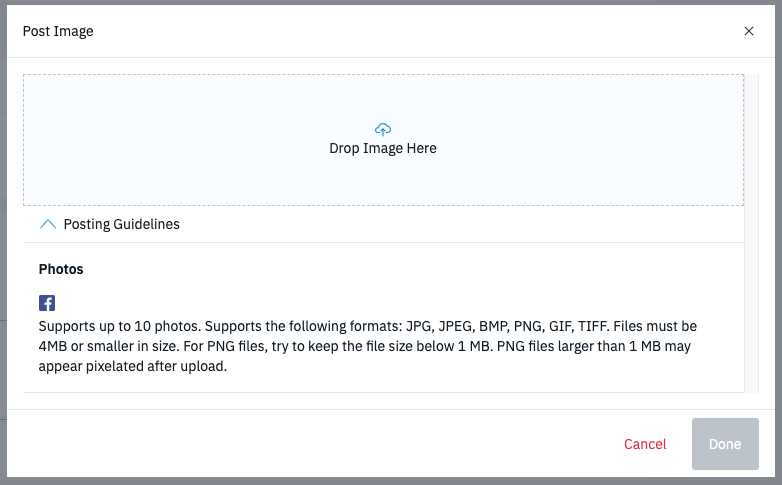 Tip: Expand the "Posting Guidelines" to see the photo or video specifications supported for Facebook Posts. |
Step 6 |
After you have added images, you will see that they now have alerts to indicate that more information is required. Hover over one of the images to open the Carousel details window.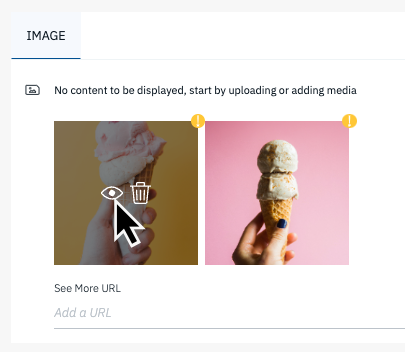 Each card will require a destination URL that will direct a customer to a specific page on your website and a description that is can be used to provide more detail on what's promoted in the carousel card.  Be sure to fill out the details for each page. In the example above there are 2 pages (or cards) on the carousel. Click on the page number or click next to fill out the remaining card. Click Save when you are done. |
Step 7
|
The 'See More' URL is a general website link that will be added to the end of the carousel. This can encourage to view more about your business offerings beyond what's included in the carousel. 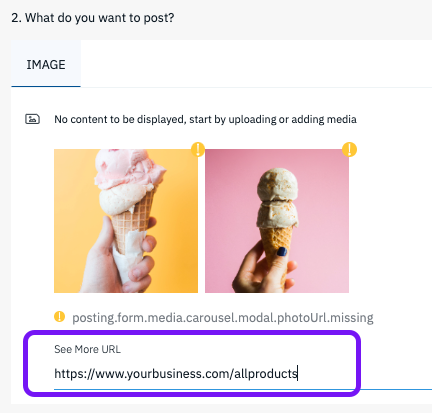 |
Step 7
|
The title of the post is used to identify the post internally. The title supports 128 characters. |
Step 8
|
The description is the body of the post and the main content that consumer will read. Here is where you can inform the consumers on the purpose of the post.  Tip: Click on the "+" button at the end of the description field to use dynamic Placeholders that localize your copy. Customers are more likely to engage with content that is locally relevant to them.  |
Step 9
|
Choose whether to publish your post immediately (Publish Now) or set a specific date and time using the calendar and time field.  |
Step 10
|
Review your selections and use the preview on the right side of the publisher to make sure that everything looks correct.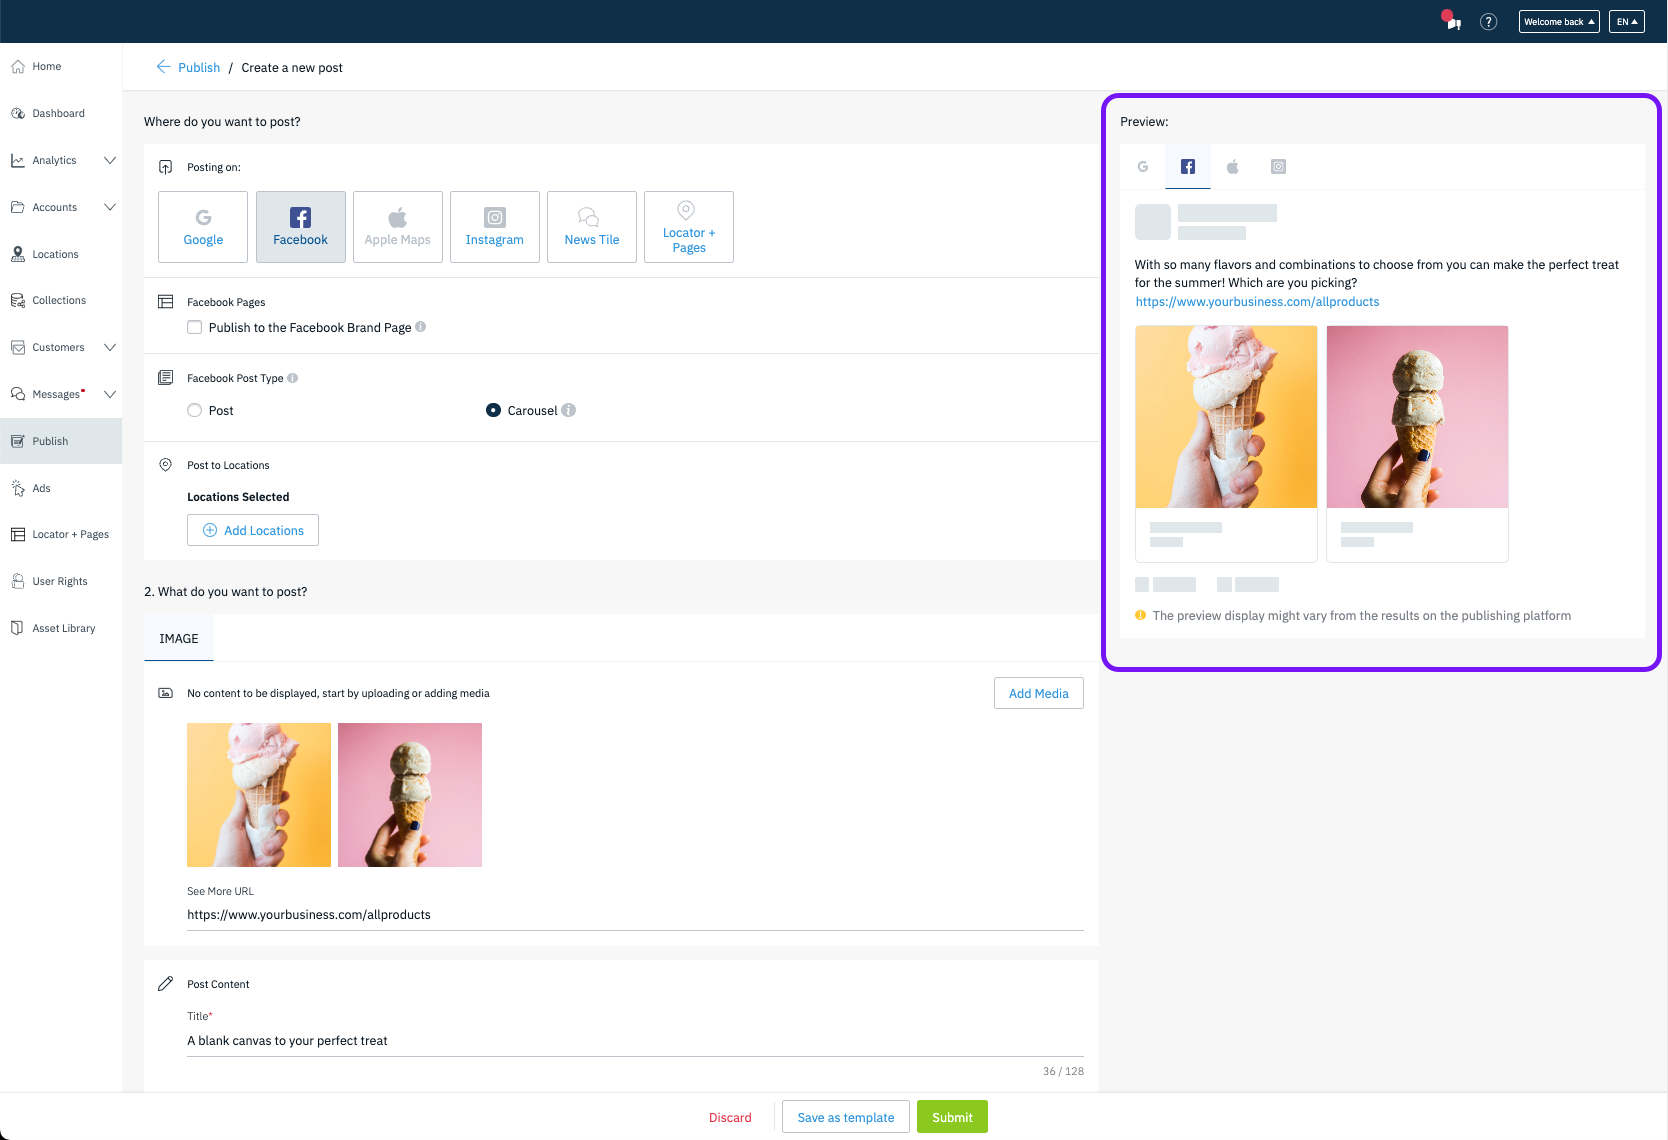 |
Step 11
|
Once you have confirmed that your post is ready to go, click on the 'Submit' button at the bottom to publish the post.  The post will go live on your profile based on the Publication Date you chose in Step 9. |
Instagram offers two post types that are great for providing updates about the business, showcasing a product, community efforts, and more! The flow is the same for both post types, however, users will need to take consideration in the media that is used. Posts support images and videos while Reels only supports videos. Be sure that you have connected Instagram to take advantage of publishing to Instagram accounts.
Step 1
|
Start by choosing Instagram from the Directory List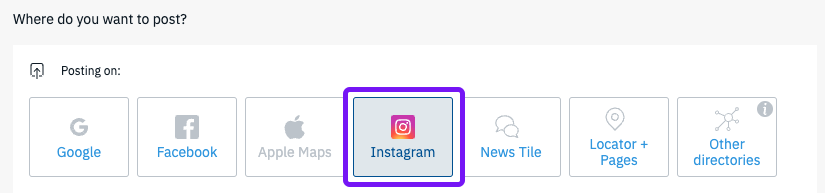 |
Step 2
|
Click on the dropdown to choose the Instagram account(s) that you want to publish content to: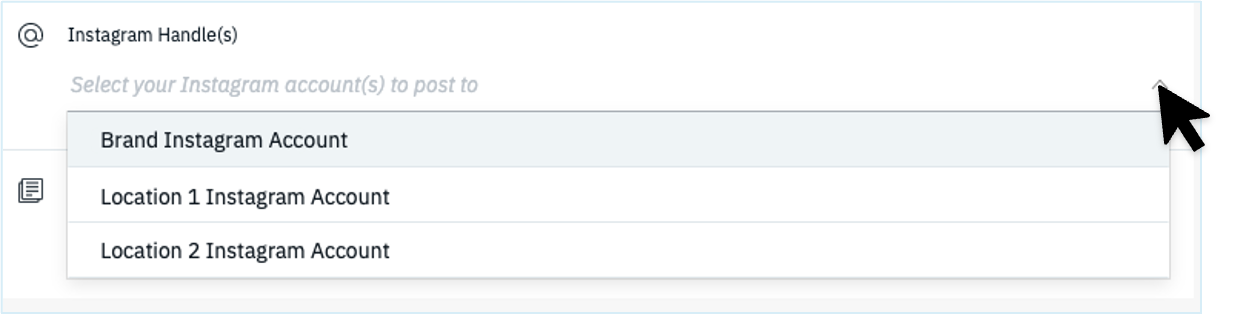 You will be able to see all the accounts that you have selected just below the field  |
Step 3
|
Choose your preferred post type for the publication. Be sure to consider the format of the media and orientation (horizontal vs. vertical). 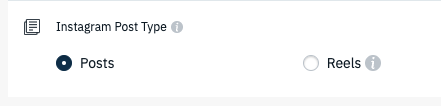
|
Step 4
|
If Posts was selected in the previous step, users will need to choose the type of media to upload (photo or video) followed by clicking on Add Media. If Reels was selected in the previous step, only Video will be supported. 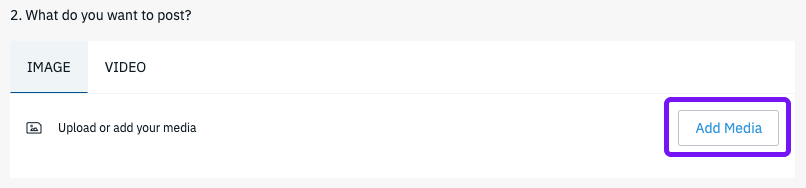 In the new window, drag and drop your image into the uploader or click on the uploader space to search your files. 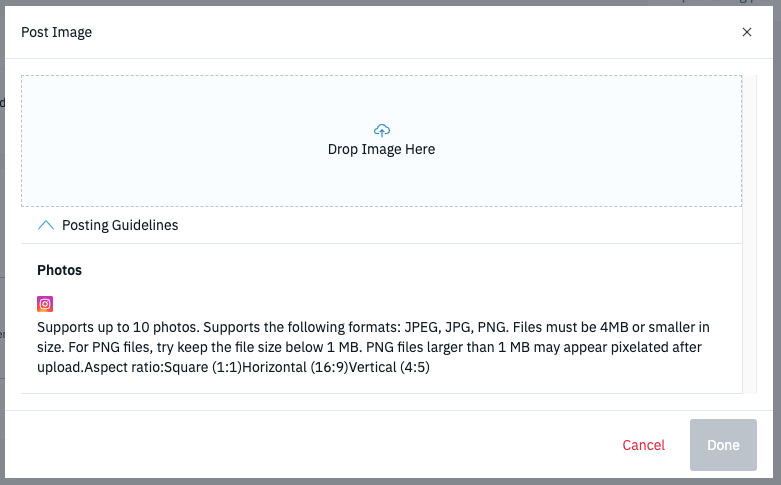 Tip: Expand the "Posting Guidelines" to see the photo and video specifications supported for Instagram Posts or Reels. |
Step 5
|
The description is the body of the post and the main content that consumer will read. Here is where you can inform the consumers on the purpose of the post.  Tip: Click on the "+" button at the end of the description field to use dynamic Placeholders that localize your copy. Customers are more likely to engage with content that is locally relevant to them.  |
Step 5
|
The First Comment field is an optional field that enables business to publish the first comment on the post or reel at the same time of the publication. This is a great way to add more detail for the content, encourage engagement, or hashtags to increase the publications visibility.  |
Step 6
|
Choose whether to publish your post immediately (Publish Now) or set a specific date and time using the calendar and time field. |
Step 7
|
Review your selections and use the preview on the right side of the publisher to make sure that everything looks correct.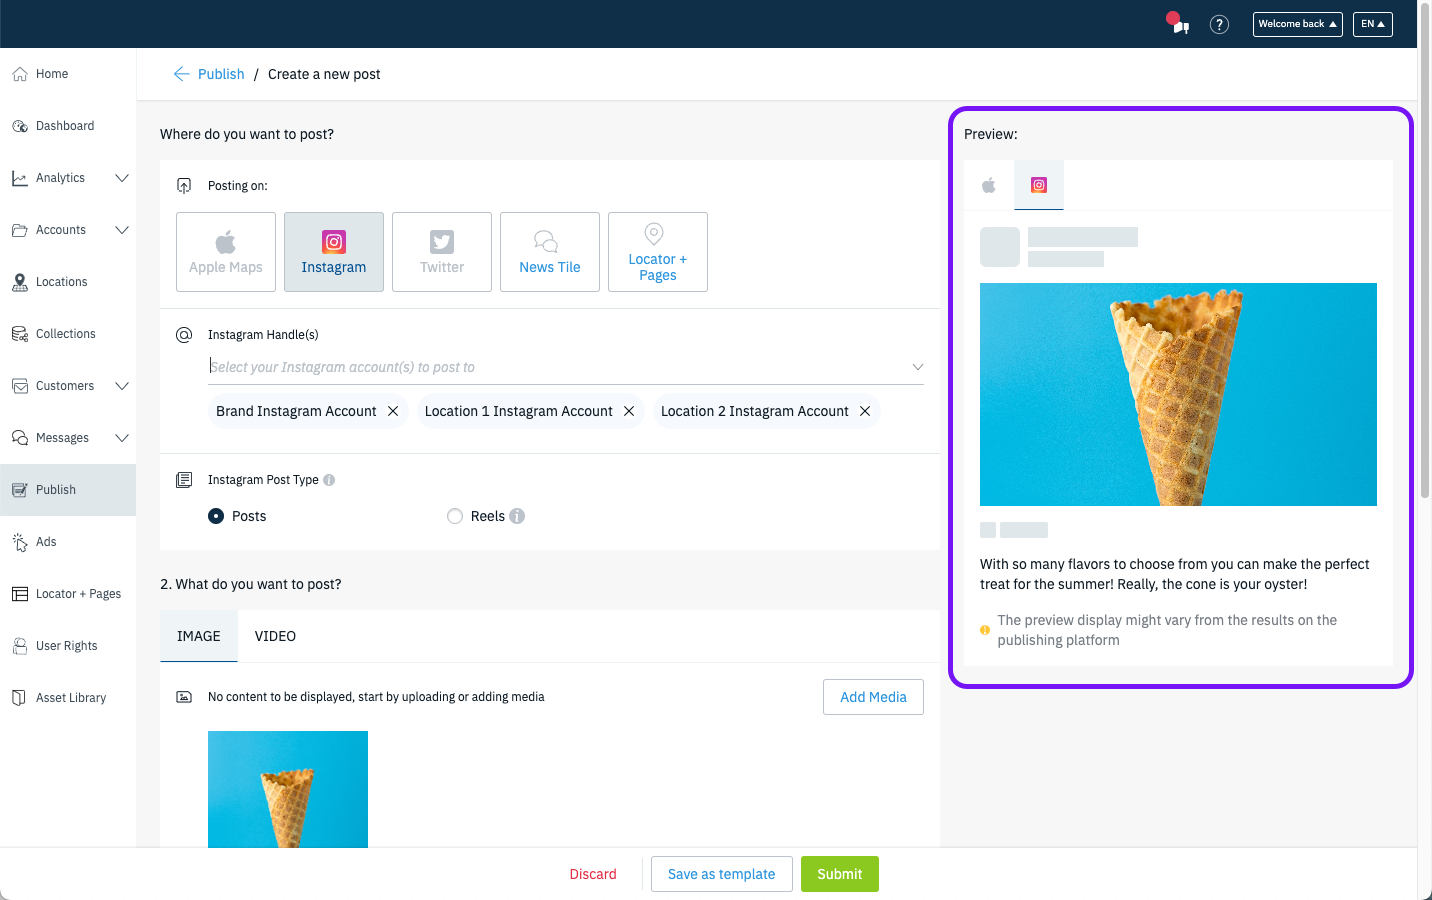 |
Step 8
|
Once you have confirmed that your post is ready to go, click on the 'Submit' button at the bottom to publish the post. |
-
Post
-
Reels
-
Stories
- Add Button
Step 1
|
Start by choosing Apple Maps from the Directory List: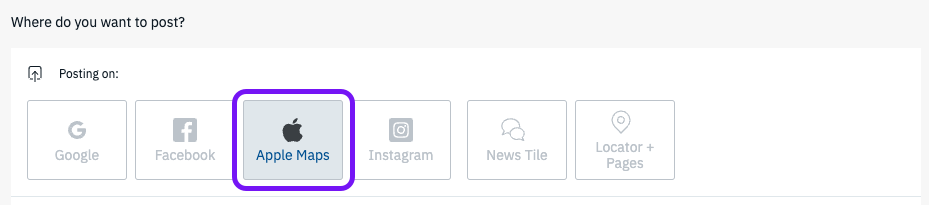 |
Step 2
|
Click on the "+ Add Locations" button to open the Location Picker. In the location picker, determine which locations to opt-in for this publication by clicking the "+" button for each location or by choosing "SelectAll."  |
Step 3
|
Add an Image to your post by clicking the "Add Media" button. In the new window, drag and drop your image into the uploader or click on the uploader space to search your files. ⚠ Important The Image should not contain text and should correspond to the Title (step 5) and Description (step 6). 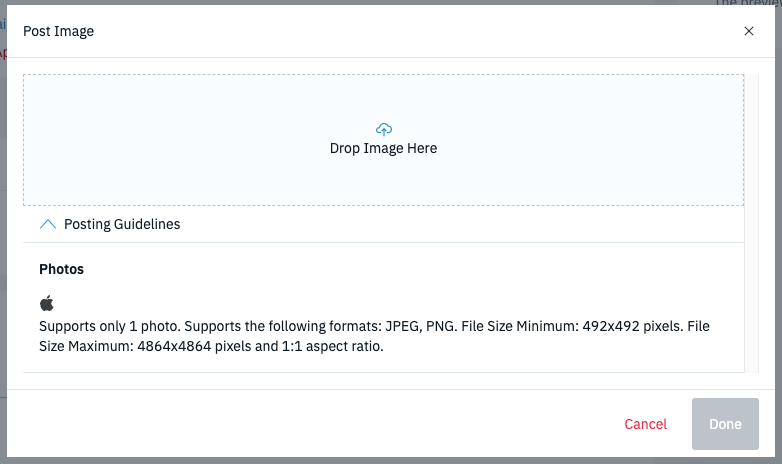 Tip: Expand the "Posting Guidelines" to see the photo specifications supported for Apple Showcases. |
Step 4
|
The Photo Description is a field to provide alternative (alt) text for customers who may be unable to see the image. 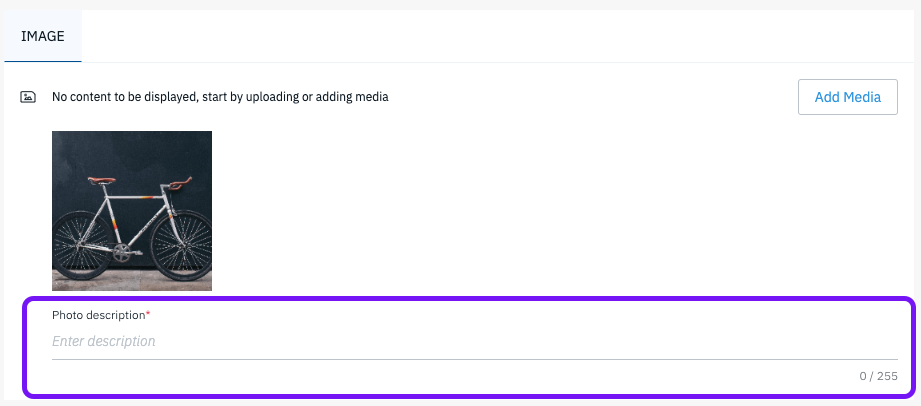 |
Step 5
|
The title of the post is used to identify the post internally and can also be a quick way to grab a consumers attention. The title supports 38 characters. |
Step 6
|
The description is the body of the post and the main content that consumer will read. Here is where you can inform the consumers on the purpose of the post.  Tip: Click on the "+" button at the end of the description field to use dynamic Placeholders that localize your copy. Customers are more likely to engage with content that is locally relevant to them. 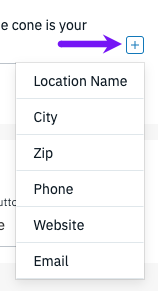 |
Step 7
|
Choose the Call-to-Action button that will be displayed on the Showcase. The available options are Website, Call, and Directions.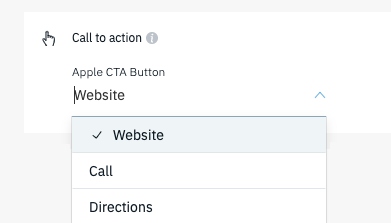 |
Step 8
|
Identify the date range for the Showcase to be visible on the Apple Maps listing. This can be a maximum of 30 days. Apple Showcases are typically published within 15 minutes.  By enabling the "Specify Duration" slider you can adjust the End Date for the Showcase visibility. |
Step 9
|
Review your selections and use the preview on the right side of the publisher to make sure that everything looks correct.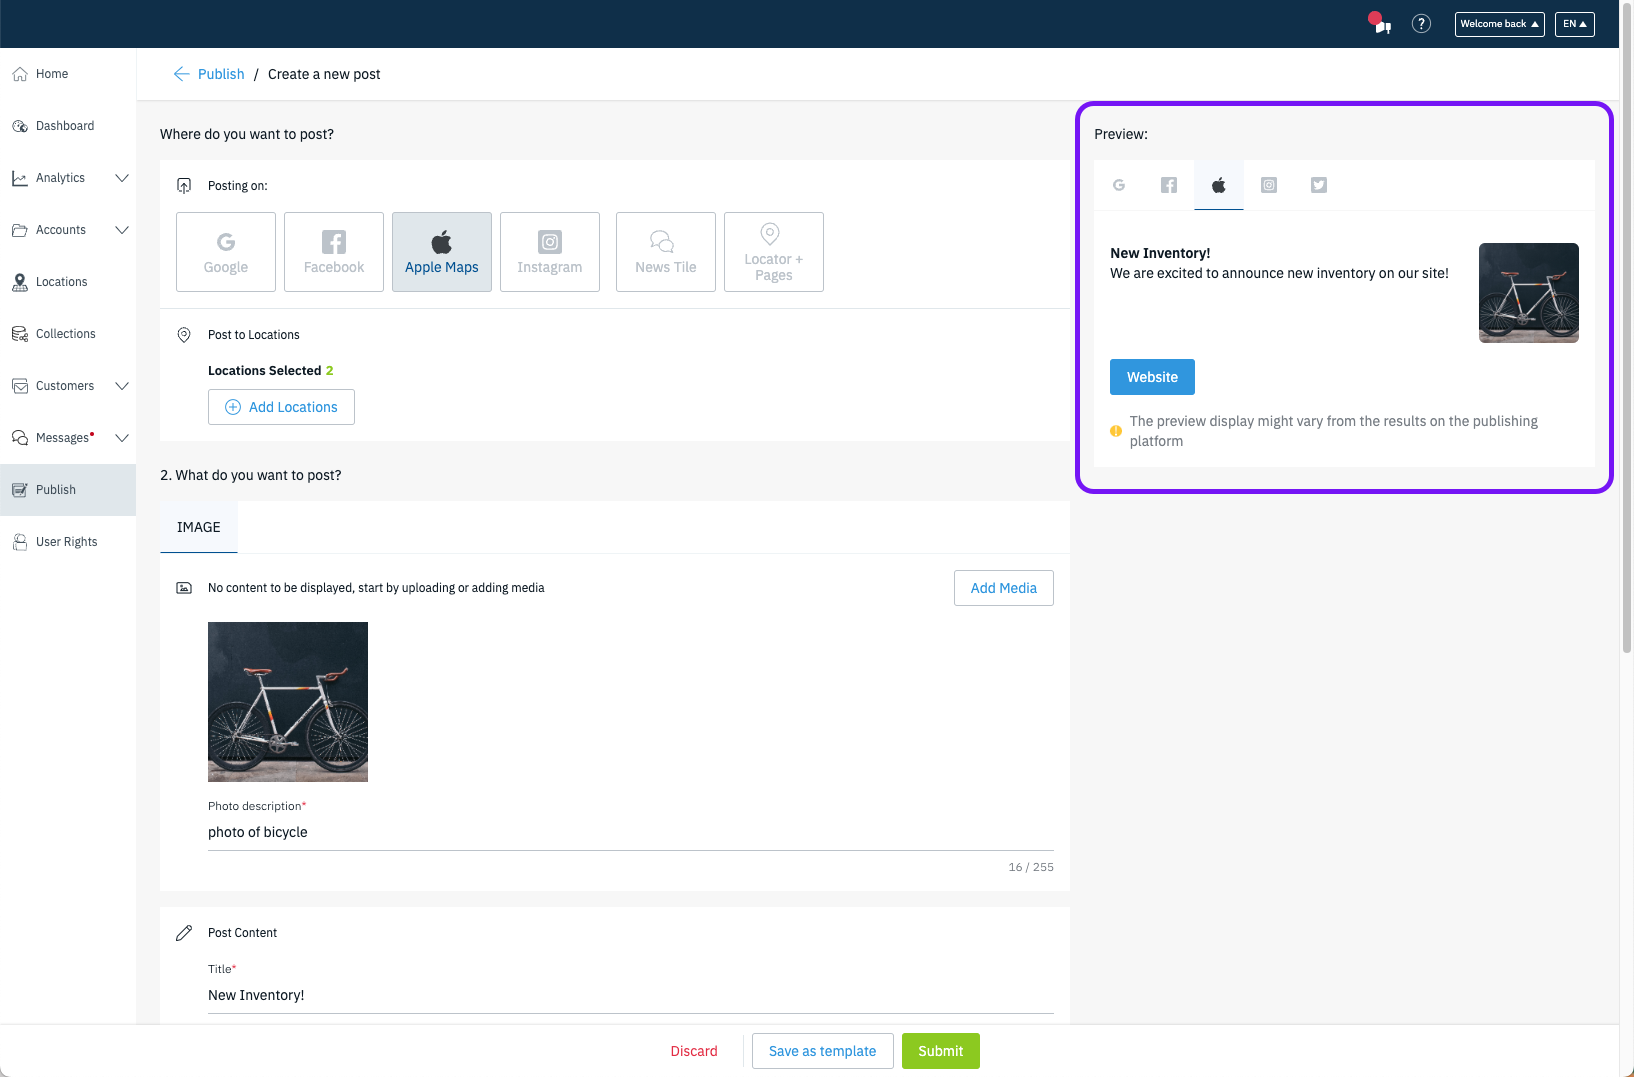 |
Step 10
|
Once you have confirmed that your post is ready to go, click on the 'Submit' button at the bottom to publish the post. The post will go live on your profile based on the Date Range you chose in Step 8 and Apple's review process. |
A News tile post enables you to publish social content to your Local Pages. This will require that a News Tile snippet has been added to your Local Pages.
Step 1 |
Start by choosing News Tile from the Directory List. This will enable both the News Tile and the Locator + Pages
|
Step 2 |
Click on the "+ Add Locations" button to open the Location Picker. 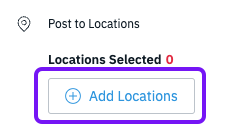 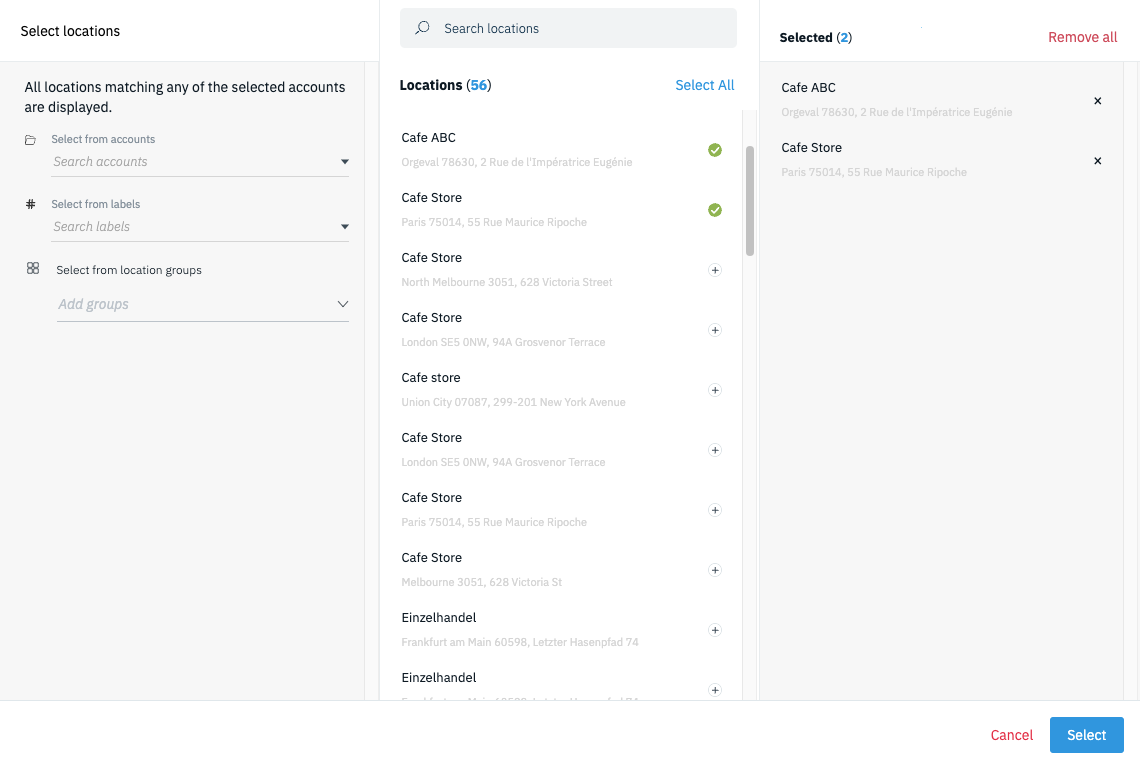 |
Step 3 |
Add an Image to your post by clicking the "Add Media" button.  In the new window, drag and drop your image into the uploader or click on the uploader space to search your files. 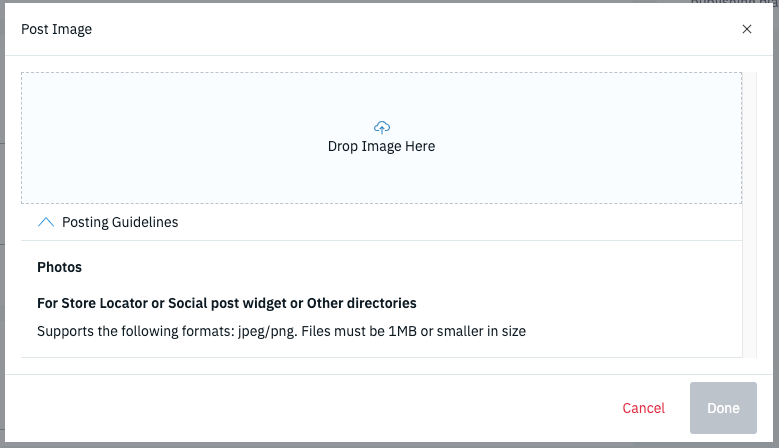 Tip: Expand the "Posting Guidelines" to see the photo specifications supported for Google Posts. |
Step 4 |
The title of the post is used to identify the post internally and can also be a quick way to grab a consumers attention. The title supports 128 characters. |
Step 5 |
The description is the body of the post and the main content that consumer will read. Here is where you can inform the consumers on the purpose of the post.  Tip: Click on the "+" button at the end of the description field to use dynamic Placeholders that localize your copy. Customers are more likely to engage with content that is locally relevant to them.  |
Step 6 |
An optional CTA can be used to send a consumer to page where they can learn more about what you are posting (e.g., product, service, etc).  |
Step 7
|
Choose whether to publish your post immediately (Publish Now) or set a specific date and time using the calendar and time field.  |
Step 8
|
Review your selections and use the preview on the right side of the publisher to make sure that everything looks correct.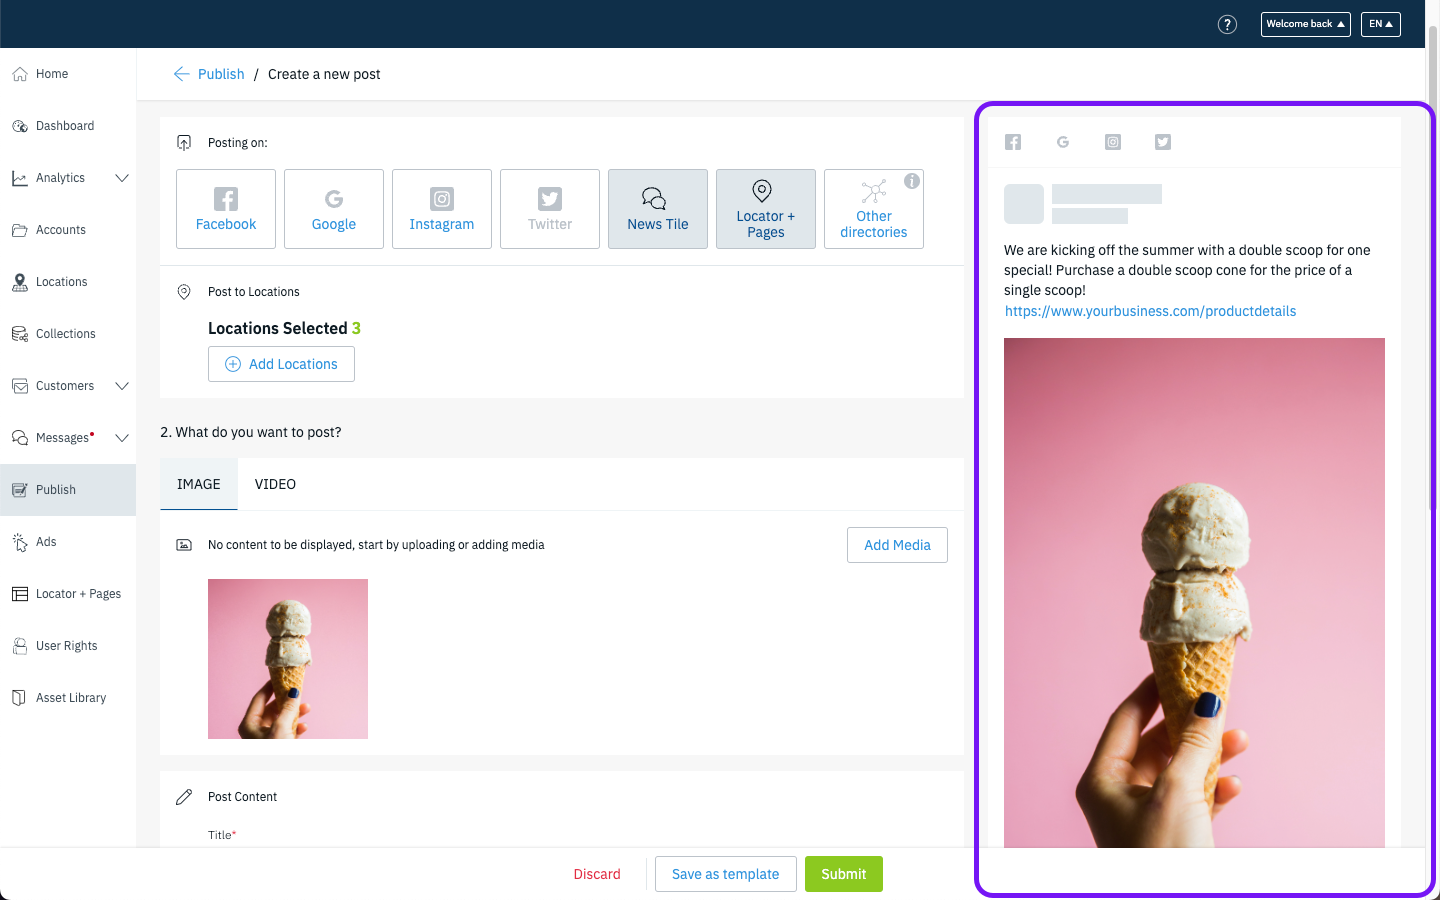 |
Step 9
|
Once you have confirmed that your post is ready to go, click on the 'Submit' button at the bottom to publish the post.  The post will go live on your profile based on the Publication Date you chose in Step 7. |

The Other Directories option will enable users to publish content to long tail directories.
Step 1
|
Start by choosing Other directories from the Directory List. 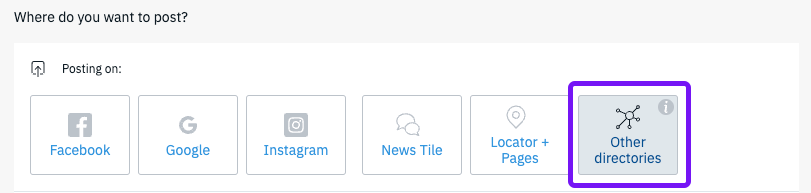 To see what the other directories are, you can click on the "i" button on the top right side of the tile. 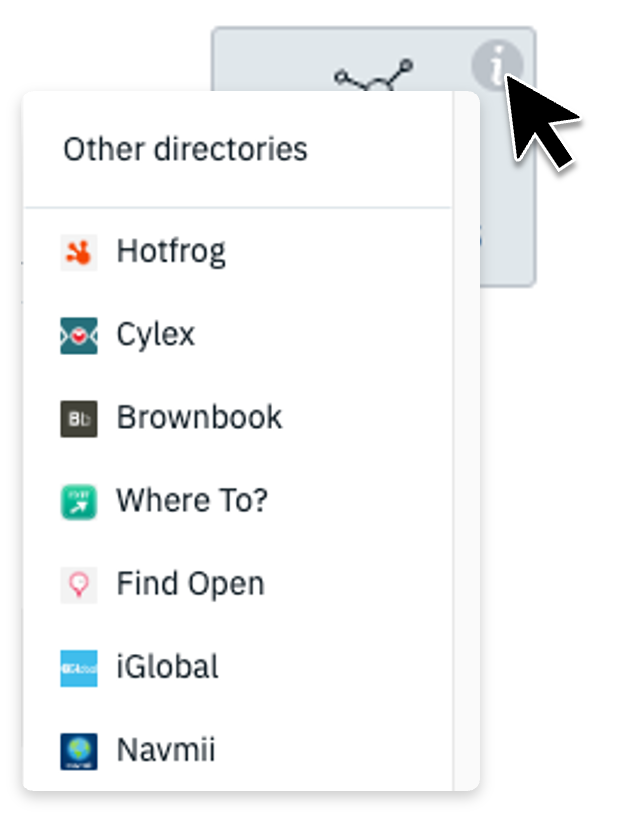 |
Step 2 |
Click on the "+ Add Locations" button to open the Location Picker. In the location picker, determine which locations to opt-in for this publication by clicking the "+" button for each location or by choosing "Select All."
|
Step 3
|
Not all long tail directories will support an image, however for those that do, it will be published. Add an Image to your post by clicking the "Add Media" button.  In the new window, drag and drop your image into the uploader or click on the uploader space to search your files. 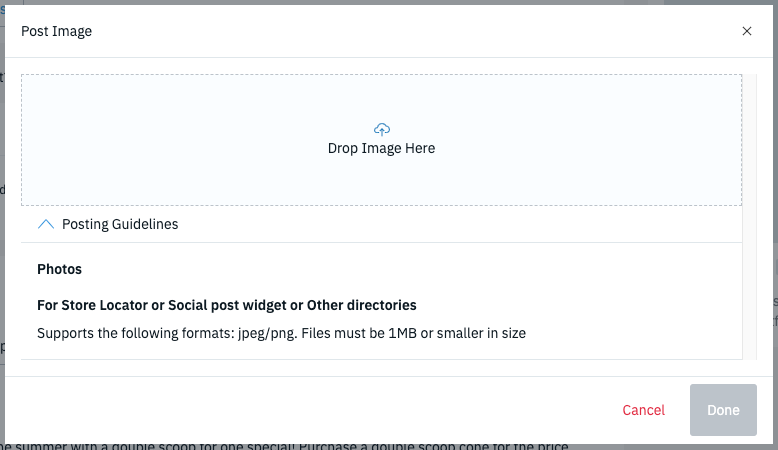 Tip: Expand the "Posting Guidelines" to see the photo specifications supported for Other directory Posts. |
Step 4
|
The title of the post is used to identify the post internally and can also be a quick way to grab a consumers attention. The title supports 128 characters. |
Step 5
|
The description is the body of the post and the main content that consumer will read. Here is where you can inform the consumers on the purpose of the post.  Tip: Click on the "+" button at the end of the description field to use dynamic Placeholders that localize your copy. Customers are more likely to engage with content that is locally relevant to them.  |
Step 6
|
An optional CTA can be used to send a consumer to page where they can learn more about what you are posting (e.g., product, service, etc).  |
Step 7
|
Choose whether to publish your post immediately (Publish Now) or set a specific date and time using the calendar and time field.  |
Step 8 |
Review your selections and use the preview on the right side of the publisher to make sure that everything looks correct.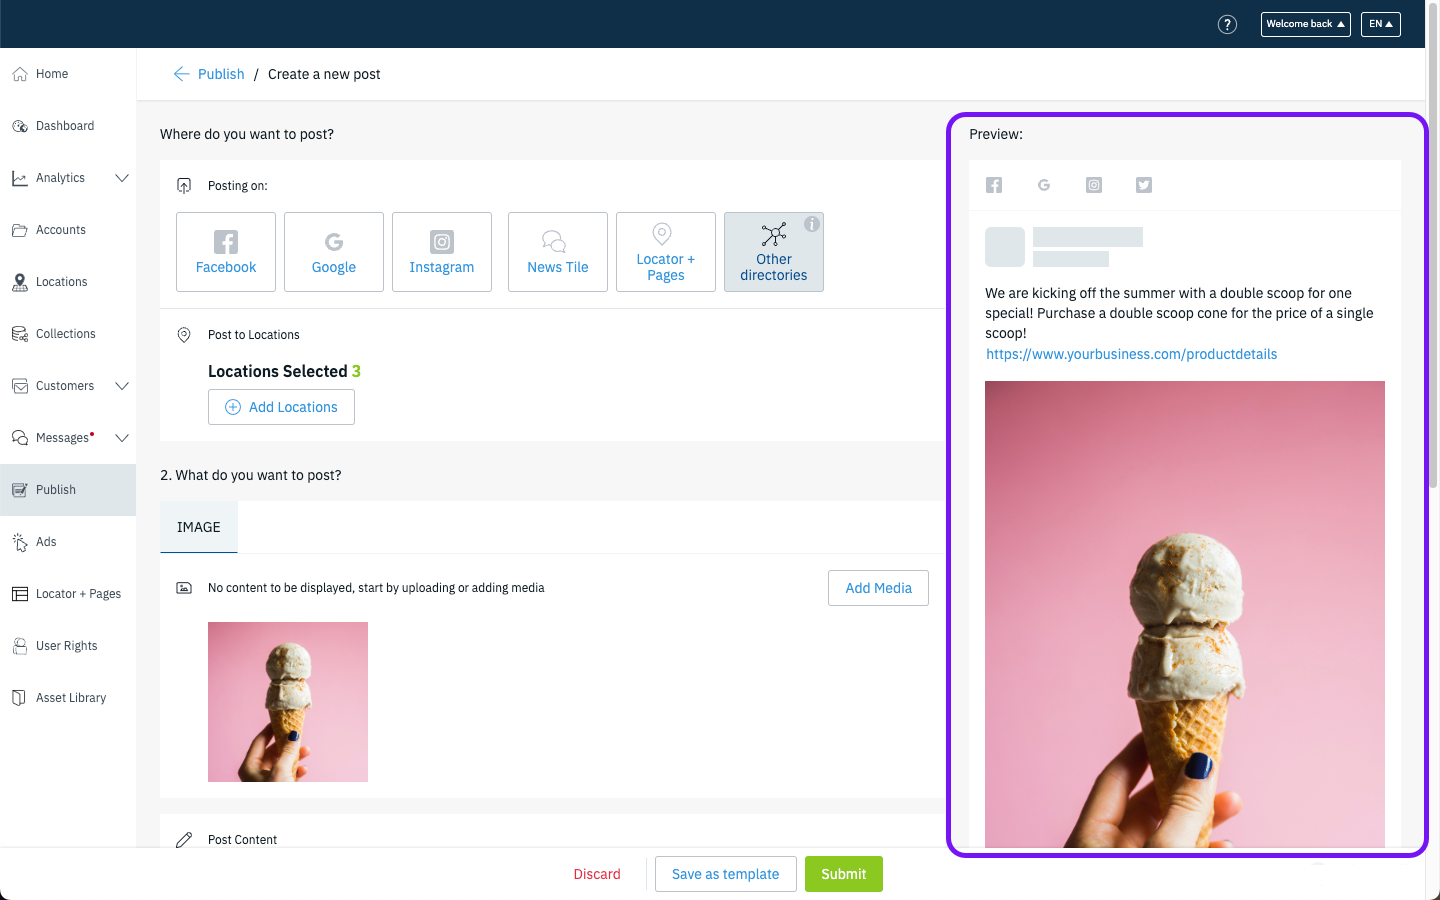 |
Step 9
|
Once you have confirmed that your post is ready to go, click on the 'Submit' button at the bottom to publish the post. The post will go live on your profile based on the Publication Date you chose in Step 7. |

Considerations
- Publishing content to multiple social channels:
- What makes the publisher so powerful is the ability to scale your social post across important social channels that improve local search success. Choosing multiple directories may limit the posting options available to ensure a successful publication.
- When considering media be sure to choose media that can work well across multiple directories. In most cases photos that are 1:1 (square) ratio are widely supported.
- If you chose multiple directories for the post, you can delete the already published post from certain directories by editing the published post and by de-selecting specific directories. This will remove the already published posts from the directories that were de-selected.
- What makes the publisher so powerful is the ability to scale your social post across important social channels that improve local search success. Choosing multiple directories may limit the posting options available to ensure a successful publication.
- Publishing content to brand pages/accounts:
- Facebook and Instagram are the only social channels that have a concept of "brand" pages. When creating a new post be sure to enable Brand Page Publishing for Facebook posts and choosing your brand account when publishing to Instagram.
- Posting content to Apple Maps listings
- Publishing to Apple Maps requires that the business has made a connection via Apple Business Connect and has delegated management to the platform.
- Read more about Apple Business Connect and delegating management to the platform here.
- Posting content to Instagram accounts
- An Account Level or Location level connection will need to be made to the Instagram account. You can learn more about connecting Instagram here.