For us to be able to keep your location data updated, a Google Business Profile (GBP) location needs to be created, verified, and connected to the platform.
The user establishing the connection must be the owner or manager of the listing or they will be prompted to request access to the listing after connecting to the platform. Only an owner or administrator can grant us access to successfully send updates to Google Business Profile profiles.
We will guide you step-by-step through the process!
The first step is to connect your account!
If you manage multiple locations as a Brand, you will have the possibility to connect all locations at once with the click of a button. If you manage individual locations, you will have the option to connect them individually.
Click on the option that suits your case below.
-
Connect individual locations
-
Connect locations in bulk
- Add Button
Step 1
|
Go to the 'Listings' tab of the location profile and click "Connect" on the Google Business Profile card to start the process.
|
|
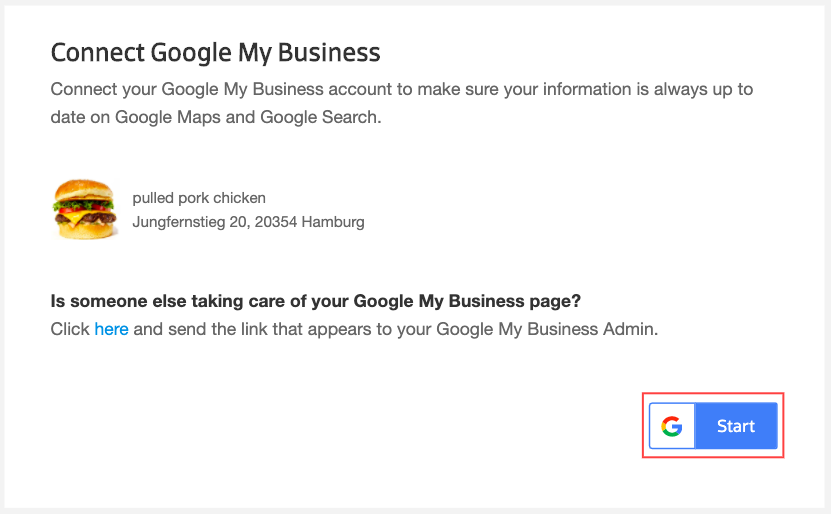
Step 2 Start |
If you wish to connect a Google Business Profile location managed by someone else by sending them the link, move to step 8. In all other cases, click "Start".
|
Step 3
|
Make sure you log in to the Google account you manage the location(s) already or wish manage the location(s) with.  |
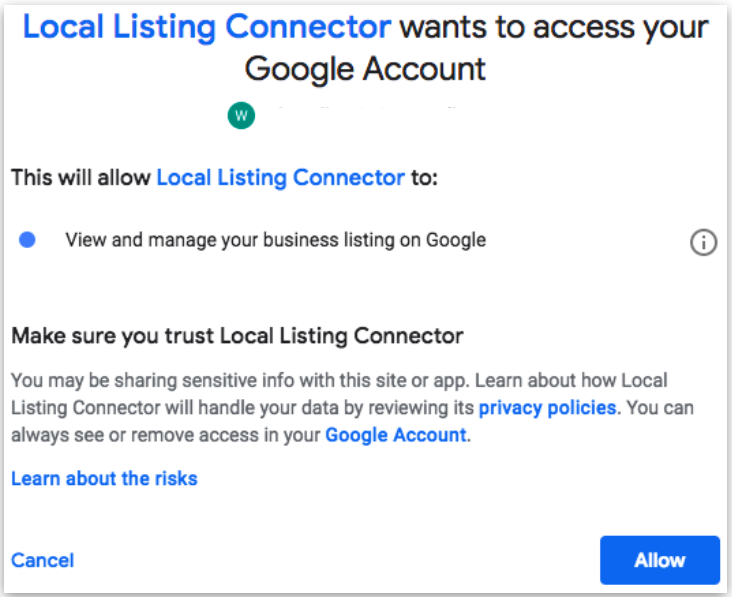
Step 4
|
A window will open in which you are asked to grant the Local Listing Connector access to the Google account. Click “Allow”. If you have previously allowed access, this step will be skipped.
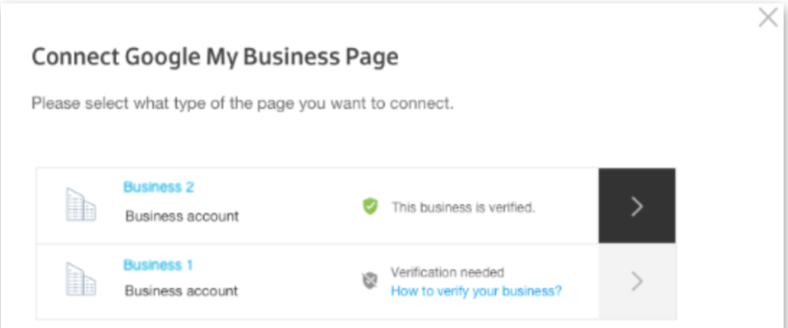
If you are connecting a verified location which you are managing, move on to step 7. If you are creating and connecting a new location, move on to step 5a. If you are connecting a location managed by you that is unverified, move on to step 5b. If you are connecting a location that exists but you do not manage at the moment, move on to step 5c. |
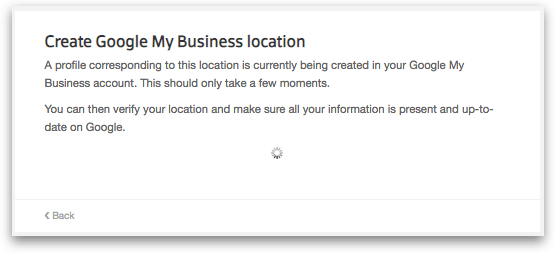
Step 5 |
Step 5A: Create and Connect New LocationIf you are creating and connecting a location that does not have an existing listing, click "Create and connect".
The location is now created and connected. Move on to step 6 to verify the location. Step 5B: Connect Unverified LocationTo connect an unverified listing that is managed by you, click on "Confirm" next to the location name. Move on to step 6 to verify the location. Step 5C: Connecting a Verified Location Managed by a Third Party (Request Access)If you wish to connect a location that is managed by a third party, you can also request access to this location directly in the Connect Flow! For more information on requesting access via our platform, please click here (step 6 in the linked article). |
Step 6
|
Click on "Verify this location" in the Connect Flow. You can request the verification code directly in the Connect Flow! You will be prompted with the verification methods available for your location. Phone verification is not always available. If you choose the phone option, you will immediately receive the verification code on the provided phone number.
|
Step 7
|
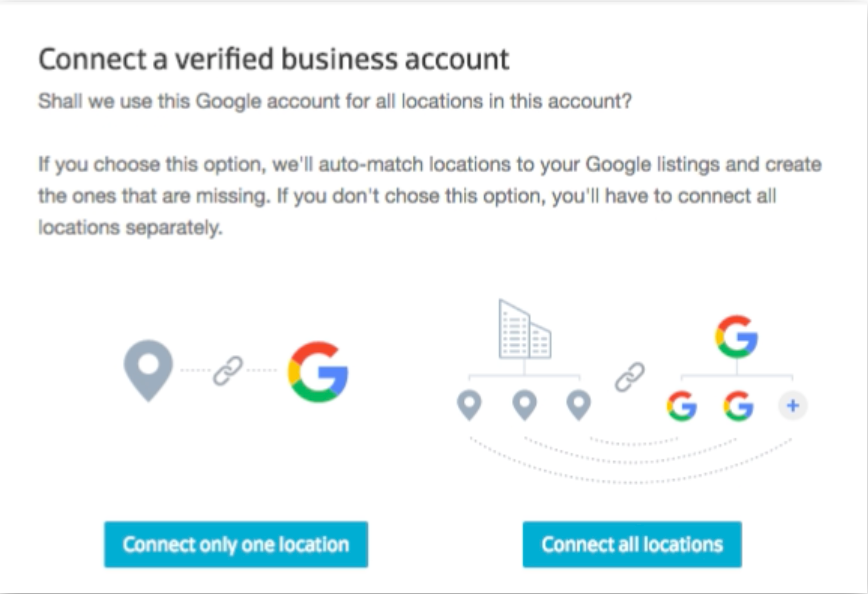
If you manage multiple locations groups, you will be asked to select a location group first, otherwise, this step will be skipped. If you have a bulk verified Google Business Profile account, you will see the option to "Connect only one location" or "Connect all locations", otherwise this step will be skipped. Please select "Connect only one location" if you have this option. You will be able to see the location and click on the "Confirm" button next to it. If you have not moved the location to a location group, the location will be found in the personal section of your Google Business Profile account. To search the personal, ungrouped section when trying to connect to Google Business Profile, click on the highlighted message "Manage this location in your ungrouped location" where you can select the location you wish to connect.
|
Step 8
|
If the Google Business Profile Profile is owned or administered by someone else and they do not have access to the platform, you are able to send them the link that will guide them through the connection. 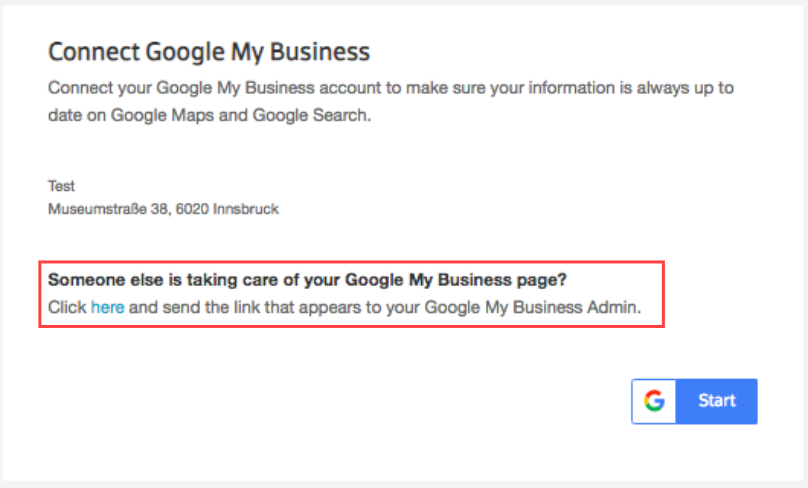 They can then sign in to the respective Google account and confirm with a few clicks that the platform is granted the access to successfully update the profile. As soon as the owner/administrator has approved the account connection the process is completed. In case the profile is not verified yet, they can also start the verification process and follow the process as stated Step 6. |


To have the possibility to connect your locations in bulk, you must have a bulk verified Google Business Profile account.
For a step-by-step guide on how to bulk verify your Google Business Profile account, take a look at this article.
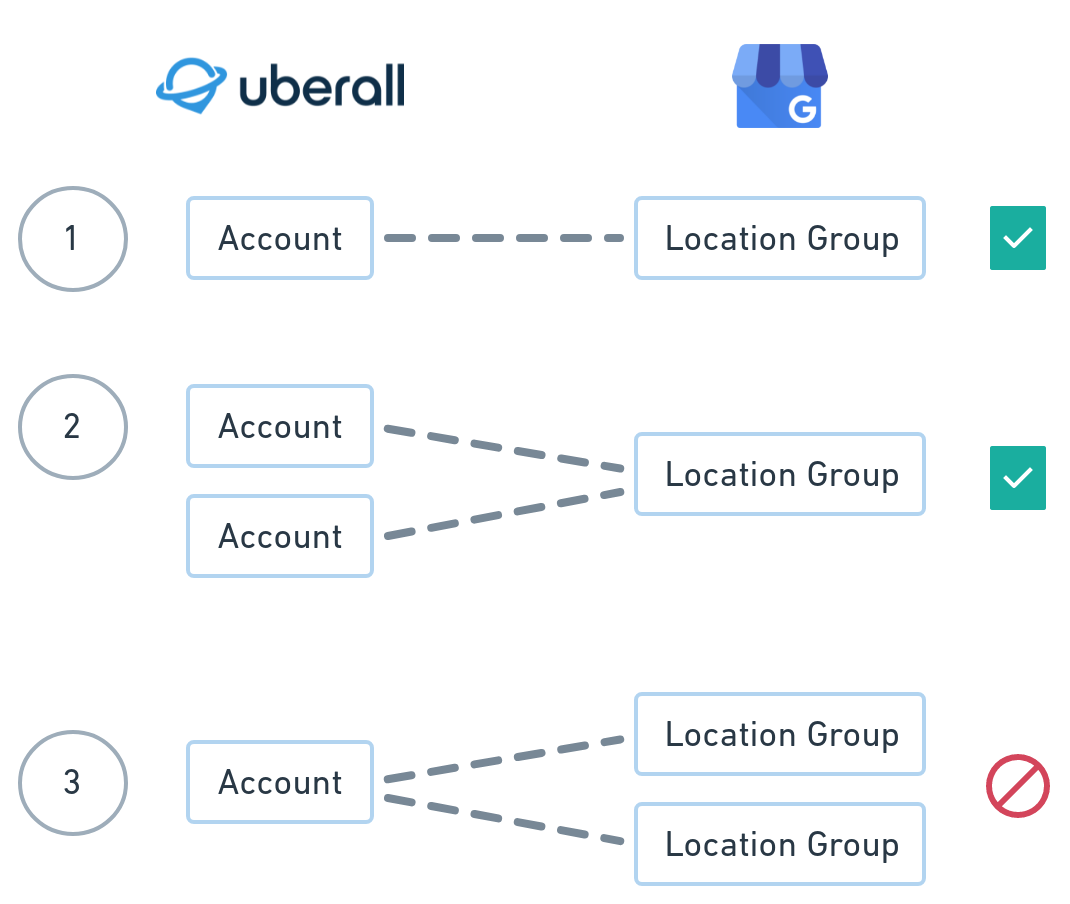
The bulk connection enables all locations in one account to connect to one location group.
The recommended structure to connect is to mirror the Accounts and Location Groups 1:1. However, you have the flexibility to connect multiple accounts to one location group.
It is not possible to connect one account to multiple location groups.
Warning
It is important that the location information in the platform is matching the GBP location address data (including pin placement).
The identifier in Uberall must match the Store Code in Google.
If these are differing greatly the system will not recognise the location and potentially create a duplicate.
Before proceeding, make sure you go through our checklist for connecting Google Business Profile.
Once you have read the information above and are ready to connect your Google Business Profile, please proceed to the steps below.
Log in the platform and, if you manage multiple accounts, filter for the Business you wish to connect.

This step is important because you want to make sure you are connecting the account to the right location group.
Next, select one of the filtered locations and go to the 'Directories' tab.
|
Step 1 Connect Click on "Connect" 
|
Step 2 Start
Click on "Start" 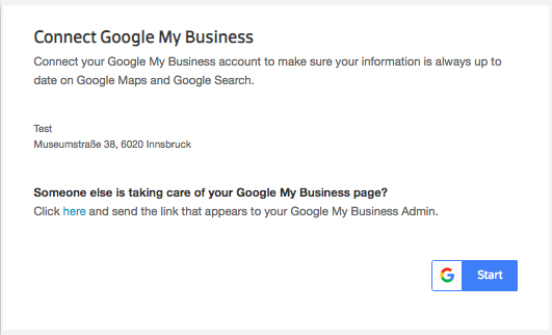 |
Step 3 Sign in
Enter account details and click on "Sign in"

|
||
|
Step 4 Allow Access
Click on "Allow"

|
Step 5 Select Account
Select the location group that contains the location
|
Step 6 Connect
Click on "Connect all locations"
|
Managing the Different Connections Statuses
Allow the system three to five days to match and connect all the locations. Click here to learn more about managing the connect status of your locations.
Checklist for Connecting to Google
- Have “Manager” Access
- Should be logged-in the Google account containing the locations
- Make sure the location data matches existing listing data for our system to recognise the existing location
- Make sure the store codes on Google and the location identifiers on the platform match
- Allowing all permissions in the connect flow is extremely important, otherwise, we might not be allowed to successfully push updates to the listings.