Special Hours
Learn about adjustments to store hours during a special event, such as holidays or seasonal changes.
Table of Contents
Introduction
Customers commonly use a location's listing to determine the hours of operation which makes having the right information crucial to building trust and confidence with the business. Most locations will have a general operating schedule that doesn't change much throughout the year. However, there are some instances when a business will temporarily change that schedule such as holidays, renovations, events and more. It's crucial for a business to plan ahead and ensure the location's listings reflect those unique schedule changes.
Special Opening Hours is a feature available in the Uberall platform for businesses to use when there are temporary changes to a locations operating schedule. This enables the business to set a unique schedule for certain days without regularly modifying the general operating hours. Some sites like Apple Maps, Google, Bing, and others accept these Special Opening Hours and display them accordingly. Once completed, the operating schedule reverts back to the standard hours of operation.
Special Opening Hours should be used when the location is open but with modified hours or the location is closed for less than a week. If a location is closed for more than a week, perhaps because of renovations, the Temporarily Closed status should be set on the location.
Video Walkthrough
How can I configure Special Opening Hours?
Uberall offers a variety of ways for users to set Special Opening Hours within the platform! Special Opening Hours can be managed on a case-by-case basis or in bulk. Expand the options below to learn more about each option.
1. Update a Single Location
|
Step 1 Navigate to Location Profile |
For those managing one location, click on Profile on the top navigation bar and jump to step 4. 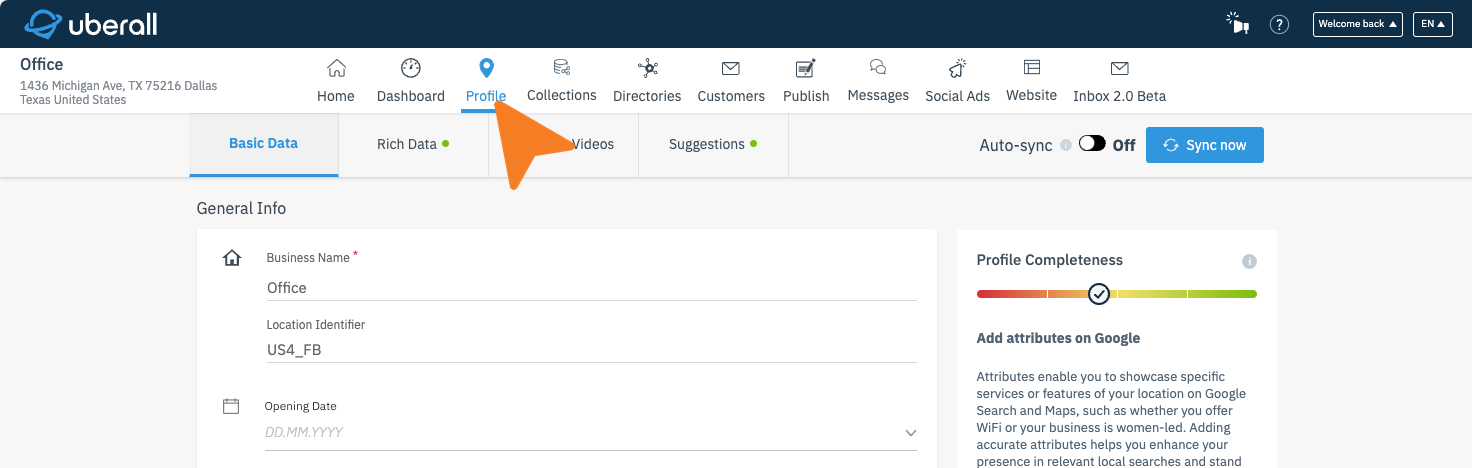
For those managing multiple locations, click on the "Locations" section on the left navigation bar. 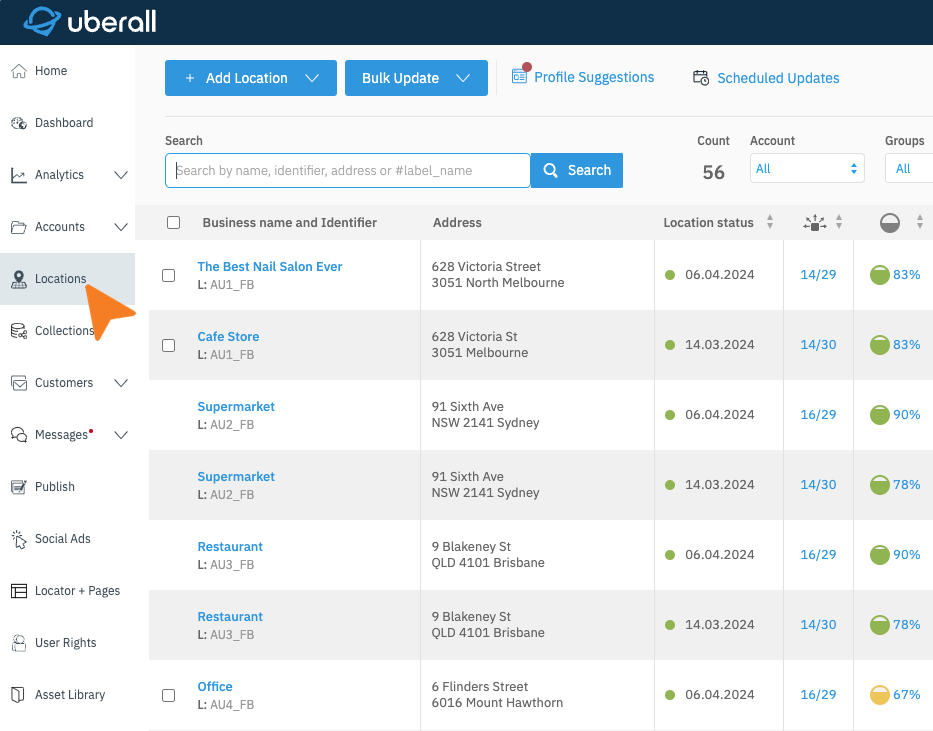
|
|
Step 2 (optional) Search for a location |
Use the search box to help you find the location that you want to make updates to. 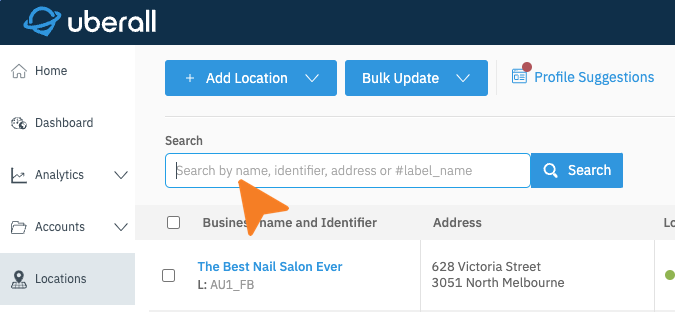
|
|
Step 3 Click Location Name |
Click the name of the location that you want to update. 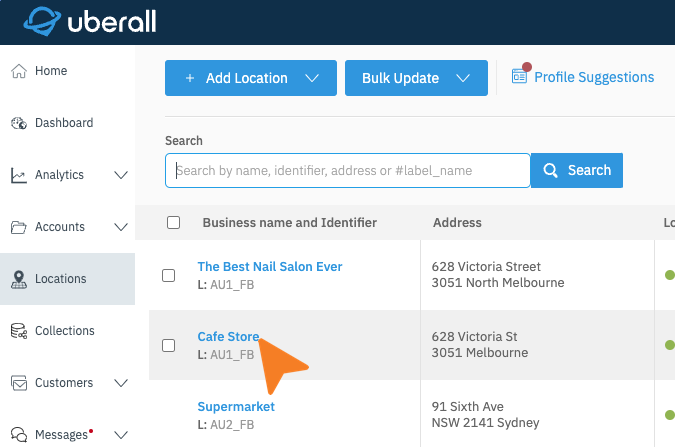
|
|
Step 4 Find Special Opening Hours |
In the Basic Data tab, scroll down until you find the Contact Info section which contains the Special Opening Hours. 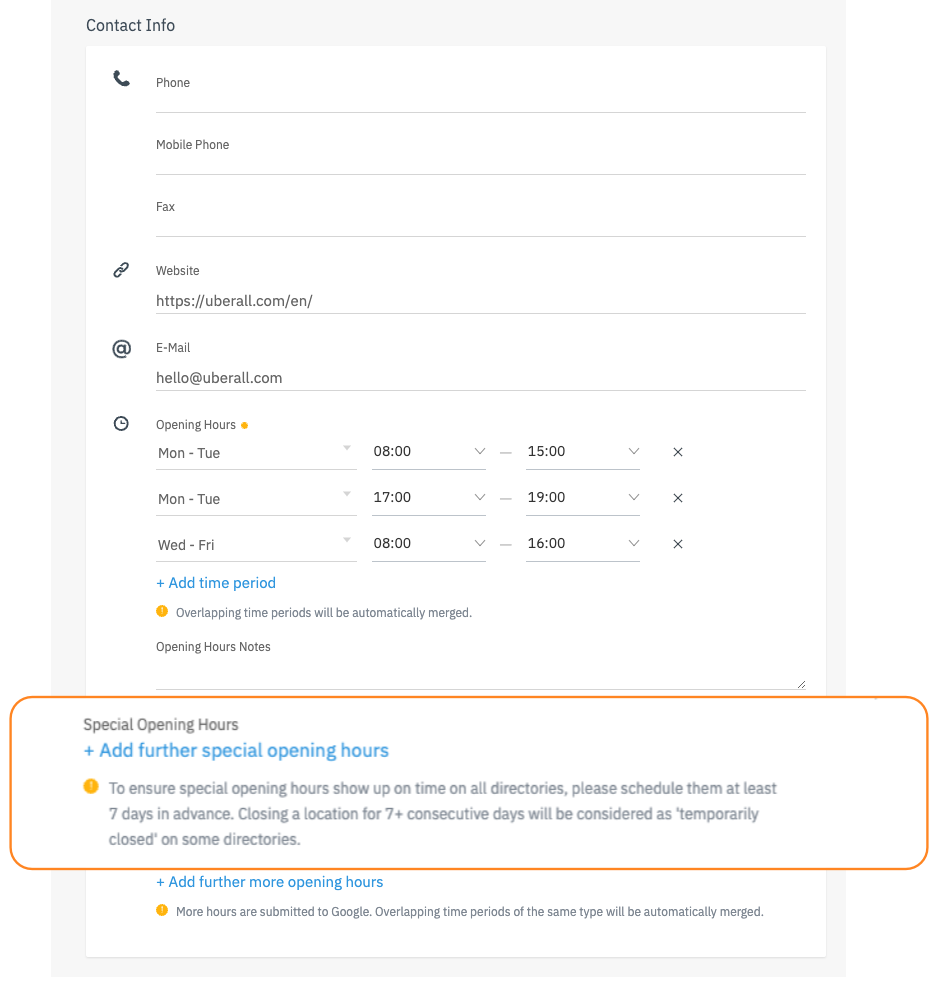
|
|
Step 5 Click “+ Add Further Special Opening Hours” |
Click on the blue “+Add Further Special Opening Hours” option to reveal a new opening hours field. 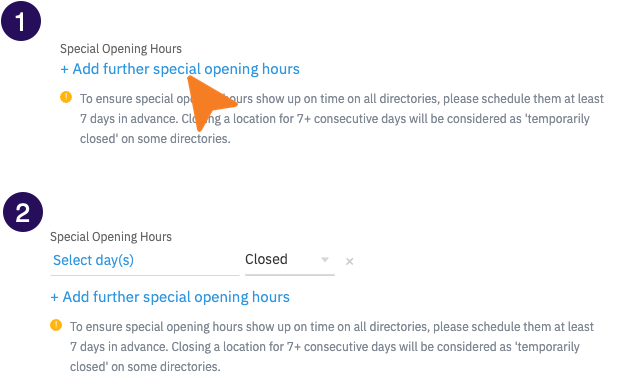
|
|
Step 6 Set Date Range |
Click on the Select day(s) field to reveal a calendar. This will enable you to choose a specific date or a date range that the Special Opening Hours will be applicable for. 
|
|
Step 7 Set Location Status |
The Special Opening Hours are set to “Closed” by default; however this can be changed by clicking on the status dropdown. 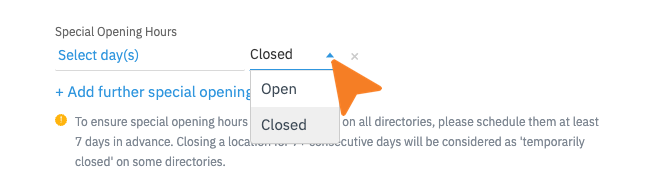
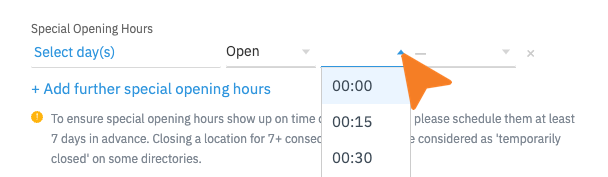
If “Open” is selected in the step above, be sure to set the opening and closing time in the newly provided fields.
|
|
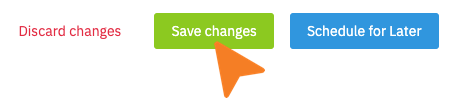
Step 8 Finalize Changes |
Once Special Opening Hours have been configured, you'll want to click on “Save Changes.” With Auto-Sync enabled the changes will automatically be applied.
Alternatively, if you expect the location to be closed multiple dates, you can click “+ Add further special opening hours” again until you have the right amount of days. 
|
2. Update using the Bulk Editor
|
Step 1 Navigate to Locations |
Start by clicking on Locations in the left-navigation bar.
|
|
Step 2 Click Bulk Update |
At the top of the Locations page, Click on the Bulk Update dropdown menu. 
|
|
Step 3 Click Bulk Editor |
From the new dropdown menu, select the Bulk Editor option. 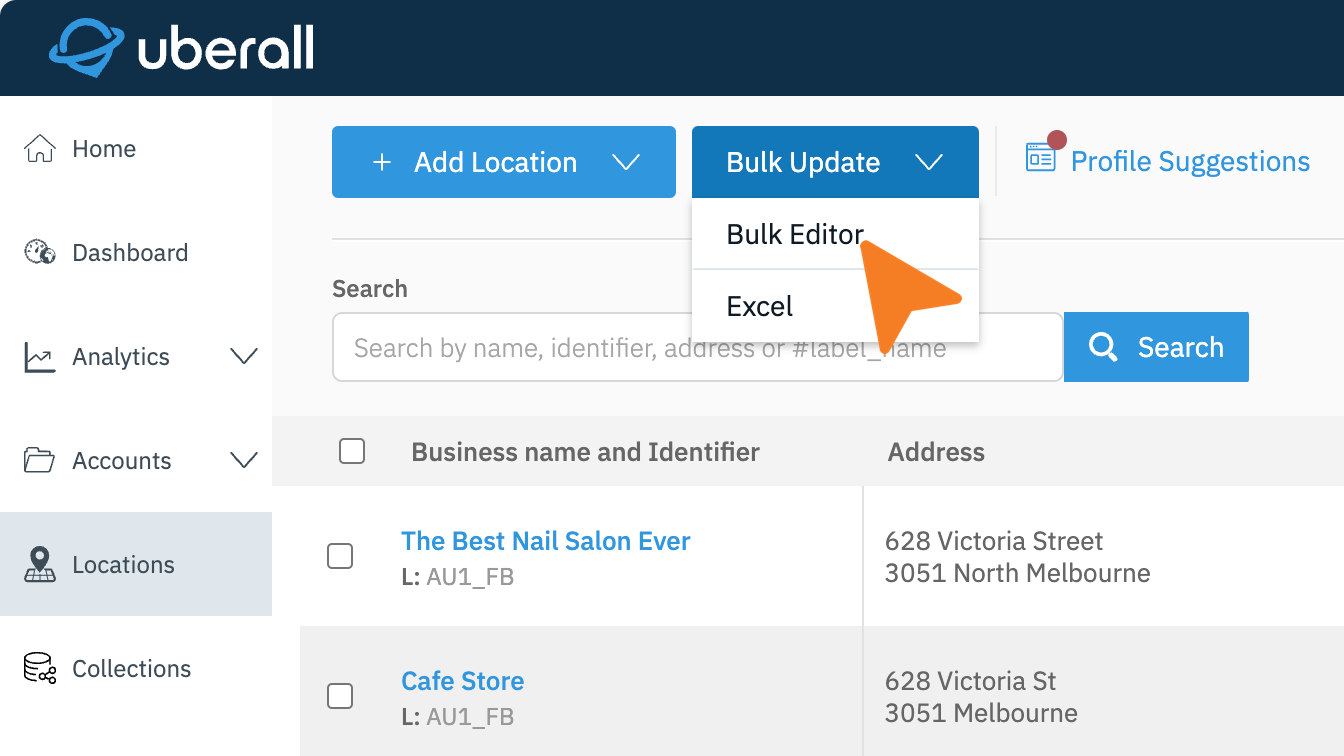
|
|
Step 4 Click + Add Locations |
Click the “+ Add Locations” button to launch the location picker. 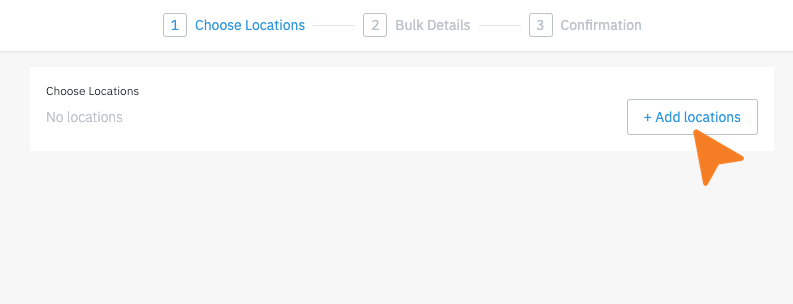 Use the Accounts filter, Labels, or Search to find the locations to opt-in for the Special Opening Hours.
Click on the “+” button(s) or "Select All" to opt-in locations followed by the “Select” button to complete the action. 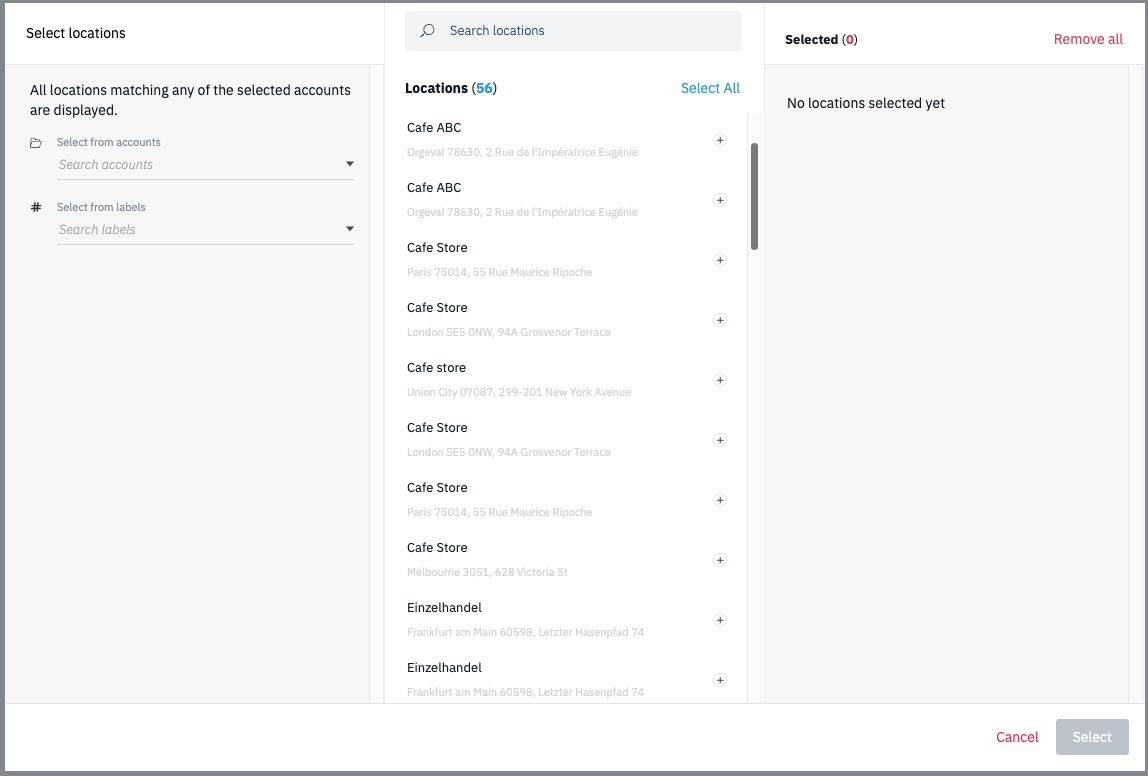
Lastly, click on the green “Next” button at the bottom after you have added locations. 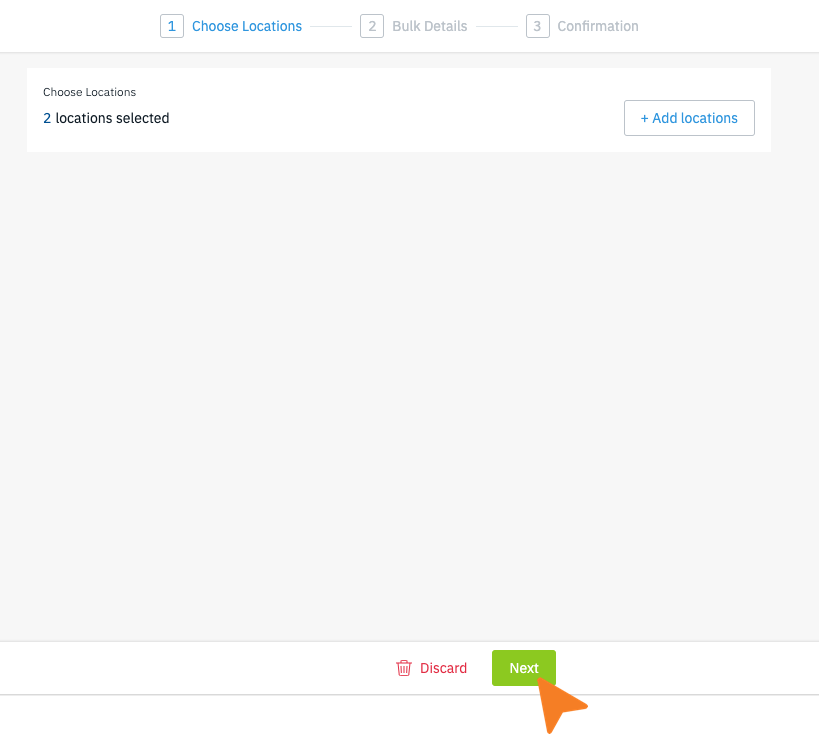
|
|
Step 5 Click + Add Special Hours |
Locate the + Add Special hours button in the Basic Data tab. 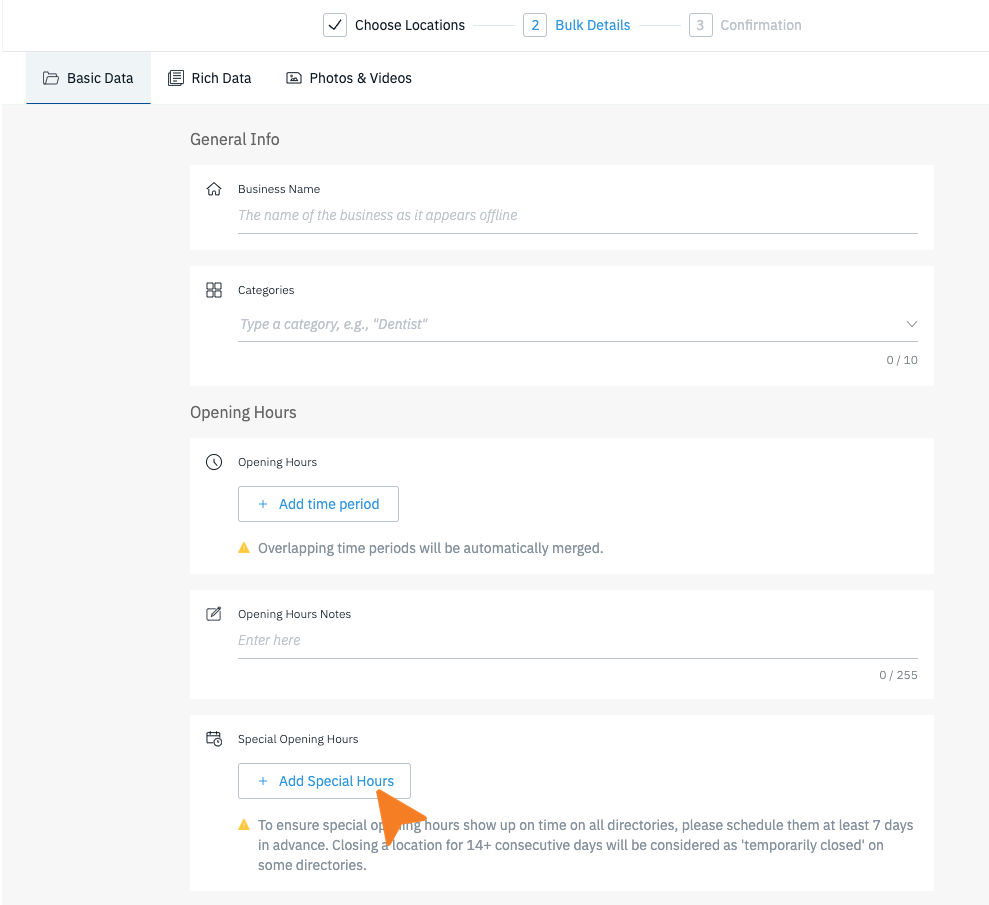
|
|
Step 6 Set a Date |
Click on the Select day field to reveal a calendar to pick a particular calendar date. 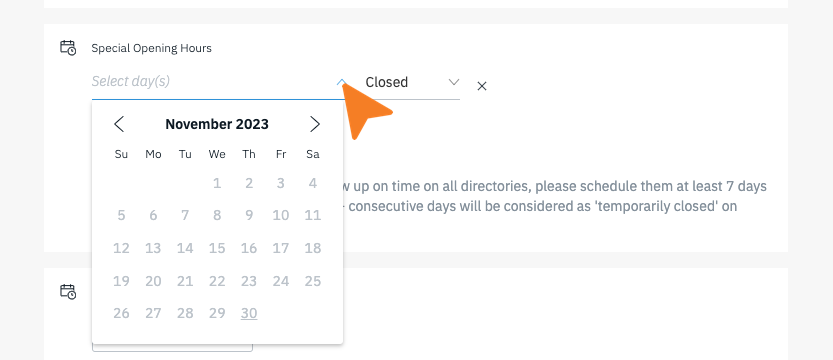
|
|
Step 7 Set Location Status |
By default, the location status will be set to closed. This can be changed by clicking on the status field. 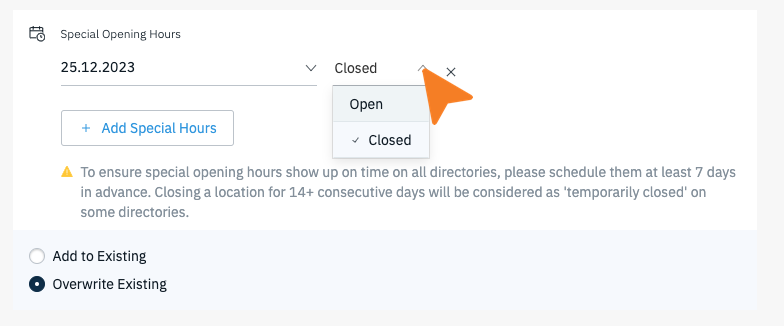
Choosing Open in the step above will require that an Opening and Closing time be set. Use the newly revealed fields to set the location's operating schedule. 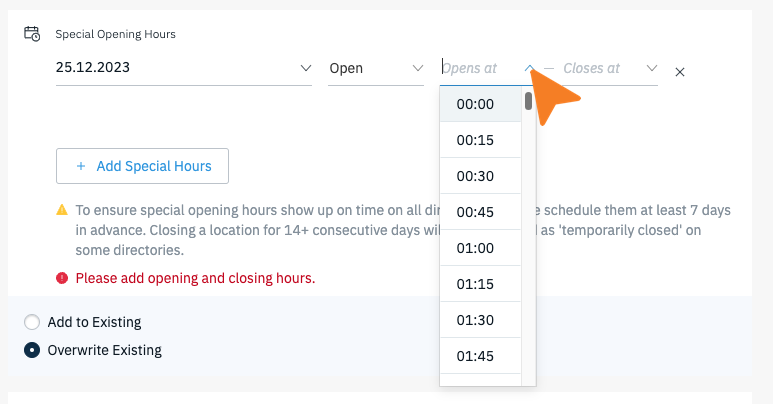
|
|
Step 8 Set Save Conditions |
After setting new Special Hours, you can decide to add to any existing Special Hours or overwrite the existing profile location data.
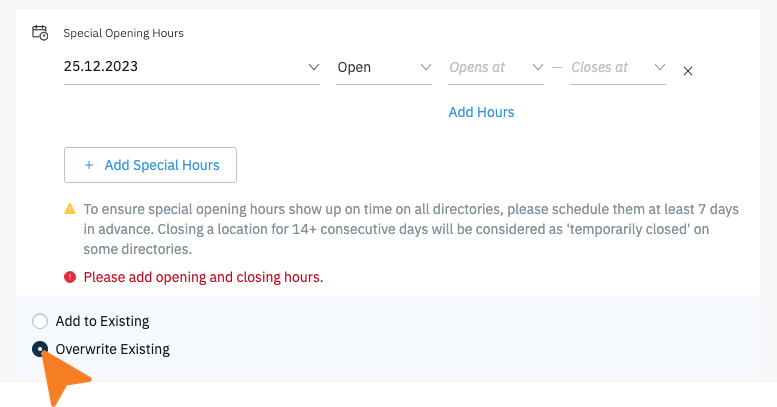 Once you have made your selections, click the “+ Add Special Hours” button again to add more or click Next to proceed.
|
|
Step 9 Review your selections |
The last page is the Confirmation page. Here you can review the changes you are about to save. Review the Updated Fields and Selected Locations to make sure the data is correct. 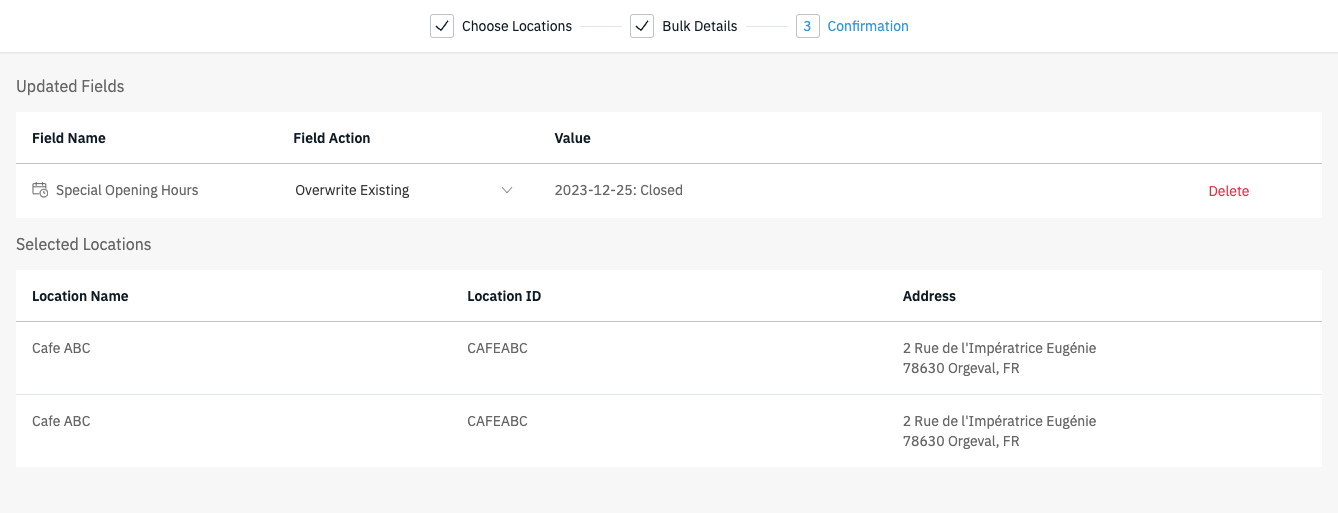
Note: This is your last chance to verify and adjust the Field Action to overwrite or add to existing data. 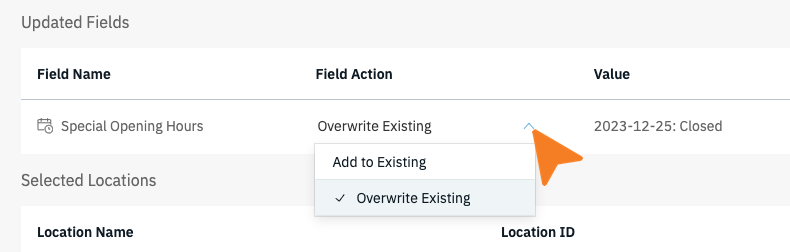 |
|
Step 10 Finalize Changes |
Once you have reviewed the Confirmation Page, click on the Save Changes button at the bottom of the page. Click Update from the list to complete your changes. 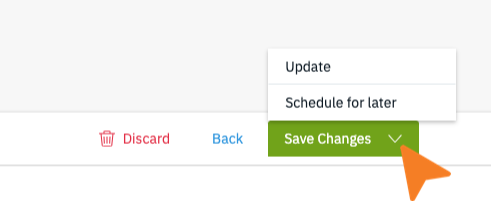 Note: Special Opening Hours do not need to be "scheduled for later" as they inherently include a specific date to publish onto the location's listings. |
3. Update using a Spreadsheet Upload
|
Step 1 Navigate to Locations |
Start by clicking on Locations in the left-navigation bar.
|
|
Step 2 Click Export |
From the locations page, click on Export to download an Excel spreadsheet. 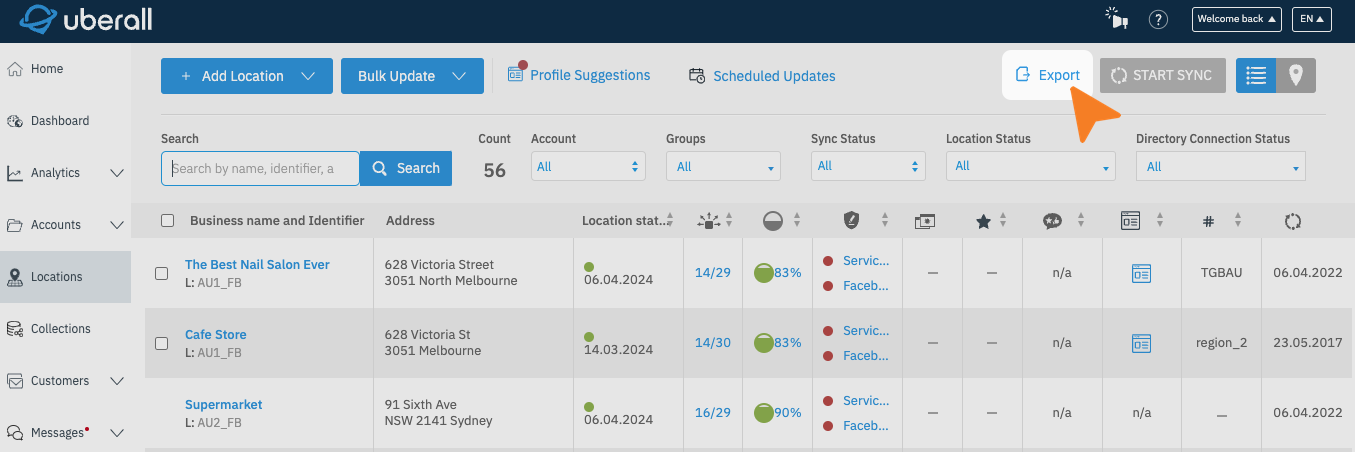
|
|
Step 3 Update Spreadsheet |
Locate the “specialOpeningHours” column in the spreadsheet (typically column “W”). Update the column with the Special Opening Hours schedule. Multiple days can be separated by a semicolon (;). 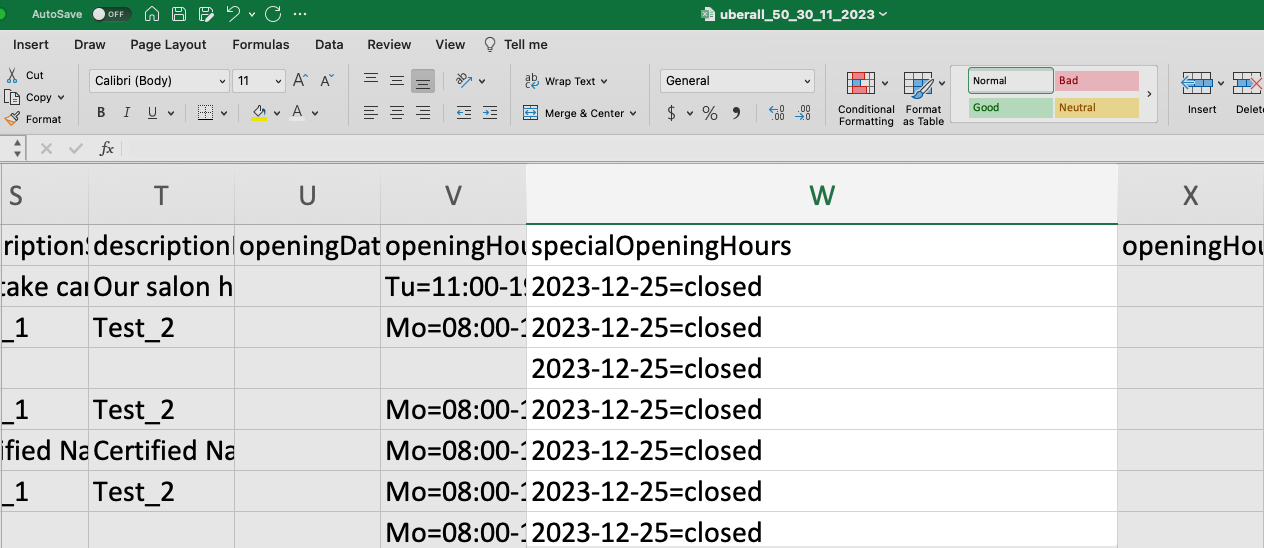 Data Format Examples:
You can remove any rows of locations you do not want to update. Additionally, all columns with the exception of Business Identifier and Identifier can be removed if you only want to update the Special Opening Hours. 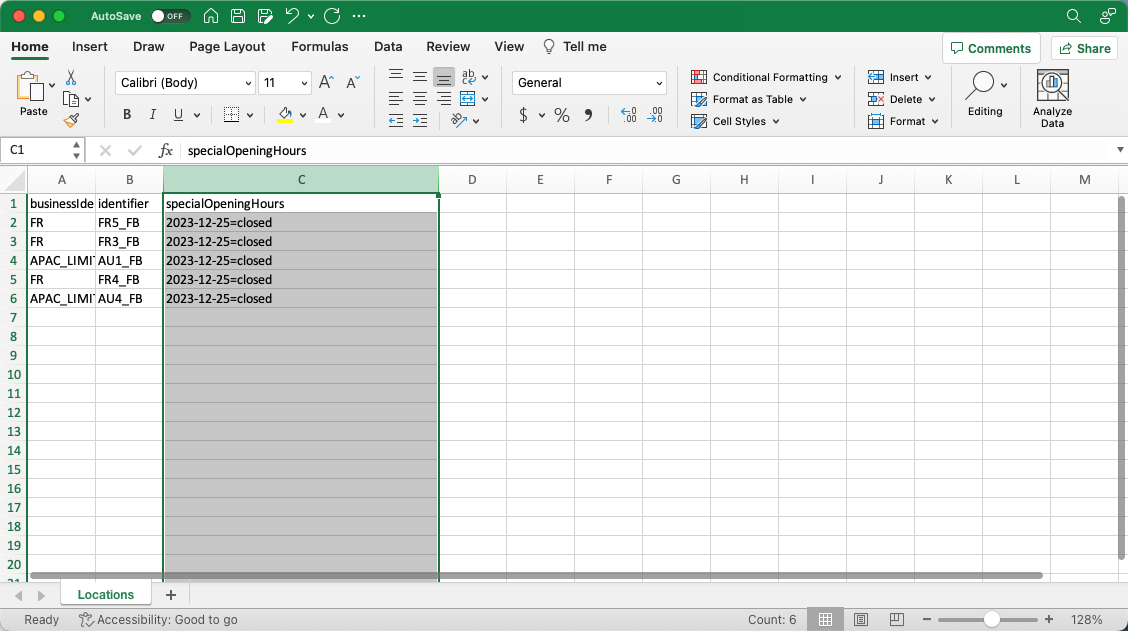
|
|
Step 4 Click Bulk Update |
At the top of the Locations page, Click on the Bulk Update dropdown menu.
|
|
Step 5 Click Excel |
Click on the Excel option from the dropdown menu. 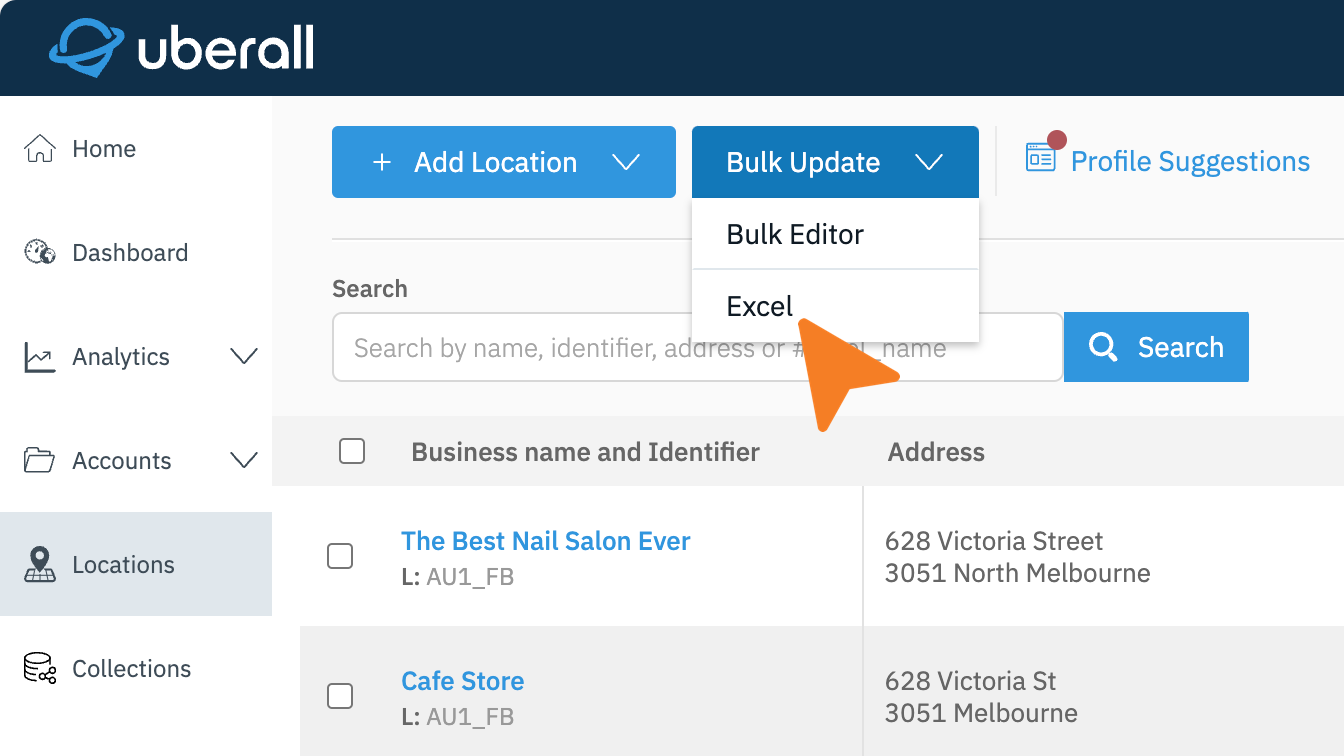
|
|
Step 6 Upload File |
Click on Select File or Drag and Drop the updated Excel file into the space provided. 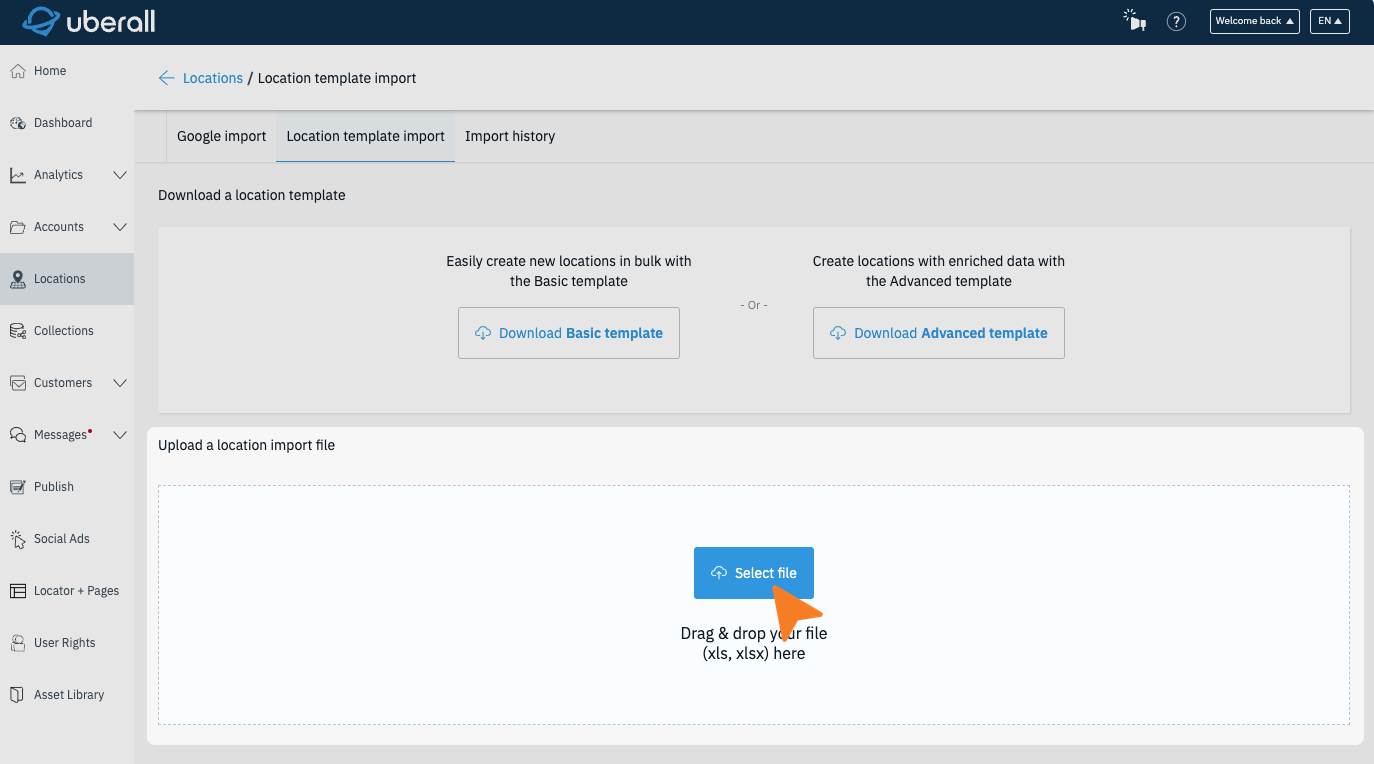
|
|
Step 7 Complete Upload Process |
Review the Column Matching page to ensure that the data will upload correctly. Click Continue to proceed. 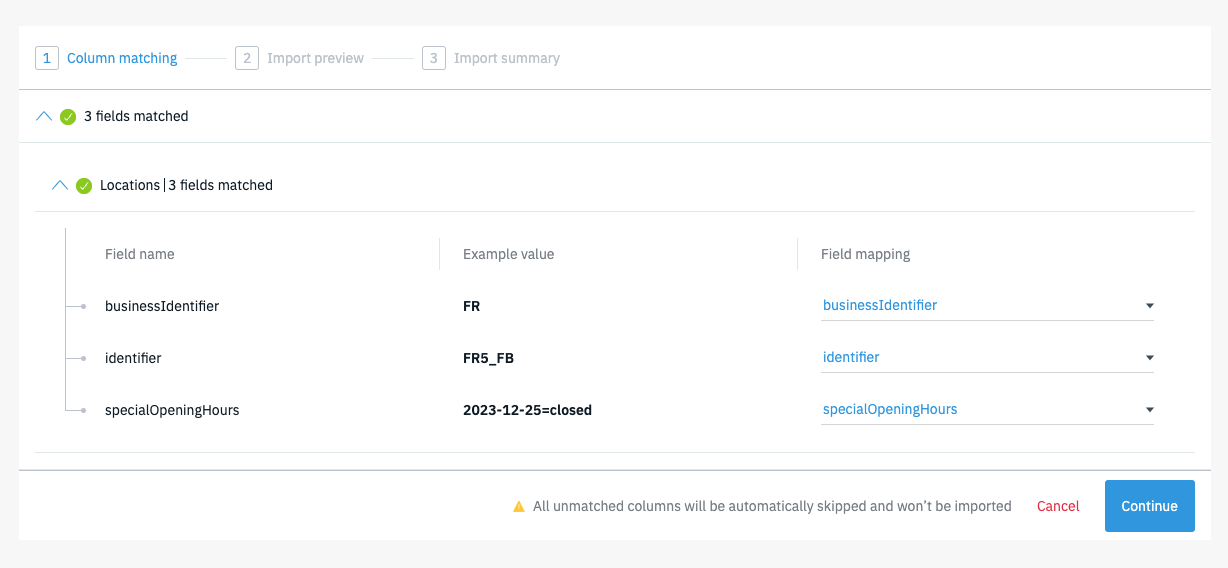
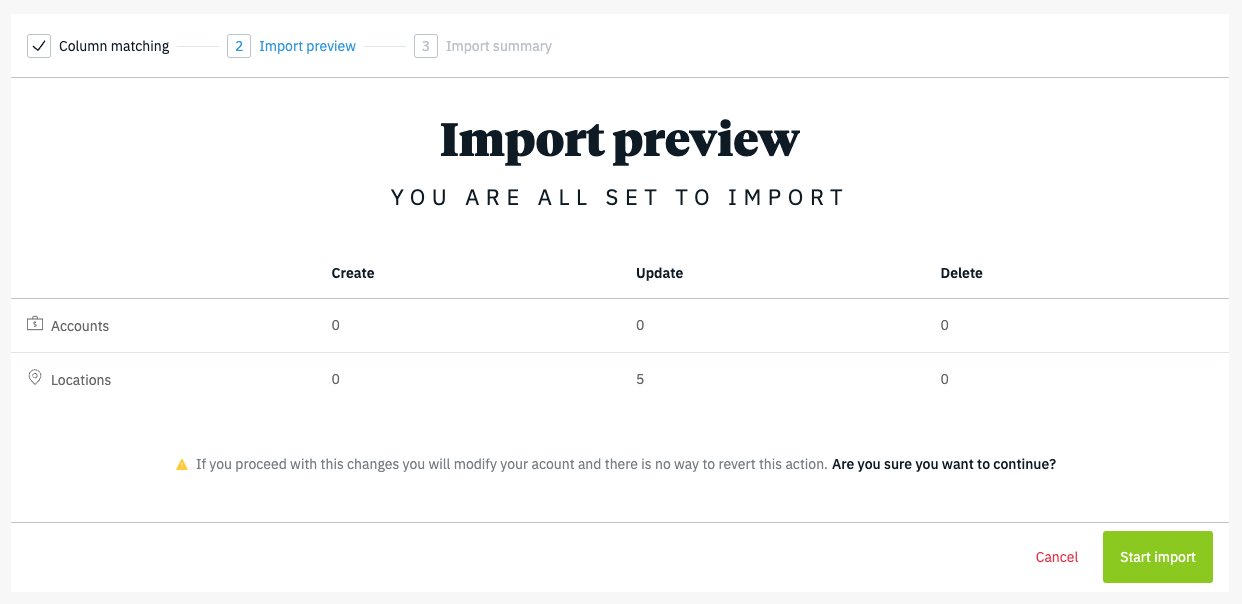
Review the Import Preview. The Special Opening Hours are counted in the Locations row. Click on Start Import and review the summary once completed.
 |
4. Update using the Mobile App
|
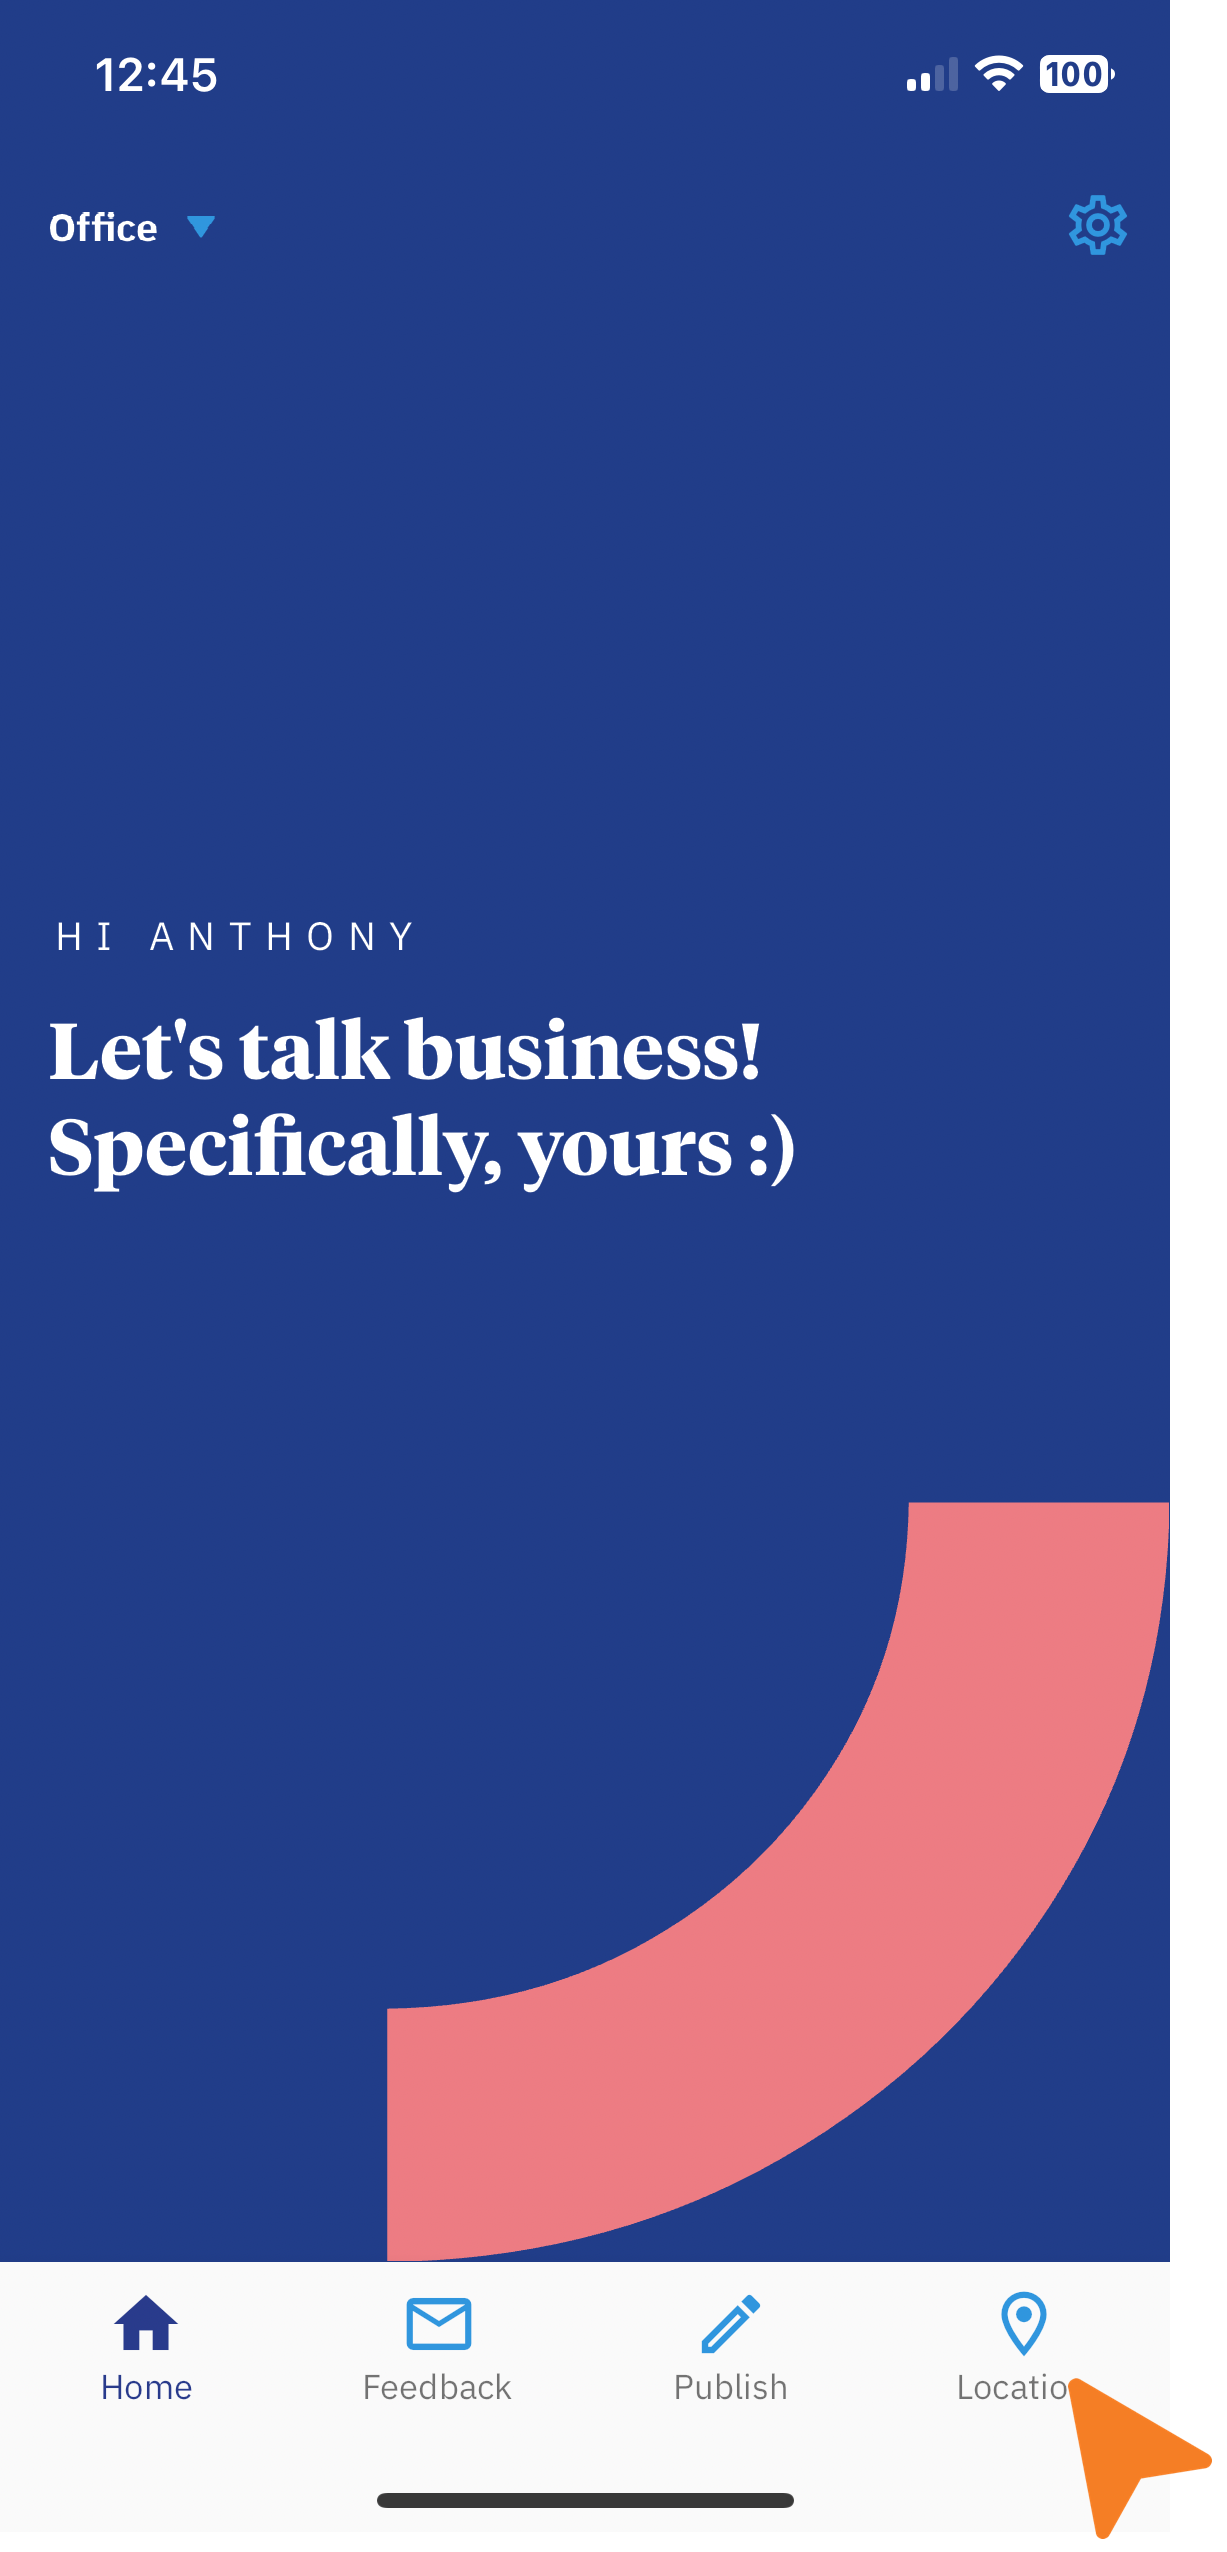
Step 1 Navigate to Location |
Start by tapping on the Locations tab on the bottom navigation.
|
|
Step 2 Select Location |
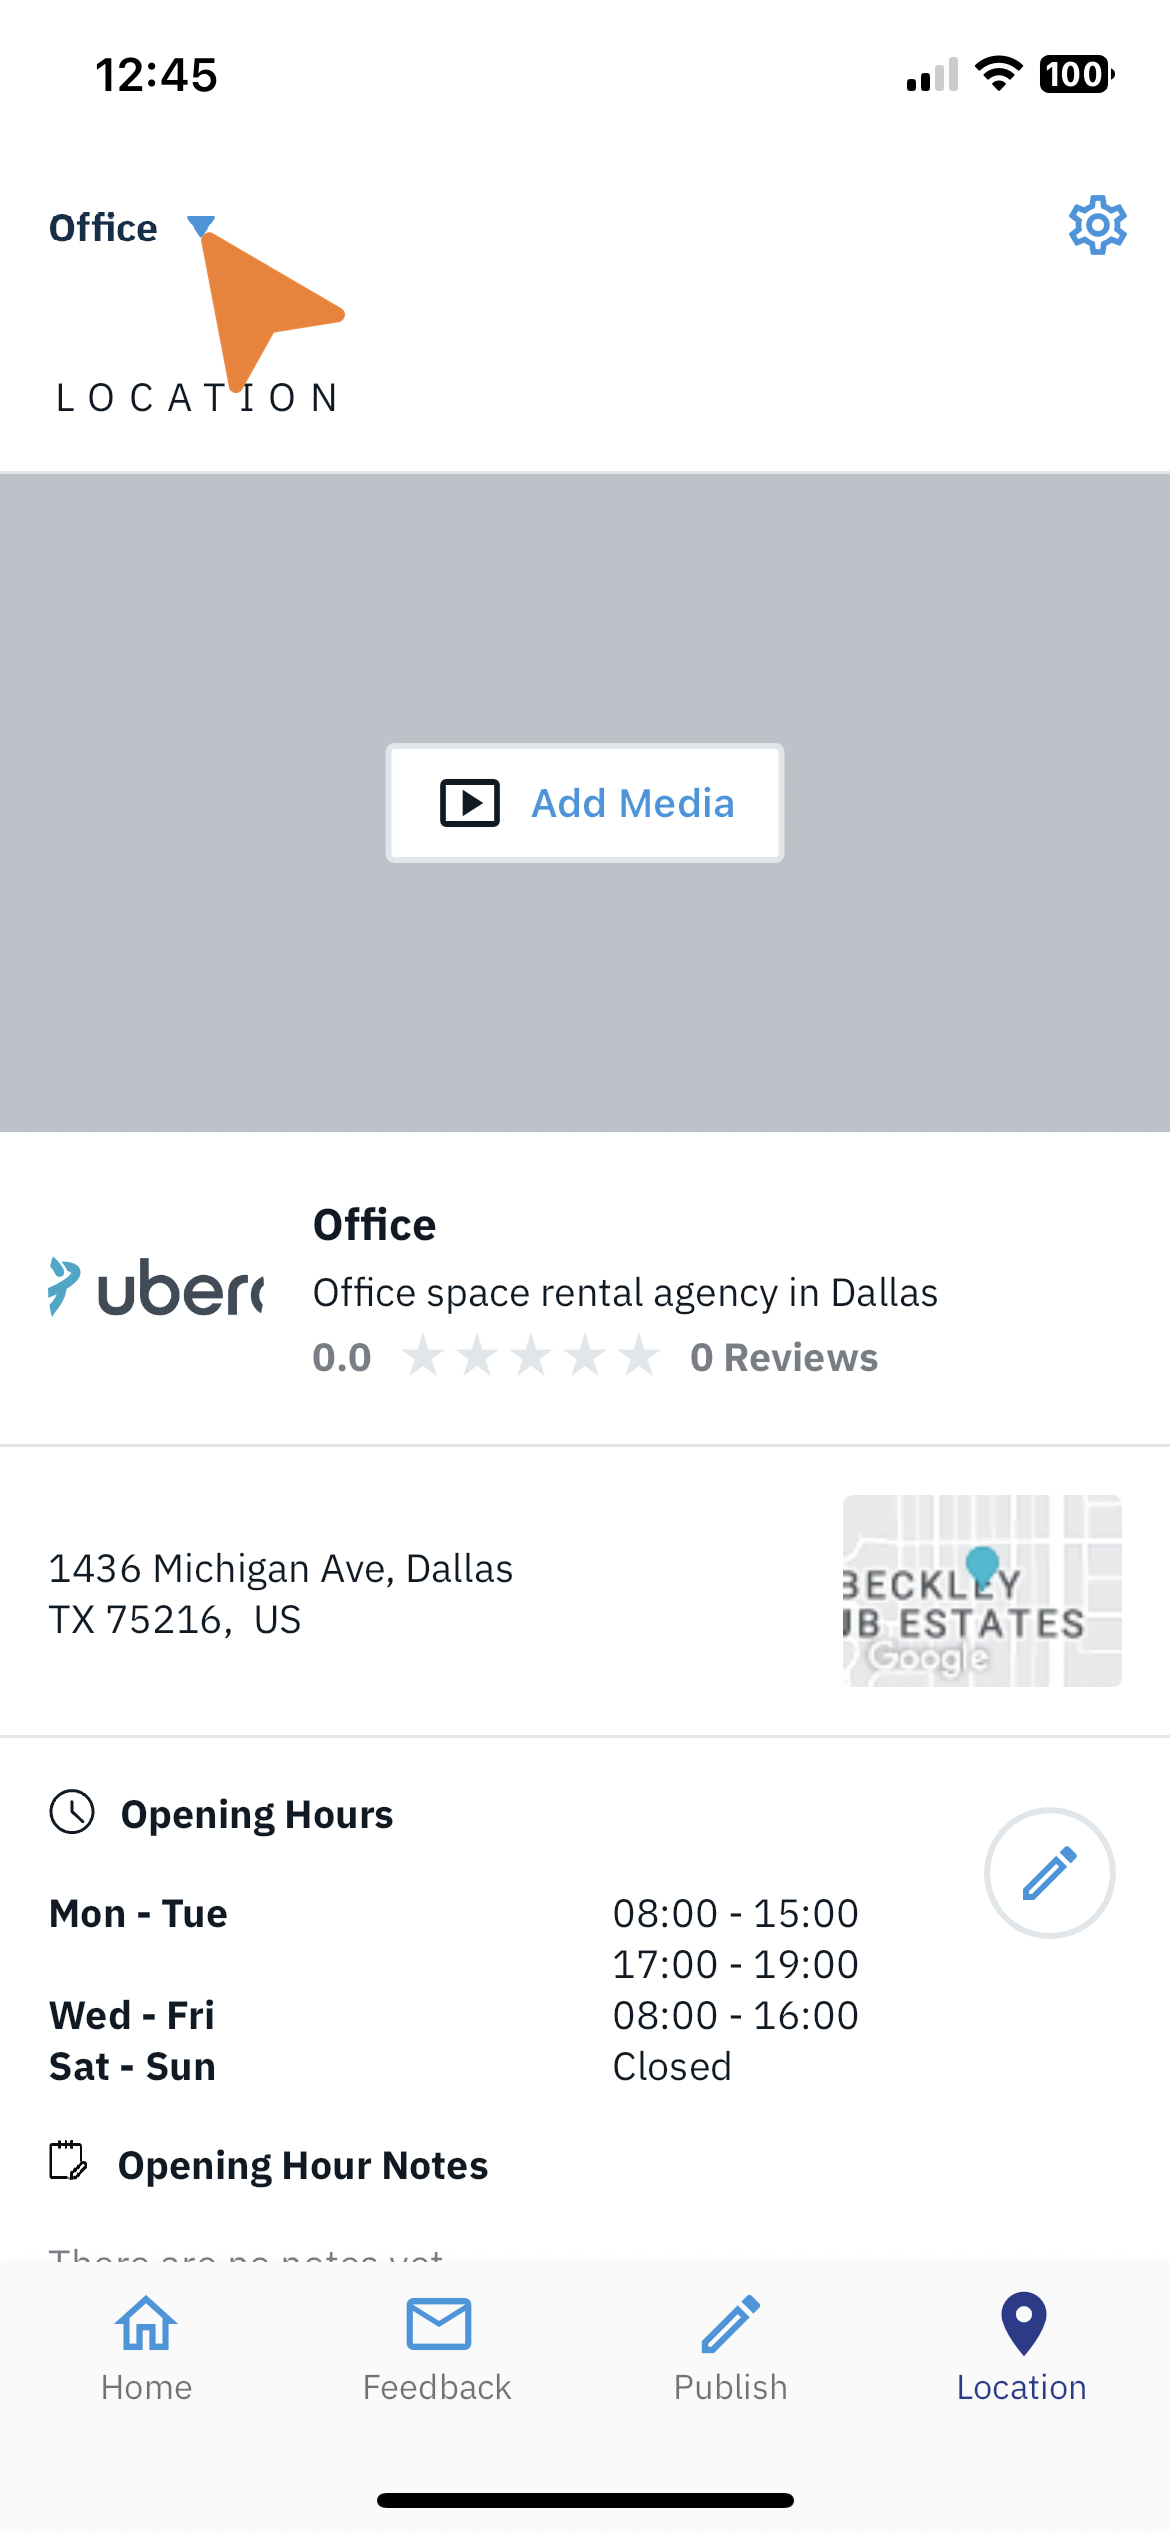
If you manage multiple locations, be sure to choose the location that you wish to update. Tap on the top left corner to reveal the list of available locations.
|
|
Step 3 Tap Create Special Opening Hours |
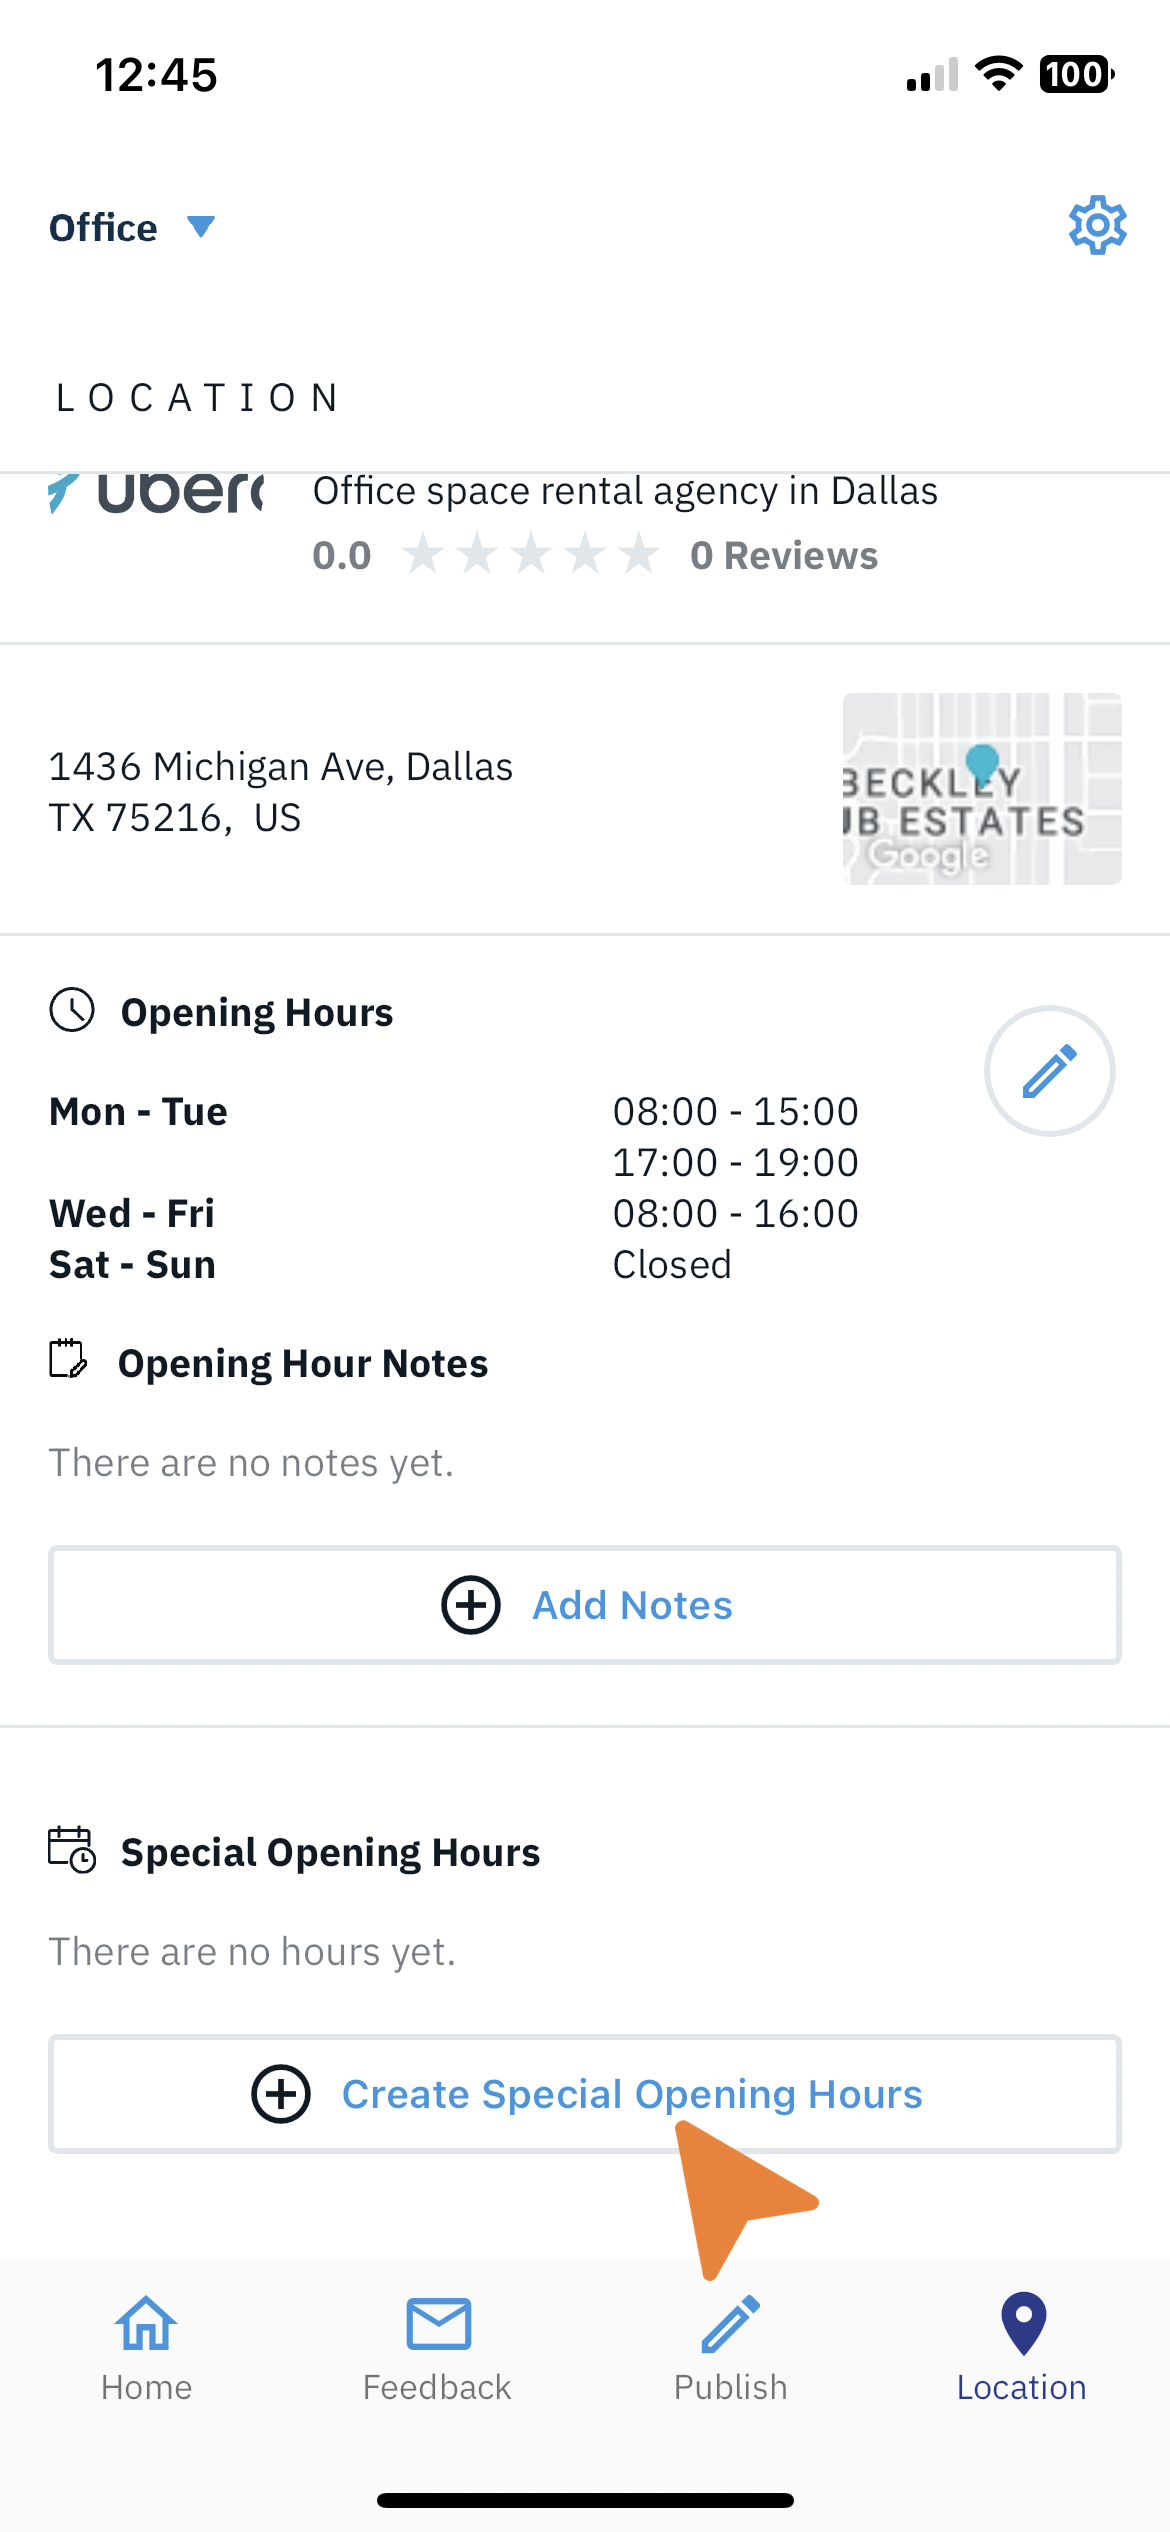
Once the location is set, scroll down the Location page until you find Special Opening Hours at the bottom. Click on Create Special Opening Hours.
|
|
Step 4 Set the Date |
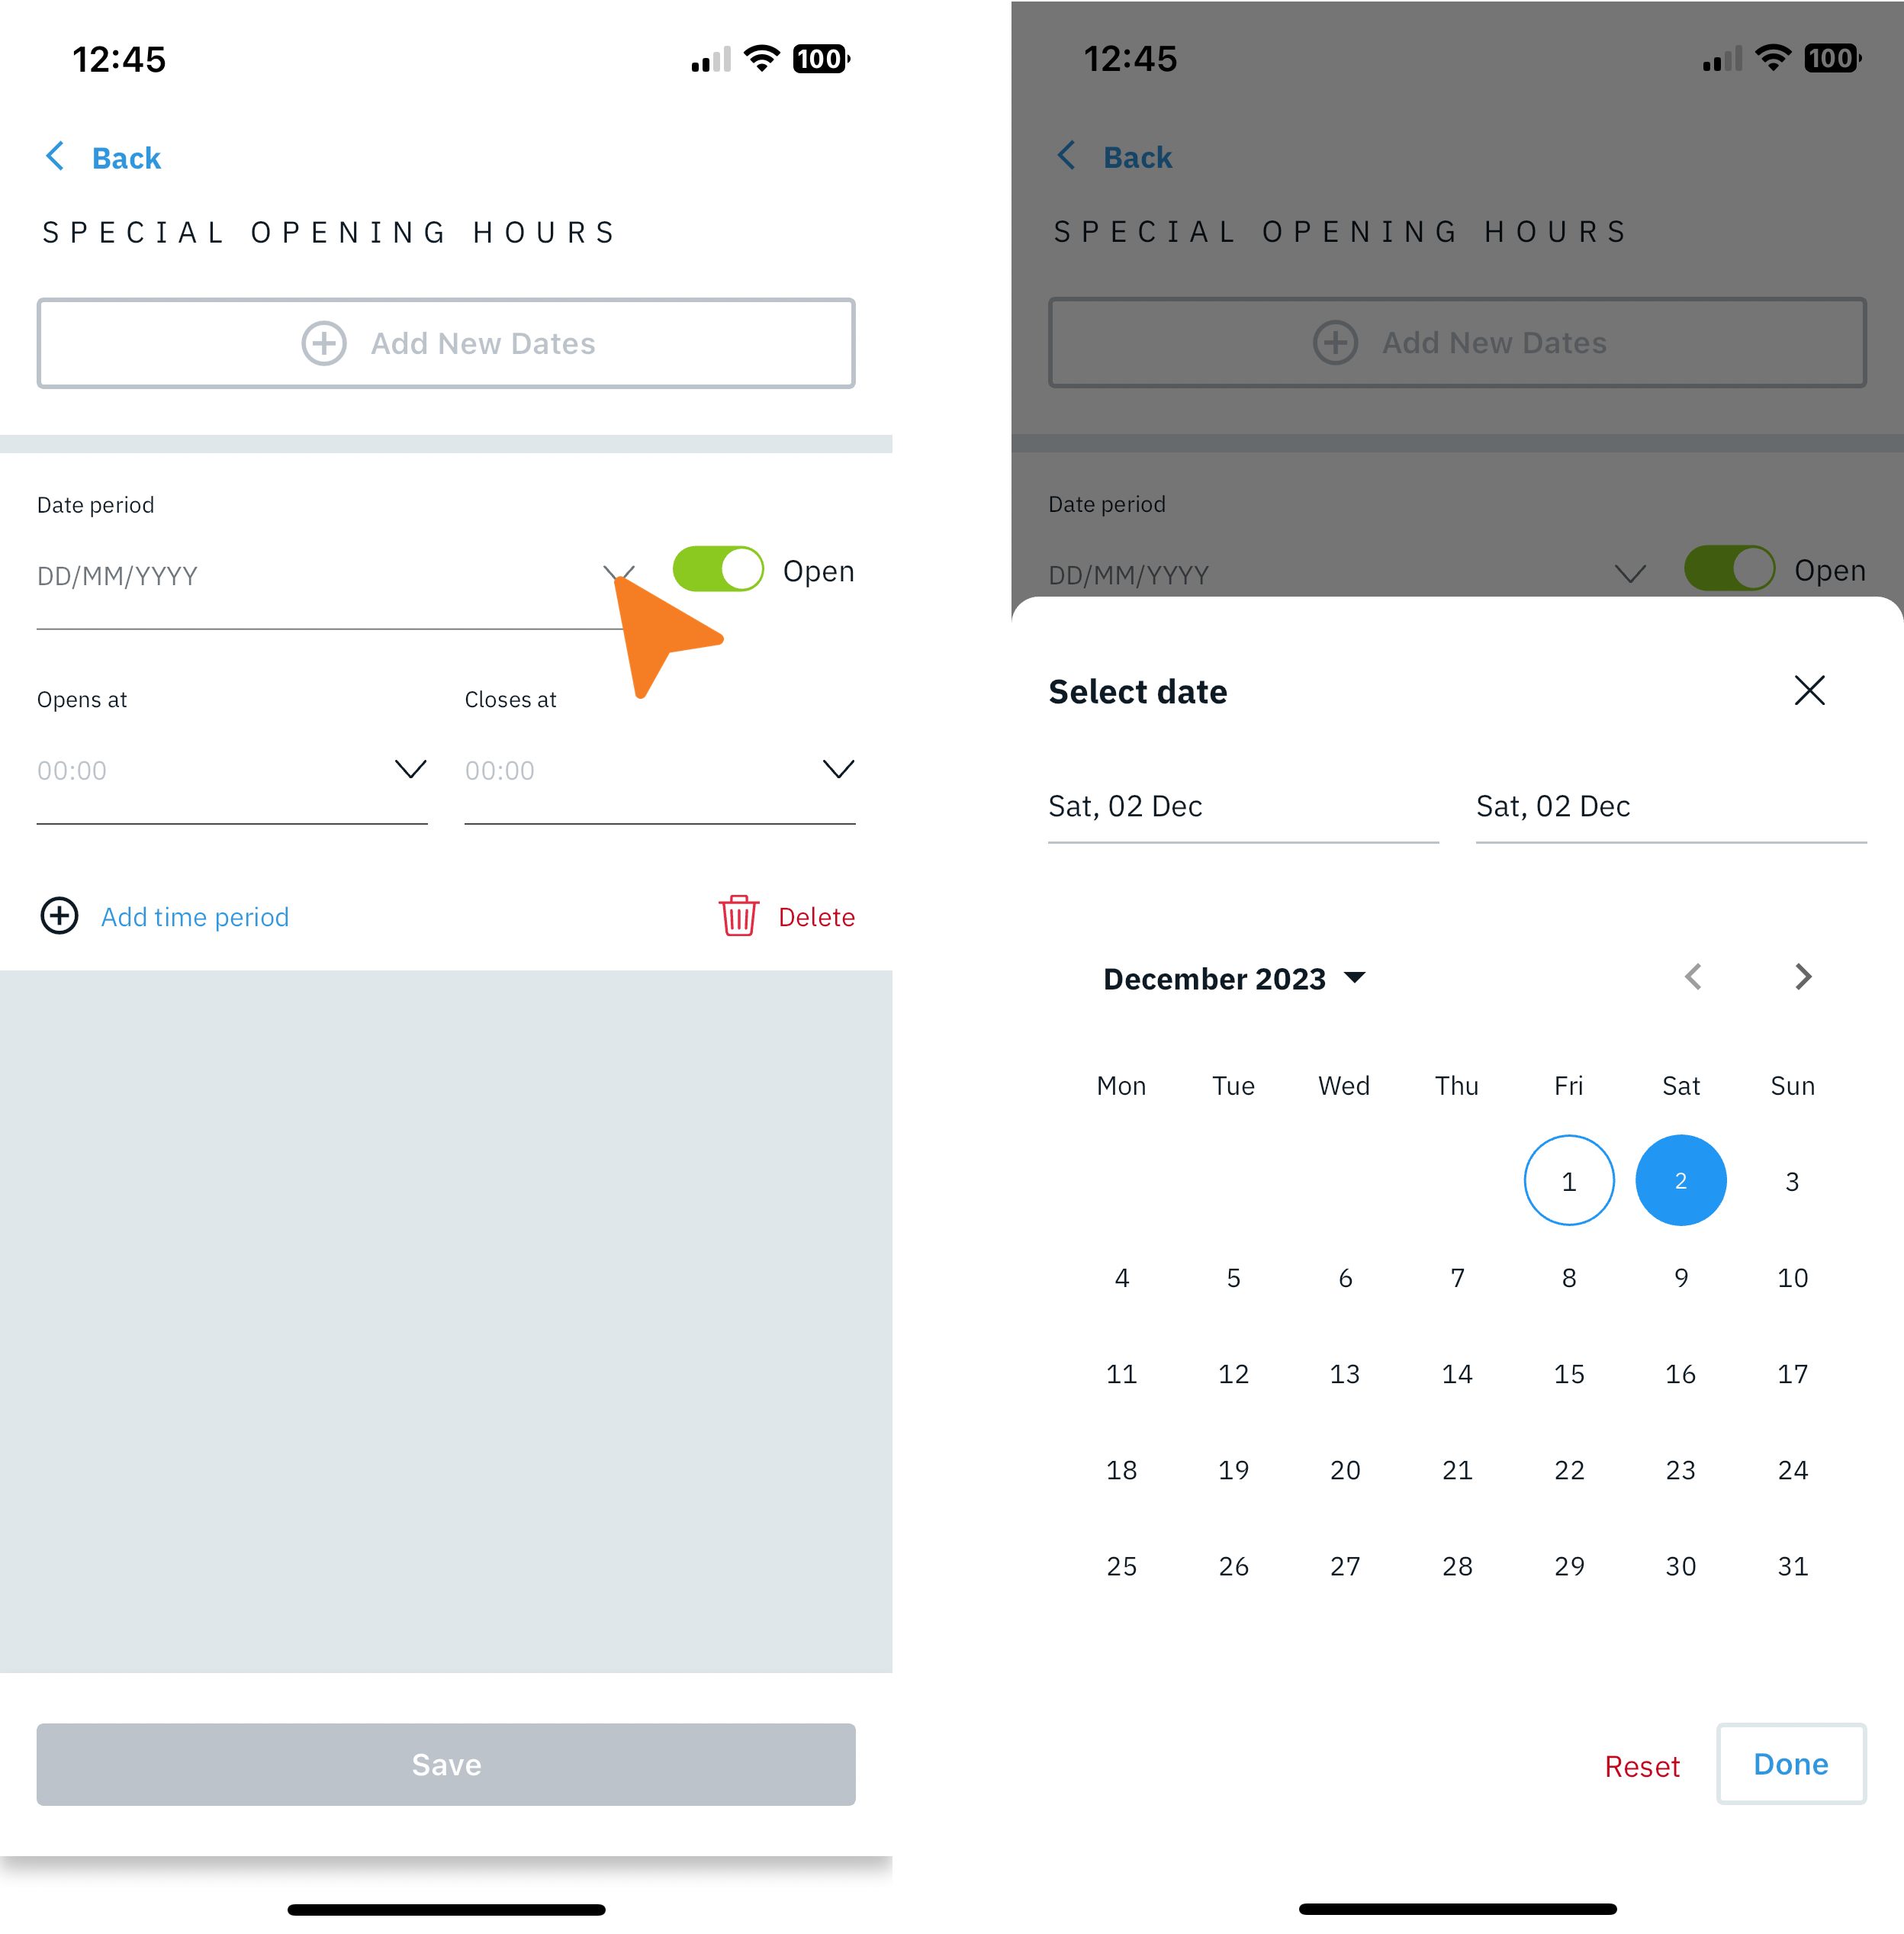
On the new page, tap on the date field to reveal a calendar selection.
|
|
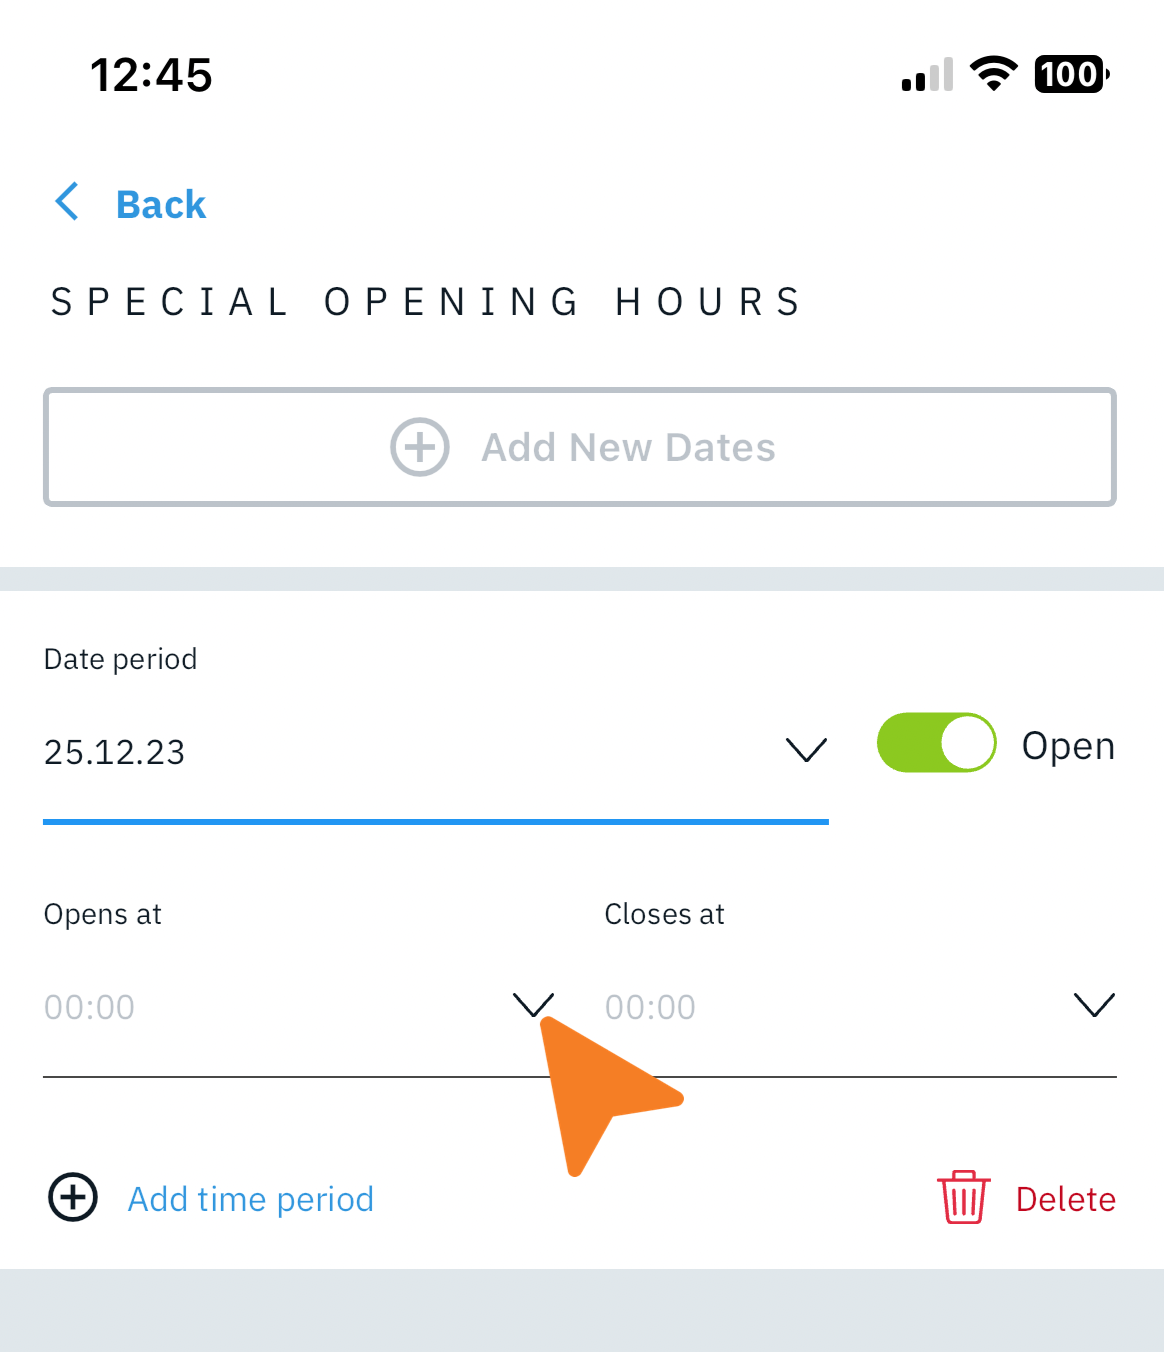
Step 5 Set Location Status |
Use the slider to determine if the location will be opened or closed. 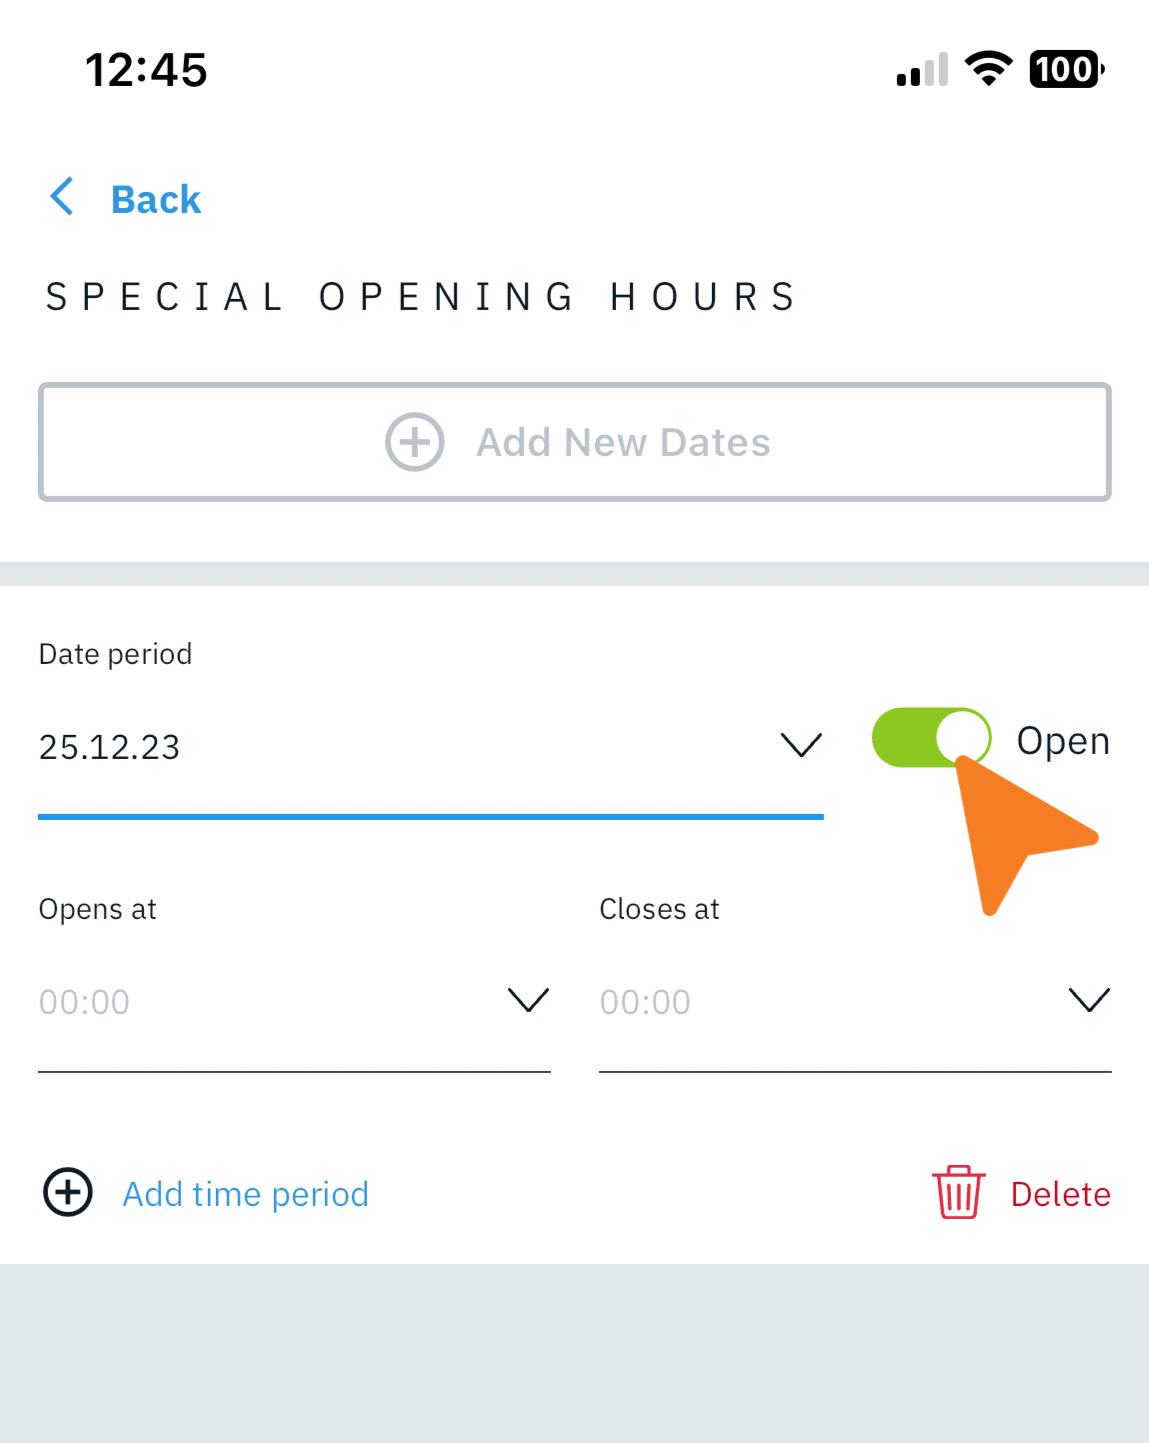
Choosing Open in the step above will require that an Opening and Closing time be set. Use the fields to set the location's operating schedule.
|
|
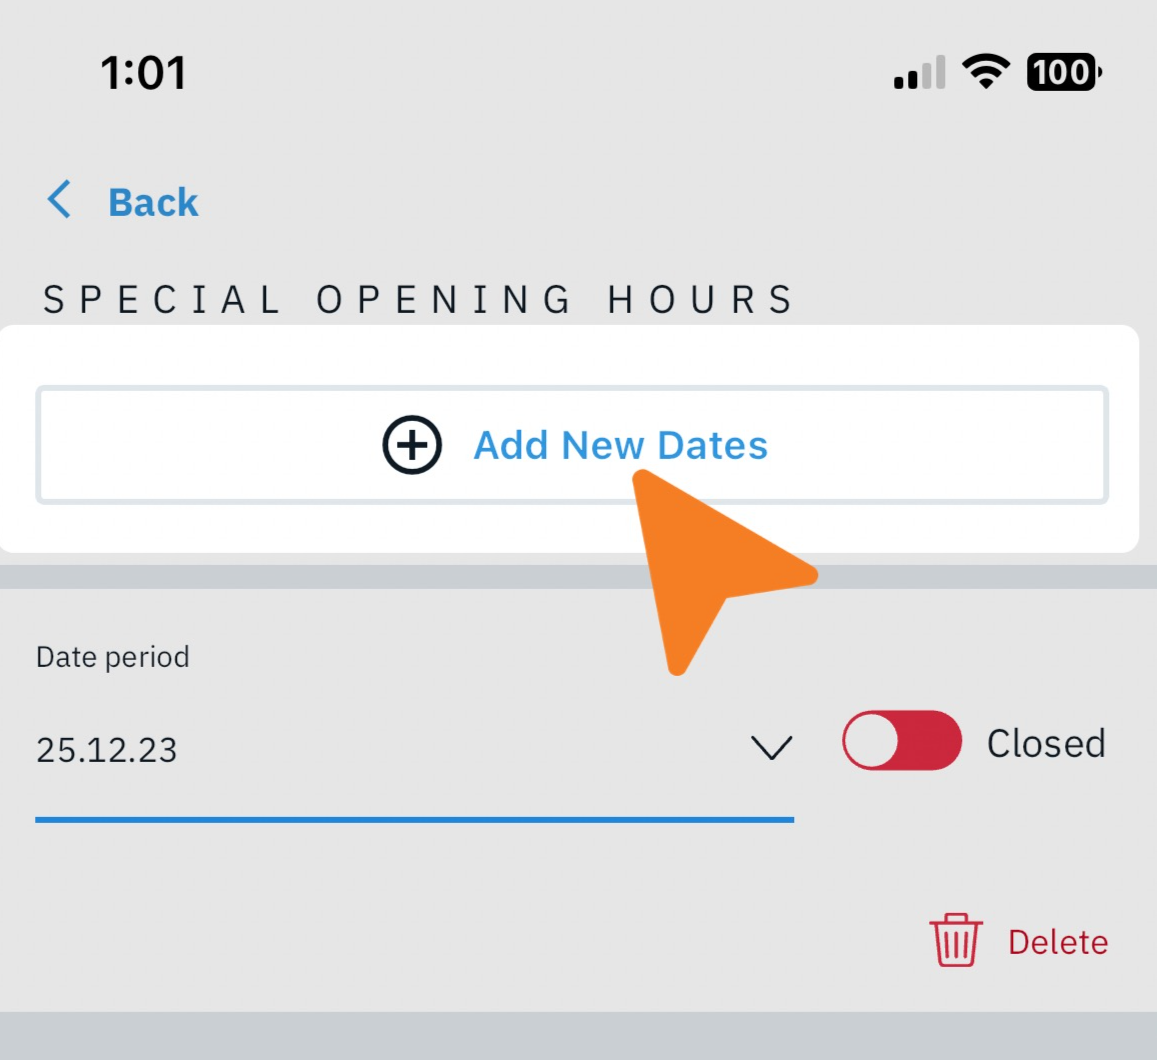
Step 6 Finalize Changes |
Now that the Special Opening Hours have been set, you can tap on Save to finalize the changes. 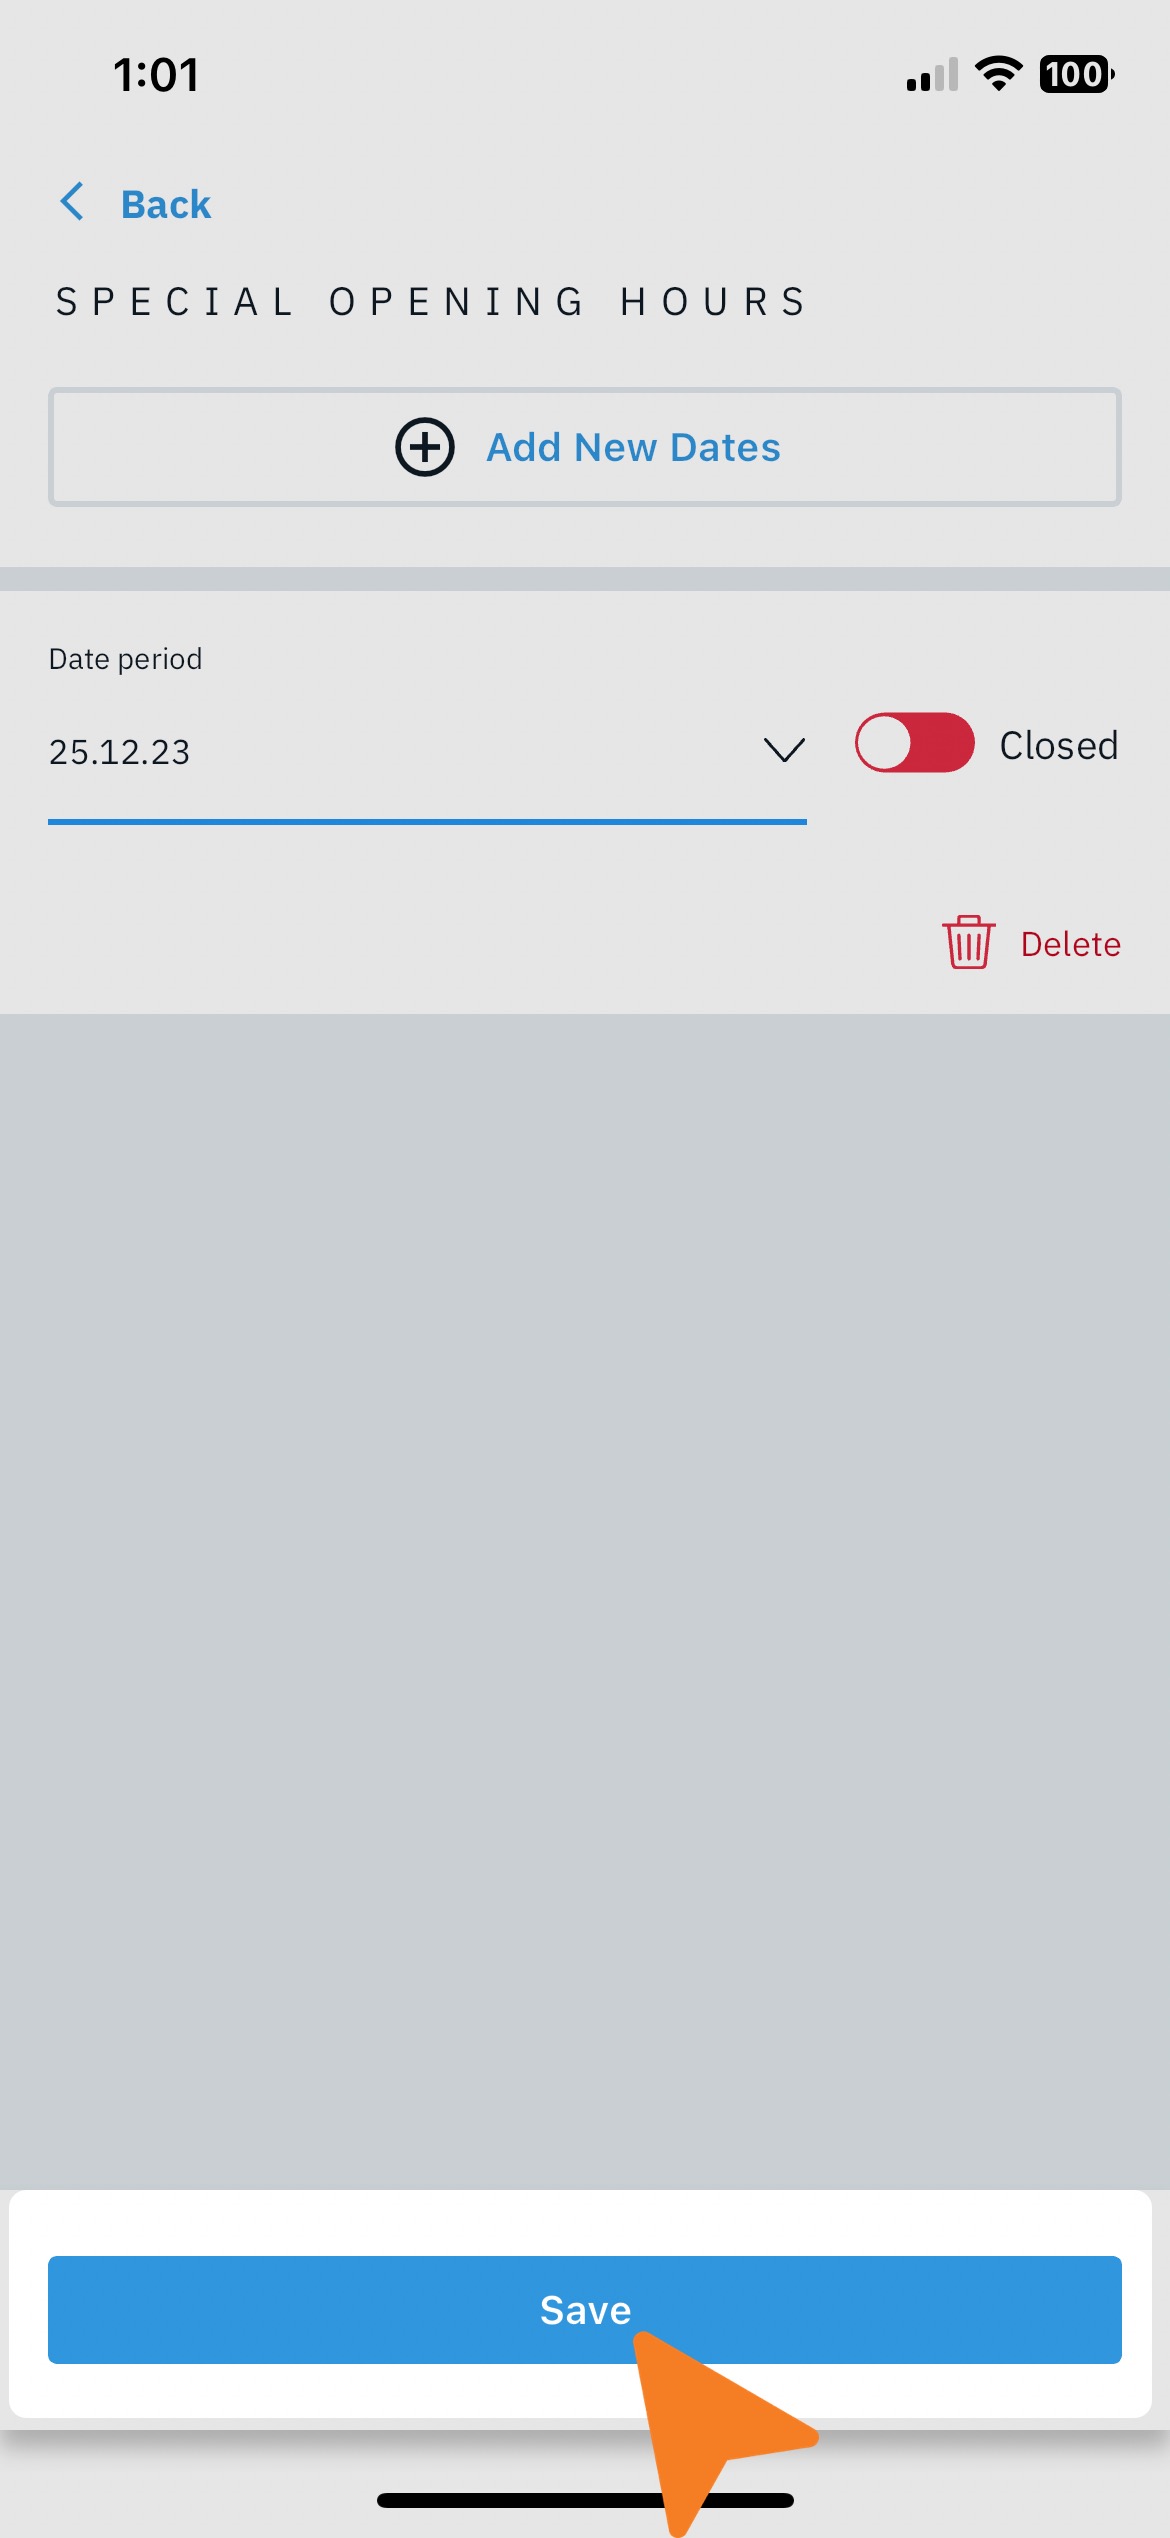
Additionally, use the + Add New Dates button to add more Special Opening Hours before tapping Save.
|
Best Practices
You should make use of the Special Opening Hours if:
- If your business is going to open or close at a different time than your usual Opening Hours. They allow you to inform your clients that on a specific date or set of dates, your business has modified its working hours.
- When your business is undergoing renovation or closing temporarily for less than a week, you can use the Special Opening Hours to indicate, that you are temporarily closed.
- If your business will be closed for more than a week, you should set the location's status to Temporarily Closed.
- Should your business closes for a series of dates, do NOT remove your normal Opening Hours from your business. Certain directories, like Google, will not interpret this as your business is closed and will continue to show the usual Opening Hours. Also, the system will show an error should you try to remove the normal Opening Hours while Special Opening Hours are present.
- Do not set no Opening Hours as that will not show your business as closed daily.
Frequently Asked Questions
Why are my Special Opening Hours not visible in the listings?
There a few reasons:
- Not all directories support this field
- Some directories take up to 7 days to update your listing - therefore, make sure to keep your location data as up to date as possible to allow those directories the time to process and display the accurate information.
- Most directories only show special opening hours a few days before the actual dates.
Why can't I add special opening hours for my location?
The field Special Opening Hours can only be added if you have provided the regular opening hours for your location.
In reverse, you cannot remove the Opening Hours if you added Special Opening Hours.
How do I set my locations to temporarily closed?
- If your location will be closed for less than seven days, set the special hours as closed for those seven days.
- If your location will be closed for more than seven days, set the location's status to temporarily closed.
- The system will register a location as temporarily closed if the special hours are set for more than seven consecutive days as well, but best practice is to change the location's status.
Info
This logic also applies if the special opening hours started in the past. For example, if today is 5th of May and the location has Special Opening Hours set as closed for 1st May until 15th May, we will send temporarily closed.